If there is no existing roof lead-through that can be used, look for a suitable place (pre-
ferably in the slipstream behind the antenna) on the vehicle roof. Make sure that water
and moisture (e.g. rain or splash water) do not penetrate the borehole. Make sure that
the cables are not bent too much to avoid signal loss and damage to the cable (smal-
lest bending radius max. 5-7 cm).
3. Mounting and installation
08 09
3. Mounting and installation
ENGLISH ENGLISH
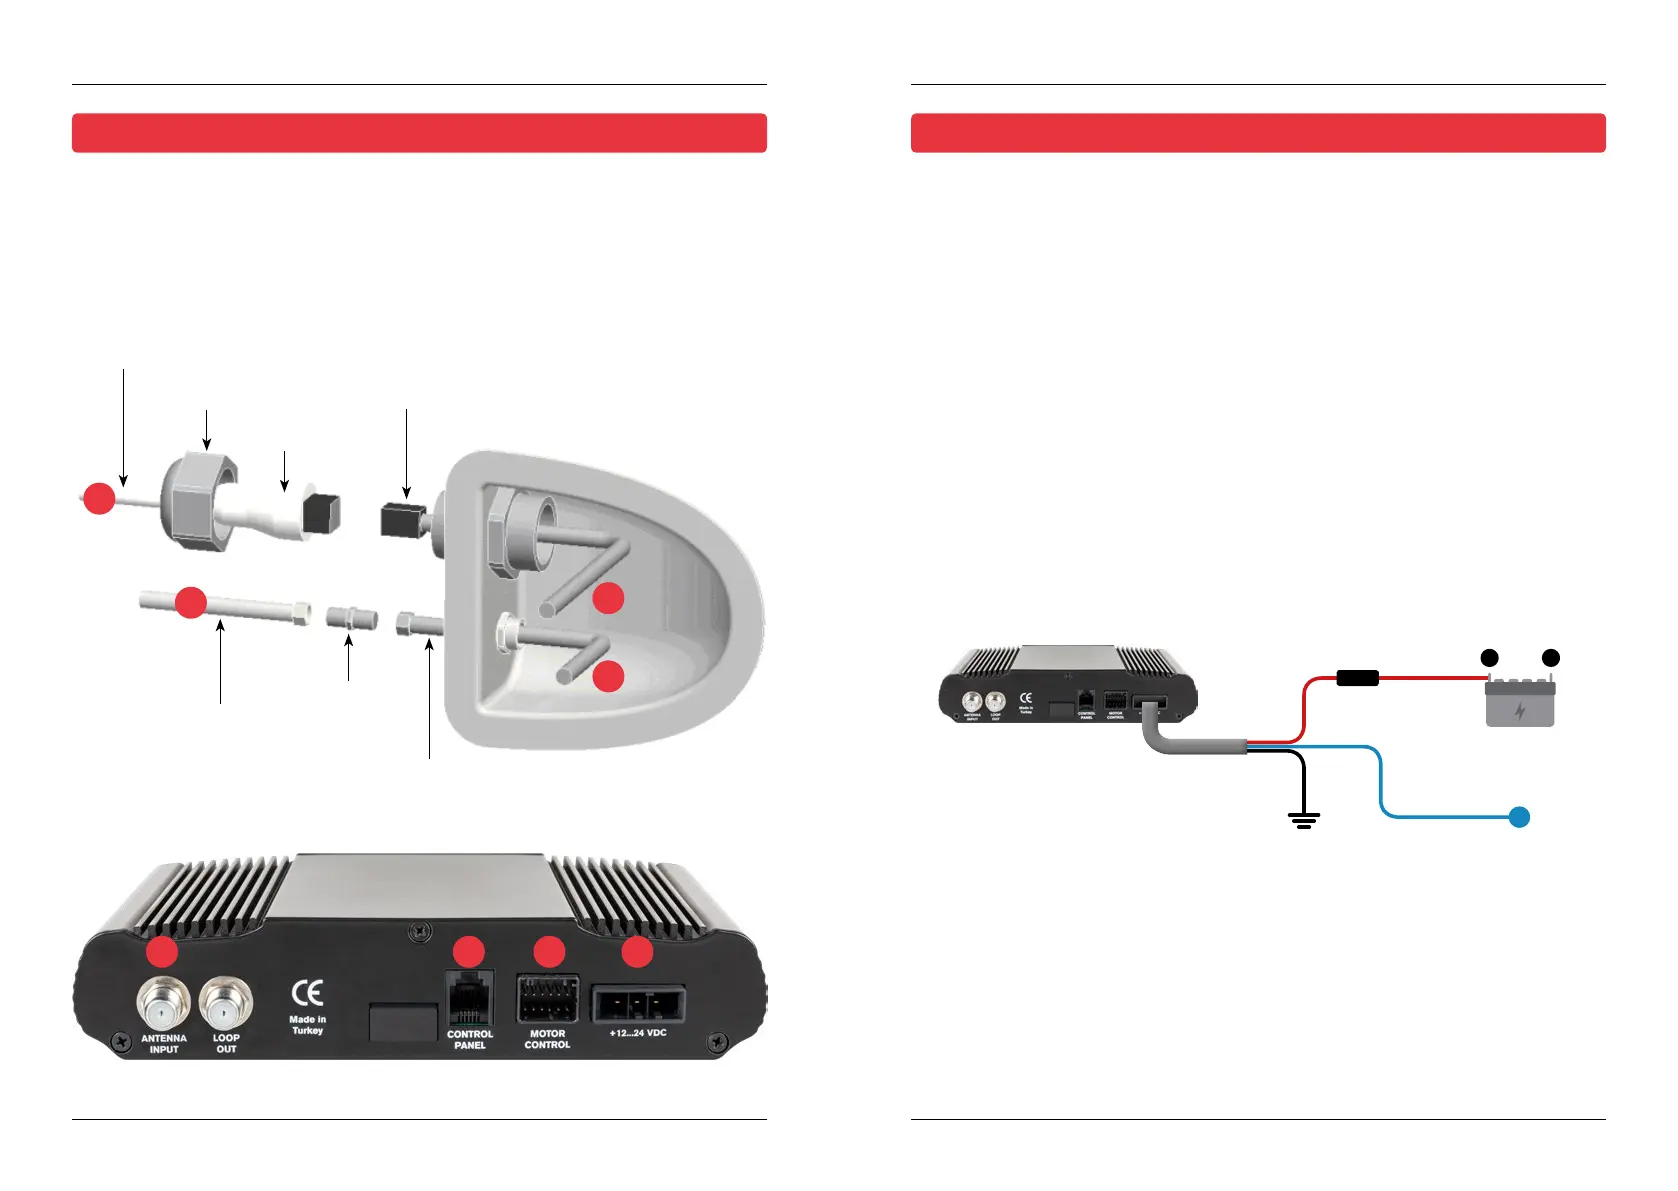
3.3 Mounting the roof passage 3.4 Connecting the connecting cables
Control cable
(coming from the antenna)
Control cable
(coming from the control unit)
LNB cable
(coming from the antenna)
LNB-Kabel
(coming from the control unit)
F-connector
Cable gland
Gasket
1
2
4
3
+
–
Connections on the roof:
1. Connect the LNB cable (No. 1) and the LNB cable (No. 2) to the F connector.
2. Connect the control cable (No. 3) and the control cable (No. 4).
3. Carefully slide both cables through the openings in the roof bushing.
4. If both cables are inside the roof bushing, tighten the cable gland.
Connecting the power supply:
Connections inside the vehicle:
1. Connect the LNB cable (No. 2) to the LNB input (No. 5) on the control unit.
2. Connect the „shorter“ LNB cable to the receiver or TV.
3. Connect the control unit to the input (No. 6) on the control unit.
4. Connect the control cable to the input (No. 7) on the control unit.
5. Connect the power supply of the vehicle to the control unit (No. 8).
5 6 7 8
Fuse
vehicle battery
12~24 volts DC
(red cable)
Ignition plus
(blue cable)
Ground
(black cable)