EasyManua.ls Logo

Campingaz DH Woody LX 4 Series User Manual

Campingaz DH Woody LX 4 Series
29 pages
To Next Page IconTo Next Page
Page #1 background imageLoading...
Page #1 background image
4 Series DH Woody LX
4010062086 (ECN20067335-D)
X 2
APPLICATION DES GAZ • 219, Route de Brignais - BP 55 • 69563 Saint Genis Laval - France
FR Instructions de montage
GB Assembly instructions
DE Montageanleitung
NL Montage-instructies
IT Istruzioni per il montaggio
ES Instrucciones de montaje
PT Instruções de montagem
NO Monteringsinstrukser
DK Monteringsvejledning
SE Monteringsanvisningar
FI Kokoamisohjeet
PL Instrukcjamontażu
CZ Návodkmontáži
SI Navodilazamontažo
SK Návodnamontáž
HU Összeszerelési utasítás
HR Upute za montiranje
RO Instrucţiunidemontaj
BG Указаниязамонтаж
TR Montaj
GR Οδηγίεςσυναρμολόγησης
Question and Answer IconNeed help?

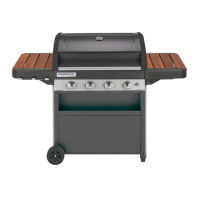
Do you have a question about the Campingaz DH Woody LX 4 Series and is the answer not in the manual?

Campingaz DH Woody LX 4 Series Specifications

General IconGeneral
BrandCampingaz
ModelDH Woody LX 4 Series
CategoryGrill
LanguageEnglish

Summary

Base Assembly and Mobility

Step 01: Base Frame Construction

Assemble the primary base frame components.

Step 02: Wheel Installation

Attach the wheels to the base frame.

Frame Reinforcement

Step 03: Mounting Support Brackets

Install support brackets onto the frame.

Step 04: Attaching Lower Supports

Secure the lower support bars.

Side Shelves and Brackets

Step 12: Side Shelf Attachment

Mount the side shelves to the grill body.

Step 13: Side Panel Covers

Install the covers for the side panels.

Step 14: Shelf Brackets

Secure the brackets for the side shelves.

Optional Configurations

Optional Configurations

Explore alternative setup options for accessories.

Igniter Box and Wiring

Step 15: Igniter Box Installation

Mount the igniter control box.

Step 19: Igniter Wiring Management

Connect and manage igniter wiring harnesses.

Drip Tray and Heat Deflector Installation

Step 16: Drip Tray Installation

Place the drip trays into their designated positions.

Step 17: Heat Deflector Placement

Position the heat deflectors correctly.

Warming Rack and Cooking Grate Installation

Step 18: Warming Rack Installation

Install the warming racks onto the grill.

Step 20: Cooking Grate Installation

Insert the main cooking grates.

Important Safety Warning

Red Tab Positioning Check

Ensure 4 red tabs are visible in slots for correct positioning.

Lid and Final Panel Assembly

Step 22: Lid Attachment

Mount the main lid onto the grill body.

Step 23: Side Panel Attachment

Secure the final side panels.

Shelf Adjustment

Step 24: Shelf Adjustment

Adjust the side shelves for proper function.

Gas Cylinder Size Requirements

Gas Cylinder Size Check

Check compatibility of gas cylinder dimensions (H < 46.5 cm).

Gas Cylinder Height Check

Gas Cylinder Height Verification

Verify gas cylinder height (46.5 cm < H < 70 cm).

Related product manuals