12
ADJUSTMENTS
Figure 11
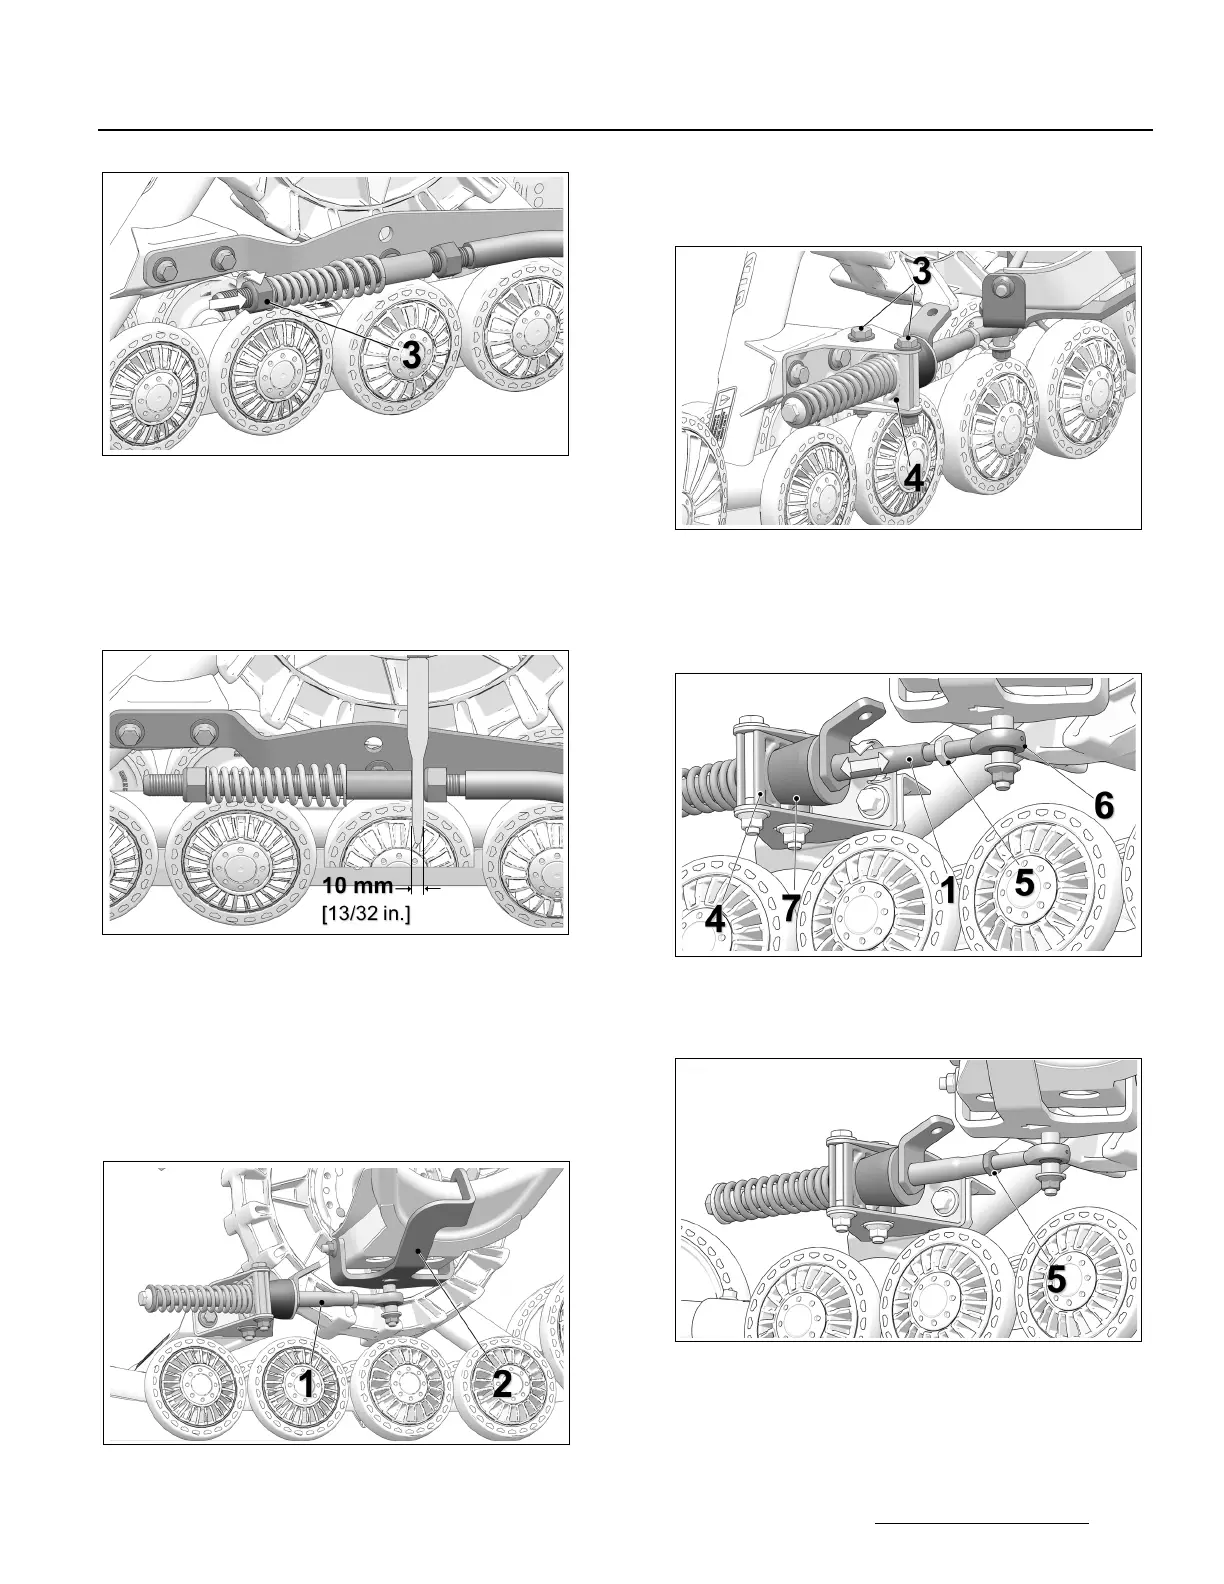
• IMPORTANT: Double-check the 10 mm
minimum distance between nut and stabilizing
arm guide. Re–adjust as needed. Figure 12.
NOTE: Use the provided template to double-check the
adjustment.
Figure 12
INDEPENDENT SUSPENSION (IS)
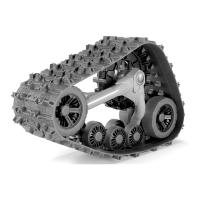
• Stabilizing arm (
1
) must be attached to rear
anchor bracket (
2
) installed on vehicle. Figure 13.
NOTE: Actual Rear Anchor bracket (
2
) mounted on
vehicle may differ from the one in the illustration.
Figure 13
• Loosen anti-rotation bracket bolts (3) to allow
the anti-rotation retainer (4) to rotate on its axis.
See Figure 14.
Figure 14
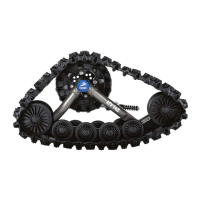
• Loosen jam nut (5). Turn stabilizing arm (1) to
adjust length of rod end (6) so that rubber cone
(7) applies light pressure on anti–rotation
retainer (4). Figure 15.
Figure 15
• Re-tighten jam nut (
5
) to 40 N•m [30 lb-ft] of
torque when adjustment is complete. Figure 16.
Figure 16
CAUTION: Tighten the jam nut to the
recommended torque specification. Over-
tightening the nut might damage the rod end.