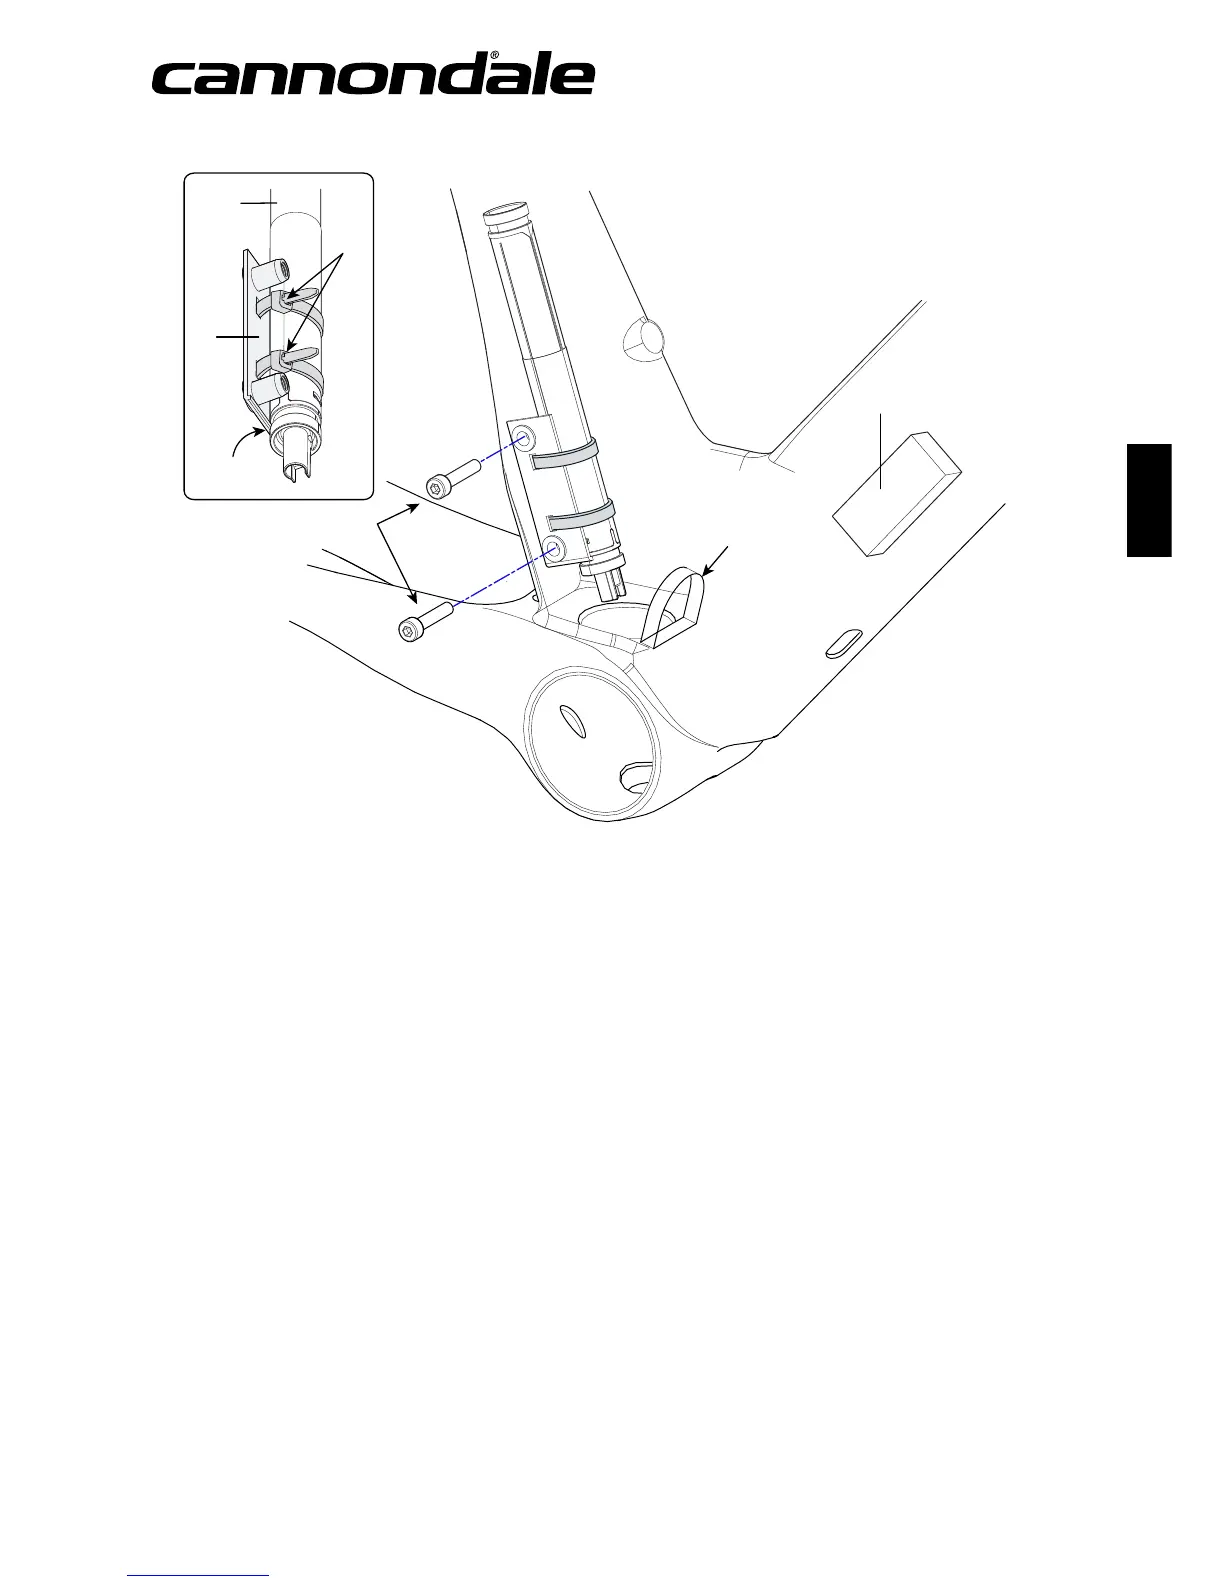
DI2 BATTERY INSTALLATION
1. Remove the BB components in order to install the seat post battery.
2. Attach the mounting plate (1) to the battery (2) with 3mm cable ties. Make sure the plate lip (b) tie heads (a) are positioned as shown.
3. Attach the battery wire, handlebar wire and the front and rear derailluer wires to the Di2 junction box (3). Insert the junction box and
wire leads into the downtube through the small window (c). Allow the battery wire to drop out through the bottom of the BB shell.
4. Attach the battery wire to the battery. Insert the battery up through the BB hole into the seat tube with the mount down. Apply a light
film of grease to the mounting bolt (4) threads and install the mounting bolts through the frame into the mounting plate inside the
seat tube. Tightened the bolts to secure the battery.
5. Insert the wires up into the frame openings so that the BB components can be installed without interference.
DI2 BATTERY INSTALLATION
1. Remove the BB components in order to install the seat post battery.
2. Attach the mounting plate (1) to the battery (2) with 3mm cable ties. Make sure the plate lip (b) tie
heads (a) are positioned as shown.
3. Attach the battery wire, handlebar wire and the front and rear derailluer wires to the Di2 junction box
(3). Insert the junction box and wire leads into the downtube through the small window (c). Allow the
battery wire to drop out through the bottom of the BB shell.
4. Attach the battery wire to the battery. Insert the battery up through the BB hole into the seat tube with
the mount down. Apply a light film of grease to the mounting bolt (4) threads and install the mounting
bolts through the frame into the mounting plate inside the seat tube. Tightened the bolts to secure the
battery.
5. Insert the wires up into the frame openings so that the BB components can be installed without
interference.
EN