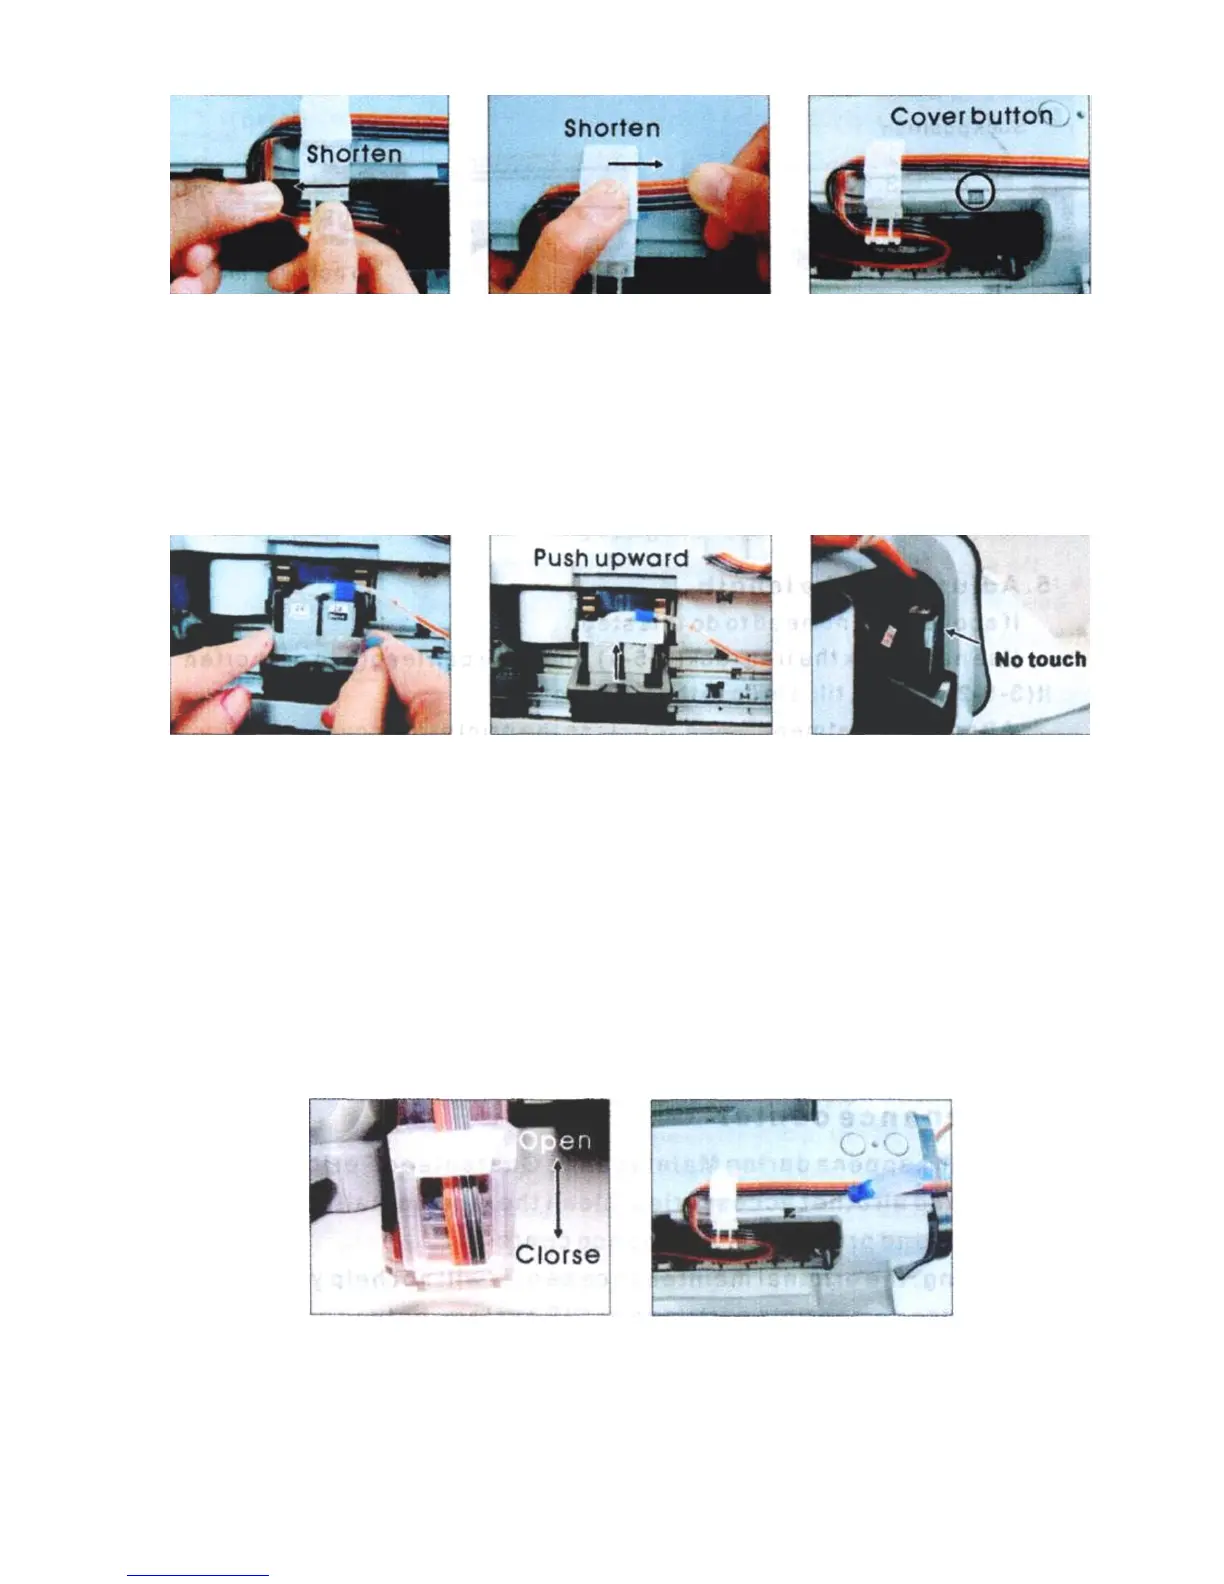
Pic. 3-5-3 Pic. 3-5-4 Pic. 3-5-5
6. Insert cartridge fixation rack
Insert fixation rack and push upward ( 3-6-1, 3-6-2), move cartridge holder to 3-
6-3 position, check if the fixation will touch the printer body or not, this fixation can't
be drop out, it can prevent the cartridge drop out during printing.
Pic. 3-6-1 Pic. 3-6-2 Pic. 3-6-3
7. Test printer operation
Move tube valve to the open position (3-7-1), use a screw or other tools to press
down cover button (3-7-2), plug on power source, turn the printer on, check if the
printer can work normal or not, check if the ink tube will touch the printer data-transfer
wire or not. Close the printer’s cover, check if there is abnormal noise. Select printer
maintenance option (2-1), print nozzle test sheet, if test sheet is normal (2-2), you can
begin printing. If the line is missing (2-3), please clean printer head. If printer head is
still wrong after cleaning, please contact your local distributor.
Pic. 3-7-1 Pic. 3-7-2