(12/58)
4) In the LF/EJECT Correction section of the Service Tool, select the Pattern No. (from 0 to 4)
determined in step 3) for LF and EJECT respectively, and click Set.
5) The selected LF and Eject correction values are written to the EEPROM, making the E-MIP
correction value (which was set at shipment from the production site) invalid.
Note: At the production site, the E-MIP correction, which is equivalent to the LF / Eject correction,
is performed using the special tool, and the E-MIP correction value is written to the EEPROM
as the valid data.
When LF / Eject correction is performed, the LF / Eject correction values become valid
instead of the E-MIP correction value (thus, in the initial EEPROM information print, "LF = *"
and "EJ = *" are printed, but the selected values are printed after the LF / Eject correction).
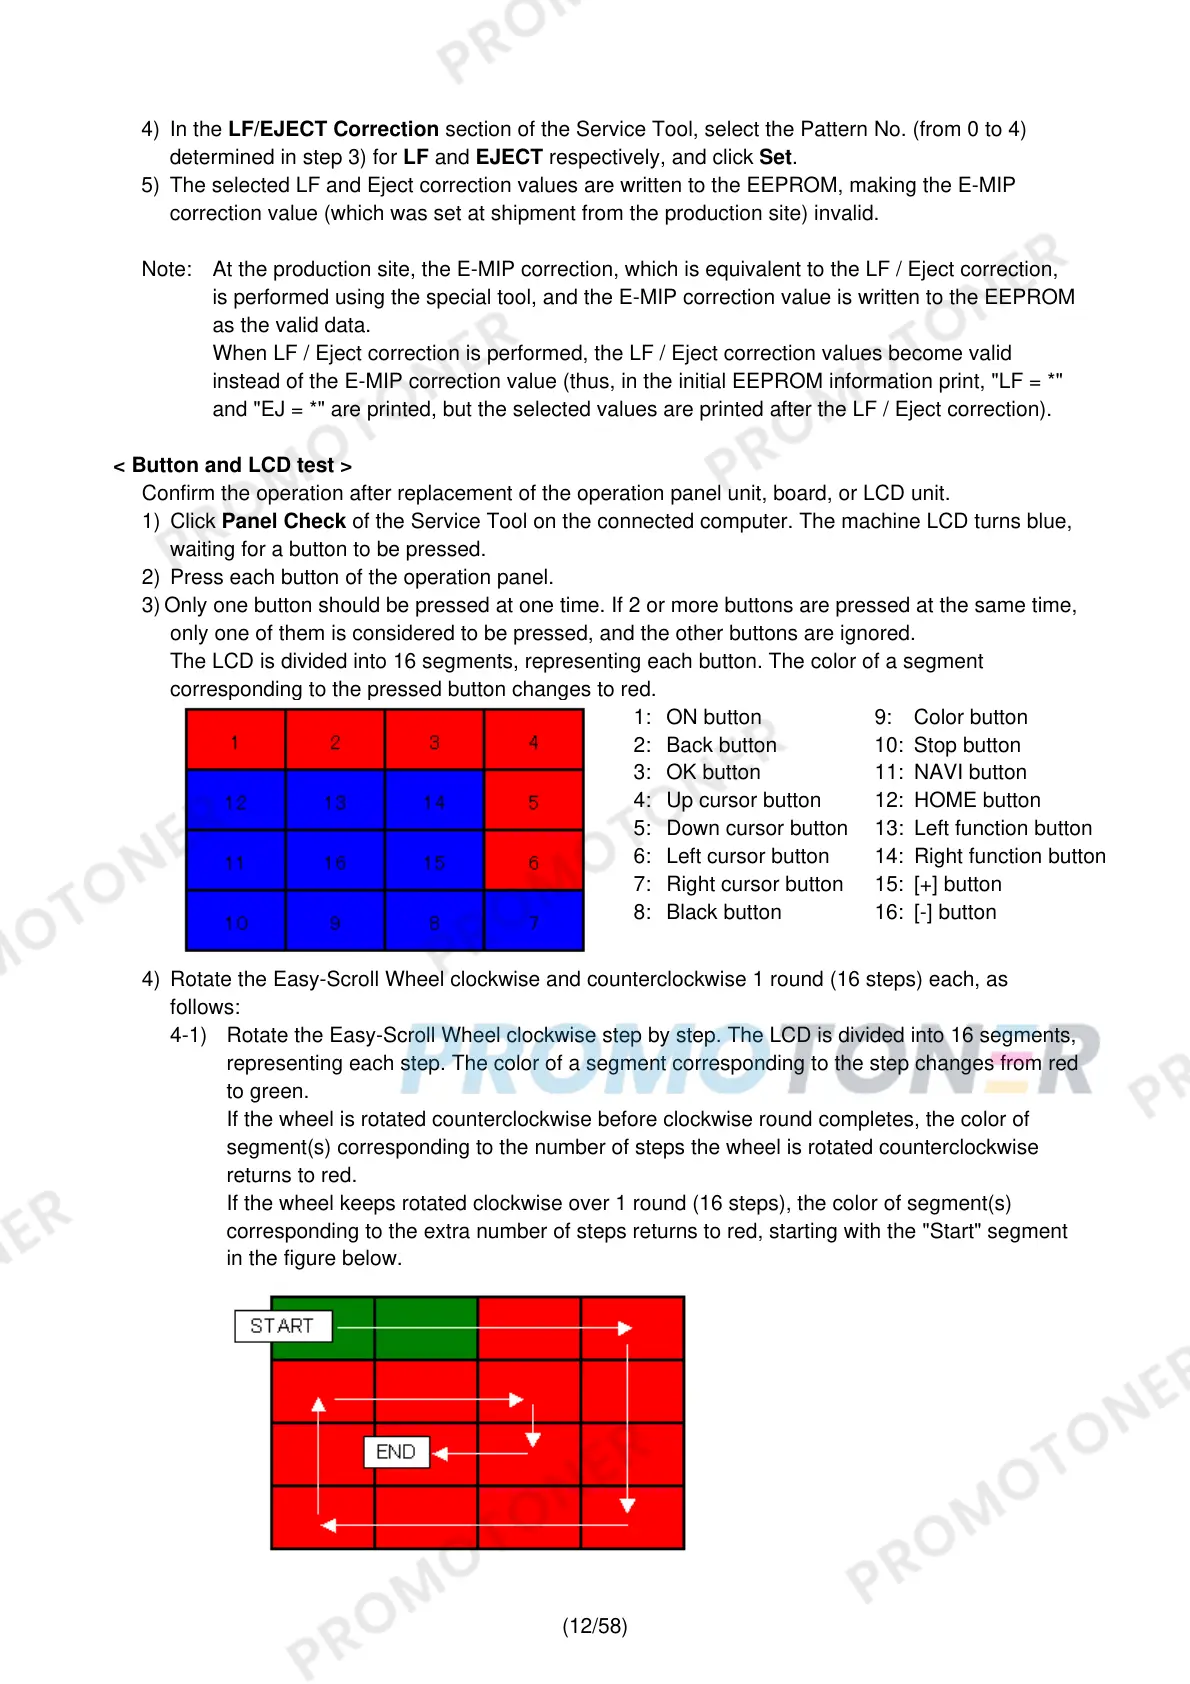
< Button and LCD test >
Confirm the operation after replacement of the operation panel unit, board, or LCD unit.
1) Click Panel Check of the Service Tool on the connected computer. The machine LCD turns blue,
waiting for a button to be pressed.
2) Press each button of the operation panel.
3) Only one button should be pressed at one time. If 2 or more buttons are pressed at the same time,
only one of them is considered to be pressed, and the other buttons are ignored.
The LCD is divided into 16 segments, representing each button. The color of a segment
corresponding to the pressed button changes to red.
1: ON button 9: Color button
2: Back button 10: Stop button
3: OK button 11: NAVI button
4: Up cursor button 12: HOME button
5: Down cursor button 13: Left function button
6: Left cursor button 14: Right function button
7: Right cursor button 15: [+] button
8: Black button 16: [-] button
4) Rotate the Easy-Scroll Wheel clockwise and counterclockwise 1 round (16 steps) each, as
follows:
4-1) Rotate the Easy-Scroll Wheel clockwise step by step. The LCD is divided into 16 segments,
representing each step. The color of a segment corresponding to the step changes from red
to green.
If the wheel is rotated counterclockwise before clockwise round completes, the color of
segment(s) corresponding to the number of steps the wheel is rotated counterclockwise
returns to red.
If the wheel keeps rotated clockwise over 1 round (16 steps), the color of segment(s)
corresponding to the extra number of steps returns to red, starting with the "Start" segment
in the figure below.