2
4. Turning on Printer
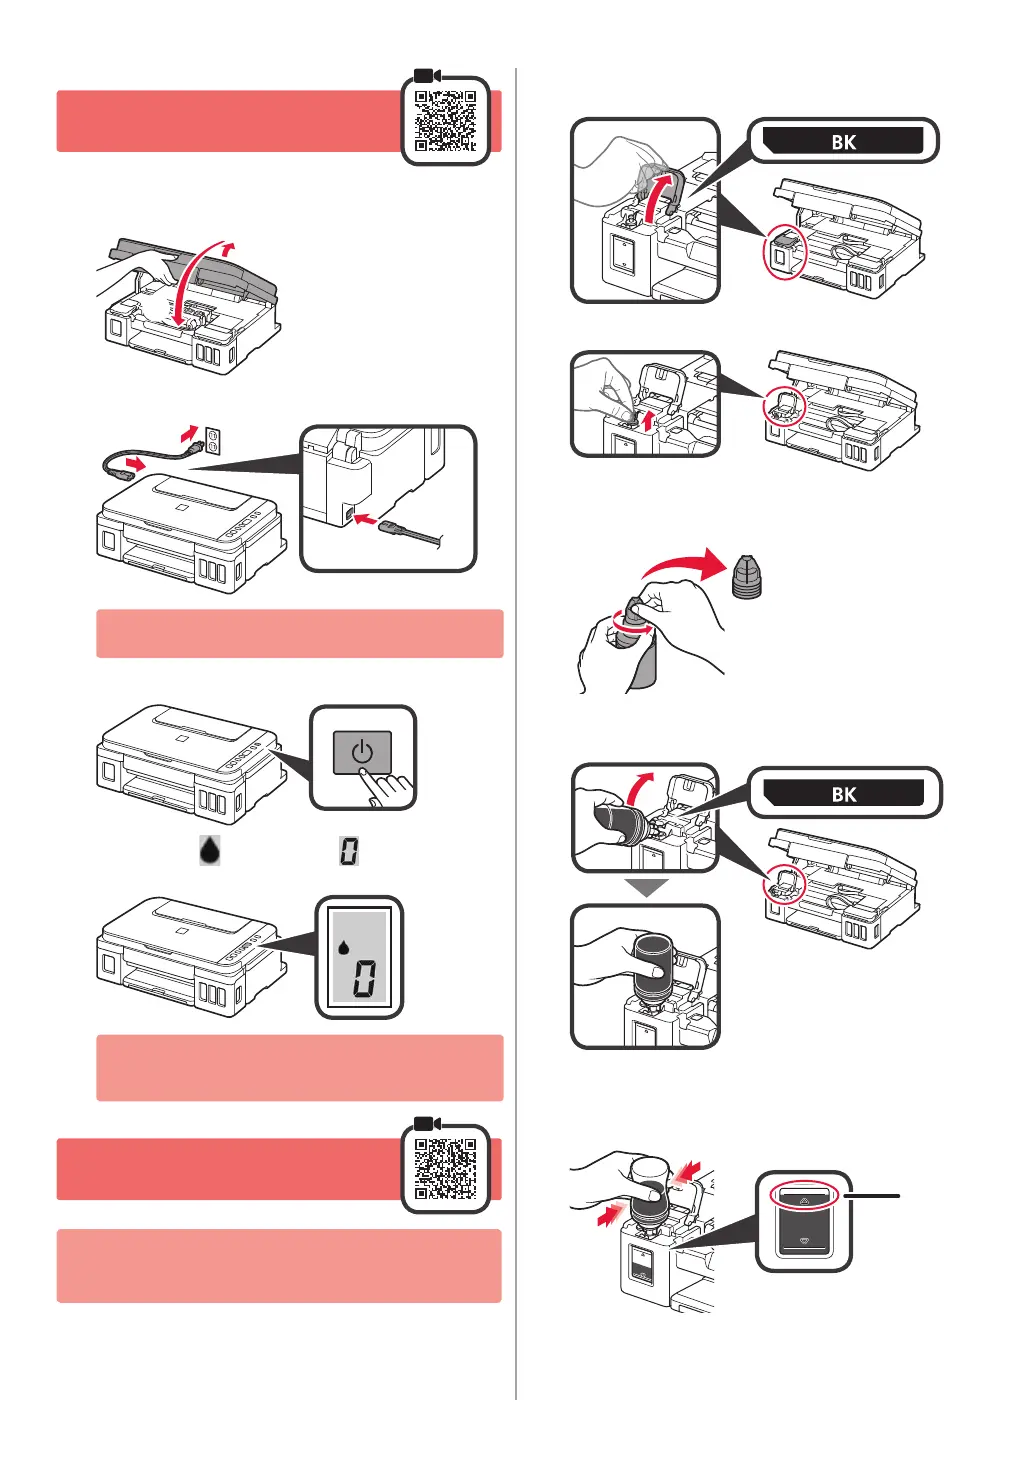
1
LIFT UP the scanning unit / cover, and then close
it.
2
Connect the power cord.
Back
Do not connect any cables except the power cord
yet.
3
Press the ON button.
4
Conrm that (Ink icon) and are displayed on
the screen.
If a different screen appears, refer to "If any of the
following screens appear" on page 3 to resolve the
error.
5. Pouring Ink
This product requires careful handling of ink. Ink may
splatter when the ink tanks are lled with ink. If ink gets
on your clothes or belongings, it may not come off.
1
Open the scanning unit / cover.
2
Open the ink tank cover.
3
Grab and remove the tank cap of the ink tank.
4
Hold the ink bottle upright and remove the bottle
cap.
5
Insert the nozzle of the ink bottle into the inlet and
stand the ink bottle upside down.
6
Pour all ink into the ink tank.
Conrm that the ink has been lled to the upper
limit line (A).
(A)

 Loading...