Do you have a question about the Canon Speedlite 430EXIII-RT and is the answer not in the manual?
To avoid botched pictures and accidents, first read the “Safety Precautions”.
Read this instruction manual and your camera’s instruction manual to familiarize yourself with their operations.
Explains how to use the Speedlite with EOS DIGITAL and EOS film cameras.
Explains the meaning of icons used in the manual for buttons, dials, and symbols.
Outlines the basic assumptions made for the operation procedures in this manual.
Follow the warnings below. Otherwise, death or serious injuries may result.
Follow the cautions below. Otherwise physical injury or property damage may result.
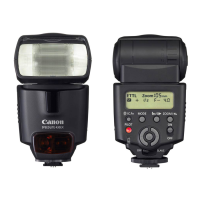
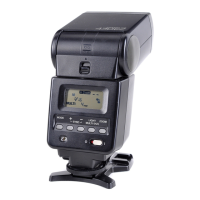
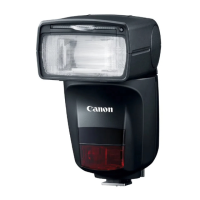
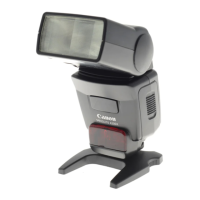
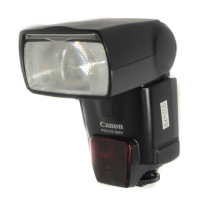
Identifies key physical components and sensors of the Speedlite.
Details the various buttons, dials, and their functions on the Speedlite.
Explains the information and symbols shown on the Speedlite's LCD panel.
Describes displays related to radio and optical transmission wireless shooting.
Lists and describes the accessories provided with the Speedlite.
Cautions for firing continuous flash to prevent overheating and damage.
Instructions for installing AA/R6 batteries for power supply.
Details the firing interval and number of flashes based on battery type.
Important cautions regarding battery usage, handling, and types.
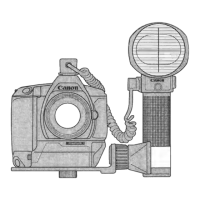
Step-by-step guide for attaching and securing the Speedlite to a camera.
Notes potential contact issues with non-alkaline batteries.
Emphasizes turning off the Speedlite before attaching or detaching it.
Instructions for turning on the Speedlite and checking flash readiness.
Explains the Quick flash function for shooting before full charge.
Describes the auto power off function to save battery power.
Explains how to use the lock function to prevent accidental setting changes.
Describes LCD panel illumination behavior in different shooting modes.
Mentions Custom/Personal Functions for illumination and flash settings.
Steps to set the flash mode to E-TTL for automatic flash photography.
Guidance on focusing on the subject and taking the picture.
Tips for correcting underexposed subjects in E-TTL flash photography.
Explains E-TTL II/E-TTL autoflash behavior in Tv (shutter-priority AE) mode.
Explains E-TTL II/E-TTL autoflash behavior in Av (aperture-priority AE) mode.
Explains E-TTL II/E-TTL autoflash behavior in M (manual exposure) mode.
Details flash sync speeds and apertures for different camera shooting modes.
Explains how the Speedlite automatically adjusts flash coverage for image sensor size.
Describes how color temperature information is transmitted for white balance.
Explains the function and range of the AF-assist beam.
Specifies camera shooting modes required for advanced flash photography operations.
Instructions for setting the flash exposure compensation amount.
Guidance on setting exposure compensation for different subject brightness.
Explains priority when flash exposure compensation is set on both devices.
Tip on directly setting flash exposure compensation using the dial.
Steps to focus on the subject and lock flash exposure.
Troubleshooting FE lock issues and suggestions for improvement.
Notes FE lock effectiveness with small subjects in the viewfinder.
Steps to enable High-speed Sync mode.
Explains the relationship between shutter speed and guide number in high-speed sync.
Instructions for returning to normal flash shooting from High-speed Sync.
Steps to enable Second-curtain Sync mode.
Notes that second-curtain sync works best in bulb shooting mode.
States that second-curtain sync is unavailable during wireless flash shooting.
Instructions for returning to normal flash shooting from second-curtain sync.
Instructions on how to adjust the bounce direction of the flash head.
Guidance on selecting bounce surfaces for optimal results.
Warns about potential underexposure when using Quick flash in bounce shooting.
Explains how to use the catchlight panel for portraits.
Steps for pulling up and pushing back the wide and catchlight panels.
Notes guide number decrease and AF-assist beam recommendations for bounce shooting.
Step to attach the bounce adapter securely to the flash head.
Instruction to take a picture using the bounce adapter.
Warns about potential underexposure when using bounce adapter with wide panel.
Notes guide number decrease and AF-assist beam recommendations with bounce adapter.
Provides guidance on white balance setting for older EOS cameras with bounce adapter.
Explains automatic adjustment of flash coverage based on lens and sensor size.
Instructions for manually setting flash coverage from 24 to 105 mm.
Guidance on setting manual flash coverage to avoid peripheral darkening.
Notes warnings displayed for wide-angle lenses and smaller sensors.
Step to pull out the built-in wide panel for ultra-wide angle lenses.
Step to push back the catchlight panel while keeping the wide panel down.
Warns about WP warning and underexposure with wide panel during bounce shooting.
Notes unsupported fisheye lens angles of view for the wide panel.
Step to set the flash mode to Manual (M) for manual flash photography.
Instructions for setting the flash output level in manual mode.
Notes display of shooting distance and aperture when shutter is half-pressed.
Refers to page 101 for guide number details with manual flash.
Explains how to configure camera and Speedlite for metered manual flash.
Steps for focusing on the subject and setting up a gray reflector.
Steps for metering and adjusting flash exposure level.
Notes that metered manual flash is exclusive to EOS-1D series cameras.
Steps to fire modeling flash using camera or Speedlite buttons.
Cautions regarding overheating and flash firing limits for modeling flash.
Lists cameras where camera-operated modeling flash is disabled.
Step to attach the color filter securely to the flash head.
Instructions for taking a picture after attaching the color filter.
Notes that guide number decreases when using the color filter.
Caution against using commercial color filters with the provided one.
Step to display the screen for clearing Speedlite settings.
Step to confirm and clear the Speedlite settings to defaults.
Notes regarding settings that are not cleared upon resetting.
Specifies camera shooting modes required for setting flash functions via camera.
Step to select the external speedlite control option in the camera menu.
Step to select the flash function settings option in the camera menu.
Instructions for selecting and setting flash functions via the camera menu.
Details flash function settings available for EOS cameras released from 2012 onwards.
Details flash function settings for EOS cameras released from 2007 to 2011.
Lists configurable functions available on the camera's flash function settings screen.
Explains how to enable/disable flash firing and AF-assist beam.
Details E-TTL II flash metering options: Evaluative and Average.
Explains setting flash sync speed in Av mode.
Options for selecting E-TTL II or Manual flash modes.
Options for shutter synchronization: 1st curtain, 2nd curtain, High-speed.
Explains setting flash exposure compensation in 1/3-stop increments.
Explains setting flash coverage automatically or manually.
Details setting up radio transmission wireless flash shooting.
Explains how to revert Speedlite settings to their defaults.
Notes on AF-assist beam, zoom coverage, and compensation priority.
Step to select the Flash C.Fn settings option in the camera menu.
Instructions for selecting and setting Custom Functions via the camera menu.
Instructions for clearing all Custom Function settings.
Notes on clearing C.Fn settings on older cameras and P.Fn limitations.
States that radio transmission wireless shooting is unavailable for Speedlite 430EX III.
Specifies camera shooting modes required for radio transmission wireless shooting.
Defines 'master' and 'slave' units in radio transmission wireless shooting.
Provides positioning and operation range examples for wireless flash shooting.
Explains how to perform autoflash shooting with a single slave unit.
Notes controlling slave units with devices other than 430EX III-RT.
Advises positioning the slave unit using the provided mini stand.
Explains performing E-TTL autoflash shooting with multiple slave units.
Explains how to set up slave units into groups for autoflash shooting.
Recommends performing test flash and shooting before multiple flash setups.
Notes factors affecting transmission distance in wireless shooting.
Compares key functional differences between radio and optical transmission wireless shooting.
Explains setting different flash modes for each firing group.
Details function restrictions based on camera models and release dates.
Explains no restrictions for EOS DIGITAL cameras released from 2012 onwards.
Lists cameras released up to 2011 with E-TTL compatibility and their restrictions.
Notes restrictions on sync speed and high-speed sync for certain cameras.
Notes unavailability of group flash, slave modeling flash, and remote release.
States that certain cameras cannot be used as slave units in linked shooting.
Instructions for setting the master unit for radio transmission wireless shooting.
Instructions for setting the slave unit for radio transmission wireless shooting.
Explains how to set transmission channels and wireless radio IDs to avoid interference.
Instructions for clearing wireless settings.
Detailed procedure for setting the transmission channel for wireless communication.
Detailed procedure for setting the wireless radio ID for secure communication.
Notes the LINK lamp indication when transmission is established.
Procedure for scanning channels when AUTO is selected.
Procedure for scanning channels when a specific channel is set.
Step to manually set a transmission channel.
Explains the meaning of the LINK lamp's colors and statuses.
Explains how to set master flash firing to ON or OFF.
Notes that slave unit will not fire if channels or radio IDs are different.
Describes LCD panel illumination behavior during wireless shooting.
Explains how to save and recall wireless settings for units.
Notes the charge status indicator on the master unit's LCD panel.
Basic procedure for autoflash shooting with one slave unit.
Step to set the optical transmission master unit.
Step to set the slave unit for optical ETTL wireless shooting.
Step to check and synchronize channel and ID settings.
Step to position the camera and slave unit.
Step to set the flash mode to E-TTL for the master unit.
Step to check transmission and charge status of wireless units.
Step to check the performance of the optical wireless flash setup.
Final step to take the picture after setting up ETTL optical wireless flash.
Warns about potential slave unit malfunction due to light sources.
Notes how to turn on a slave unit if auto power off has occurred.
Explains how to use multiple slave units for increased flash output.
Notes charge status indicators and link lamp colors for connection status.
States that master/slave flash coverage is set to 24 mm.
Instructions for firing the master unit and using modeling flash.
Discusses advanced techniques like flash exposure compensation and high-speed sync.
Explains the use of multiple master units in wireless flash shooting.
Notes the ability to operate slave units individually for settings.
Notes FEB and stroboscopic flash capability when using as slave.
Notes the LINK lamp color indicating connection status.
Explains autoflash shooting with two slave groups and flash ratio adjustment.
Step to set the firing group for slave units (A or B).
Step to set the master unit for A:B flash ratio control.
Explains autoflash shooting with three slave groups (A, B, C) and flash ratio.
Step to set a slave unit to firing group C.
Step to set master unit for A:B:C firing group control.
Step to set the flash ratio between groups A and B.
Step to set flash exposure compensation for slave group C.
Explains how to increase slave units and control their output.
Notes the setting for firing all three groups simultaneously.
Warns about potential overexposure with group C pointing directly at subject.
Explains flash ratio conversion to stop increments.
Step to set the flash mode to Manual (M) for multiple flash shooting.
Step to set firing group control for selecting groups to fire.
Step to set the manual flash output for each firing group.
Final step to take the picture with manual flash output settings.
Notes group selection for slave units when firing group control is set.
Step to set the flash mode to Group (Gr) for different group settings.
Step to set the firing group for individual slave units.
Notes limitations of Gr flash mode for older cameras.
Instructions for setting flash mode, output, and compensation for each group.
Step to select the flash mode for each firing group.
Step to set flash output and exposure compensation for each group.
Final step to take the picture after setting all groups.
Step to select Test or Model function on the slave unit.
Notes on auto external flash metering compatibility and slave unit behavior.
Notes exposure control behavior with specific flash modes.
Notes how to exclude a group from firing.
Tip on directly setting flash output/compensation on slave units.
Step to select the Remote Release function on the slave unit.
Explains the process of taking a picture via remote release from a slave unit.
Notes unavailability of slave modeling flash and remote release for older cameras.
Suggests manual focus if autofocus fails for remote release.
States remote release uses single shooting mode.
Explains linked shooting, which releases slave camera shutters with the master.
Advises attaching Speedlite or transmitter to cameras before linked shooting.
Defines 'master camera unit' and 'slave camera unit' in linked shooting.
Step to set the Speedlite to linked shooting mode.
Step to set the master or slave role for each unit.
Step to set transmission channel and radio ID for linked shooting.
Step to configure camera shooting functions for linked shooting.
Step to set all Speedlites to master or slave roles.
Step to set up slave camera units within range of the master.
Final step to take the picture during linked shooting.
Instructions for clearing linked shooting settings.
Notes using linked shooting as a remote control without camera attachment.
Notes auto power off timing for master and slave units during linked shooting.
Recommends manual focus for slave cameras in linked shooting.
Notes time lag between slave and master unit releases.
Notes firing Speedlite during linked shooting with P.Fn-07-1.
Notes that linked shooting cannot be performed if flash firing is disabled.
Notes factors affecting transmission distance.
Explains linked shooting functionality specifically for Live View.
States optical transmission slave function availability for both 430EX III-RT and 430EX III.
Explains controlling slave units with devices equipped with optical master function.
Defines 'master' and 'slave' units in optical transmission wireless shooting.
Provides positioning and operation range examples for optical transmission wireless shooting.
Advises avoiding obstacles between master and slave units for transmission.
Notes that transmission distance varies by master unit.
Recommends performing test flash and shooting before optical transmission.
Advises positioning the slave unit using the provided mini stand.
Instructions for setting the slave unit for optical transmission wireless shooting.
Explains how to change the transmission channel to avoid interference.
Step to set the transmission channel for optical wireless communication.
Instructions for clearing wireless slave settings.
Advises pointing the sensor toward the master, possibly using bounce function.
Notes that indoor shooting may allow imprecise positioning due to signal reflection.
Explains how to save and recall wireless settings for slave units.
Steps to save or load wireless settings for slave units.
Notes that slave unit will not fire if channels are different.
Step to set the optical transmission master unit.
Step to set the slave unit for optical ETTL wireless shooting.
Step to set the transmission channel for optical wireless communication.
Step to position the camera and slave unit.
Step to set the flash mode to E-TTL for the master unit.
Step to check the readiness of the slave flash unit.
Step to check the performance of the optical wireless flash setup.
Final step to take the picture after setting up ETTL optical wireless flash.
Warns about potential slave unit malfunction due to light sources.
Notes how to turn on a slave unit if auto power off has occurred.
Discusses advanced techniques like flash exposure compensation and high-speed sync.
Explains the use of multiple master units in wireless flash shooting.
Notes the ability to operate slave units individually for settings.
Notes FEB and stroboscopic flash capability when using as slave.
Notes the LINK lamp color indicating connection status.
Explains how to set firing groups for two-group or three-group shooting.
Step to set the firing group for slave units.
Notes the ability to operate slave units individually for settings.
Notes FEB and stroboscopic flash capability when using as slave.
Step to set the slave unit as an individual slave for manual flash.
Step to set the manual flash output for the individual slave unit.
Notes that individual slave units cannot receive flash mode control from master.
Specifies camera shooting modes required for customizing the Speedlite.
Explains how to display and set Custom Functions.
Explains how to display and set Personal Functions.
Steps to display the Custom and Personal Functions screens.
Steps to select and change settings for Custom and Personal Functions.
Lists available Custom Functions (C.Fn) with their numbers and pages.
Lists available Personal Functions (P.Fn) with their numbers and pages.
Explains how to clear all Custom and Personal Functions.
Notes that C.Fn-00 is not cleared when resetting all Custom Functions.
Notes that Custom Functions can be managed via the camera's menu.
Allows selection of distance indicator display in meters or feet.
Allows enabling or disabling the auto power off function.
Configures how modeling flash is fired (camera button, test button, or both).
Notes auto power off timing changes with flash head temperature.
Allows enabling or disabling the AF-assist beam.
Changes the auto power off time for slave units.
Sets the time window for slave units to accept auto power off cancellation.
Sets how flash exposure compensation is adjusted (button/dial or dial only).
Adjusts flash coverage (light distribution) for automatic settings.
Configures LCD panel illumination duration or state.
Allows disabling the AF-assist beam blink for slave charge indication.
Adjusts the contrast of the LCD panel in 5 levels.
Selects LCD illumination color for normal shooting.
Selects LCD illumination color for master units (not on 430EX III).
Selects LCD illumination color for slave units.
Selects AF-assist beam emission method: flashes or infrared.
Enables or disables Quick flash functionality.
Notes manual AF point selection and AF-beam behavior with color filter.
Warns about potential underexposure with Quick flash during continuous shooting.
Sets whether flash fires or not during linked shooting.
Enables direct setting of specific functions via dial.
Warns about potential exposure issues with multiple Speedlites in linked shooting.
Summarizes the content of the Reference chapter: system map, troubleshooting, etc.
Illustrates radio and optical transmission setups with master and slave units.
Identifies Speedlites, transmitters, accessories, and cords in system diagrams.
Describes warning levels and indicators for temperature increase.
Shows continuous flash count and rest time guidelines before warnings.
Notes that firing interval may extend even without Level 1 warning.
Advises a rest time of at least 30 minutes when Level 2 warning is displayed.
Warns against touching hot parts after firing continuous or modeling flash.
Notes that LCD warning may not display if C.Fn-22-1 is set.
Troubleshooting steps for when the Speedlite does not turn on.
Troubleshooting steps for when the Speedlite fails to fire.
Troubleshooting steps for when the Speedlite turns off automatically.
Troubleshooting steps for underexposed or overexposed pictures.
Troubleshooting steps when the bottom of the picture appears dark.
Troubleshooting steps when the picture periphery appears dark.
Troubleshooting steps when the picture is very blurred.
Troubleshooting steps when flash coverage is not set automatically or manually.
Troubleshooting steps when the AF-assist beam does not fire.
Troubleshooting steps when functions cannot be set and 'LOCKED' is displayed.
Troubleshooting steps when wireless shooting is not functioning.
Troubleshooting steps for when the slave unit does not fire.
Troubleshooting steps for slave unit firing issues.
Troubleshooting steps for overexposed pictures in specific shooting modes.
Troubleshooting steps when the LOCKED indicator is displayed.
Troubleshooting steps for LCD panel illumination issues.
Troubleshooting steps for standard exposure or uneven exposure in linked shooting.
Troubleshooting steps for when the slave unit does not fire in optical transmission.
Details the type of Speedlite and compatible camera systems.
Provides specifications for the flash head, including guide number and coverage.
Details exposure control systems, effective flash range, and compensation.
Details flash recycling times and AF-assist beam methods.
Provides specifications for radio transmission wireless master/slave functions.
Details specifications for optical transmission wireless slave function.
Lists the number of Custom and Personal Functions available.
Details power source requirements, battery life, dimensions, and weight.
Specifies operating temperature range and humidity.
Provides guide number data for normal and quick flash at different coverages.
Provides guide number data for manual flash at different coverages and outputs.
Lists functions that are available when using Type-B cameras.
Lists functions that are unavailable when using Type-B cameras.
Details legal restrictions and permitted regions for radio transmission wireless function.
Contains FCC and IC compliance information and conditions of operation.
States compliance with FCC/EC regulations and directives.
Advises against unauthorized modifications to the equipment.
Warns about exposure to dripping, splashing, and excessive heat.
Explains disposal guidelines according to the WEEE Directive for electrical equipment.
| Auto Zoom Head | Yes |
|---|---|
| Bounce Head | Yes |
| Swivel Head | Yes |
| Power Source | 4 x AA batteries |
| Type | Electronic flash |
| Guide Number | 43 (m, ISO 100) |
| Zoom Range | 24-105mm |
| Flash Coverage | 24 to 105mm |
| Tilt Angle | 0 to 90 degrees |
| Recycle Time | 0.1 to 3.5 Sec. |
| Wireless Operation | Yes |
| Compatible Cameras | Canon EOS |
| Flash Exposure Compensation | ±3 stops in 1/3-stop increments |
| Flash Modes | E-TTL II, Manual, Multi |