Do you have a question about the Canon Wireless File Transmitter WFT-E4 II A and is the answer not in the manual?
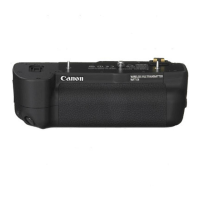
Instructions for attaching the Hand Strap E1 to the transmitter.
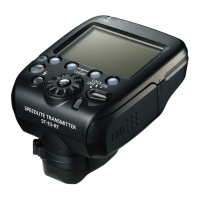
Information on checking the battery level and power icons.
Preparation steps for connecting the transmitter to wireless or wired LAN.
Steps to access and use the connection wizard for network setup.
Choosing transfer methods: FTP, EOS Utility, WFT Server, LinkedShot.
Choosing between Wireless LAN or Wired LAN for connection.
Step-by-step guide for connecting to a wireless LAN using the wizard.
Inputting the encryption key for secure wireless LAN connection.
Connecting using Wi-Fi Protected Setup Pushbutton Connection mode.
Connecting using Wi-Fi Protected Setup PIN code mode.
Setting up IP addresses, subnet masks, gateways, and DNS servers.
Settings for connecting to an FTP server: address, port, login.
Enabling automatic image transfer immediately after shooting.
Choosing specific image sizes/types for automatic transfer.
Manually selecting and transferring single images.
Adding a caption to an image before transfer.
Transfer multiple images at once, by folder, or by card.
Reviewing the status of transferred images.
Locating and viewing images on the FTP server.
Setting up connection between transmitter and computer using EOS Utility.
Overview of remote shooting and camera control via EOS Utility.
Setting up transmitter as a server for remote access.
Creating logon name and password for WFT Server access.
Accessing WFT Server interface via a web browser.
Browsing images on the camera's CF card via WFT Server.
Advanced remote shooting controls via WFT Server, including focus.
Basic remote shooting controls via WFT Server.
Configuring multiple cameras to shoot simultaneously, controlled by a master.
Positioning slave cameras for optimal linked shooting.
Reviewing configured network settings on the transmitter.
Modifying network, IP security, and file overwrite settings.
Saving network configurations to a CF card.
Loading network configurations from a CF card.
Connect external storage devices via USB, unplug, and manage power.
Setting camera to record images directly to external media.
Creating custom DCIM folders on external media.
Configuring simultaneous recording to CF card and external media.
Copy images from CF card to external media via quick or selected backup.
Connect GPS devices via USB, unplugging and power management.
Connect GPS devices wirelessly via Bluetooth, detaching and power.
Solutions for common error codes displayed by the transmitter.
Troubleshooting wireless LAN issues like rate drops and interference.
Verifying network configuration details on Windows and Mac.
Creating and saving custom captions for image transfers.
Technical details, standards, interfaces, and model numbers.
Regulatory compliance and safety information for the device.
| Type | Wireless File Transmitter |
|---|---|
| Wireless LAN | IEEE 802.11b/g |
| Ethernet | 10Base-T/100Base-TX |
| USB Host Function | Yes |
| Compatible Cameras | Canon EOS-1D Mark III, EOS-1Ds Mark III |
| USB | USB 2.0 |
| Protocols | FTP, HTTP |
| Power Source | AC Adapter |
| Security | WEP, WPA, WPA2 |