MAP1 IP Configuration Page 8 of 12
July 2021 • Rev. 1.2
5. Insert the power connector into the MAP1 controller. The unit will begin the power up
sequence which takes about 30 to 40 seconds. When complete, the MAP1 controller
will beep indicating its mode e.g. First Access, Webster or CloudACS.
6. Remove the USB flash drive from the MAP1 controller.
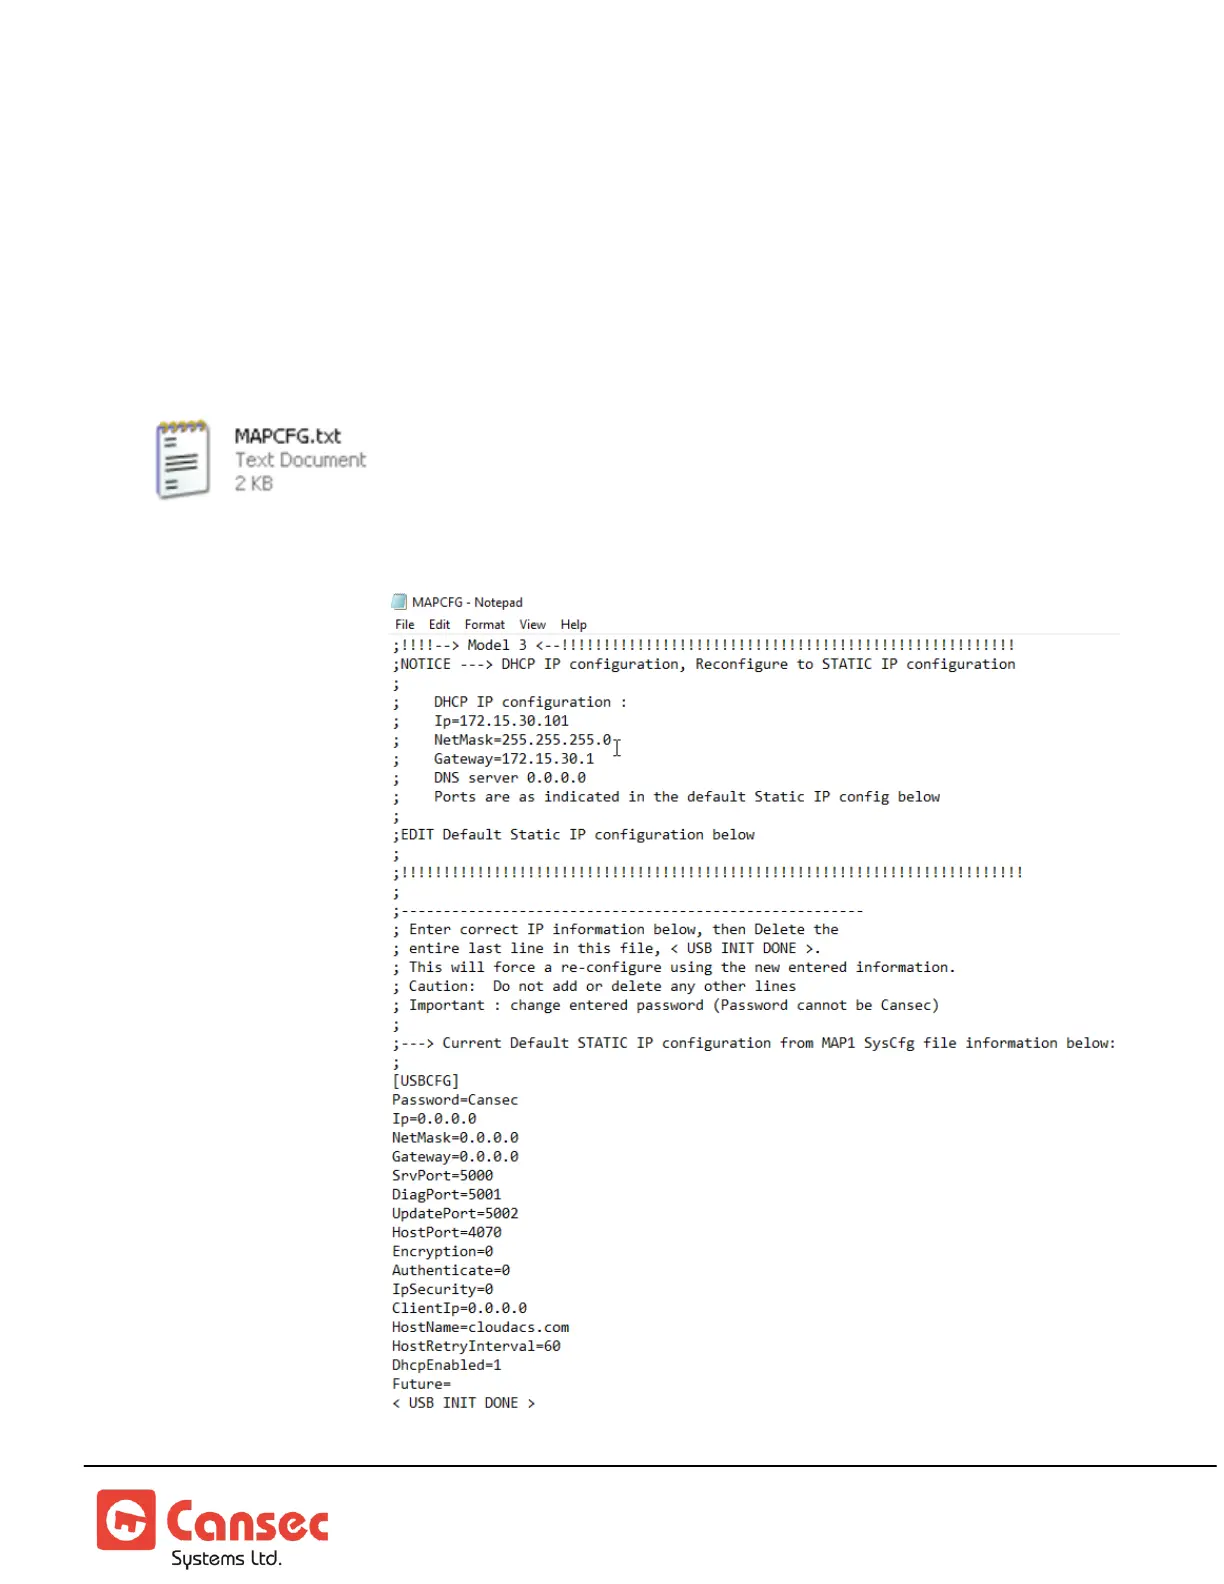
7. Insert the flash drive into a USB port on a computer. When ready, launch Windows
Explorer or File Explorer. Access the USB drive and edit the file named MAPCFG.txt
created by the MAP1 controller during boot-up sequence. If the file
is not present, repeat from step 1. Otherwise proceed to step 8.
8. A similar file will be
displayed when
opened in Notepad.