Do you have a question about the Canyon 28-705 and is the answer not in the manual?
Lists components for bunk bed assembly Option #1, Configuration Type #1.
Provides assembly tips, including wrench usage and tightening guidance.
Lists required tools for assembly, including included and not-included items.
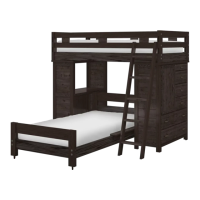
Lists components for bunk bed assembly Option #1, Configuration Type #2.
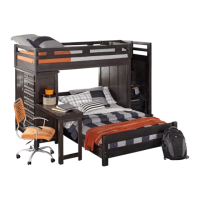
Lists components for bunk bed assembly Option #2, Configuration Type #2.
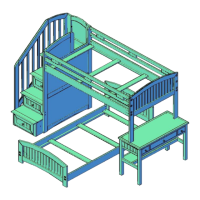
Lists components for bunk bed assembly Option #3, Configuration Type #2.
Lists components for bunk bed assembly Option #4, Configuration Type #2.
Bed slats require a slat pack or bunkie board for proper safety; they are not included.
Identifies and lists parts for the top bunk bed and associated hardware.
Identifies and lists parts for the loft dresser and loft desk.
Identifies and lists parts for the loft hutch, side rails, and guard rails.
Identifies and lists parts for the bottom bunk bed, headboard, footboard, and ladder.
Identifies and lists twin slats, bunk bed end components, and hardware.
Assemble top bunk bed with dresser, desk, hutch, rails, and attach to components.
Insert dowel pins and attach loft hutch to dresser/desk, then top bunk bed.
Insert and align cross dowel nuts within side rail and guard rail access holes.
Attach side rails and guard rails using flat head bolts, do not fully tighten yet.
Place four slats on side rail cleats and fasten with screws.
Assemble top bunk bed with dresser/desk, loft hutch, and side/guard rails.
Insert dowel pins and attach loft hutch to dresser/desk, then top bunk bed.
Insert and align cross dowel nuts within side rail and guard rail access holes.
Attach side rails to dresser/hutch/top bunk bed and 1 pc bunk bed end twin.
Place four slats and fasten with screws on top side rail cleats.
Align and secure metal hook brackets to the ladder and top guardrail.
Assemble bottom bed frame using headboard, footboard, and side rails.
Insert and align cross dowel nuts within side rail access holes.
Attach bottom bed frame to dresser/desk/hutch or bunk bed end.
Place four slats and fasten with screws on side rail cleats.
Insert caster sockets into the bottom corners of the headboard and footboard.
Instructions for installing the rail cap onto the side rail.
Place the assembled twin/full bottom bed between other components.
Warnings regarding mattress size, guardrails, age limits, and horseplay.
Instructions on checking components, using the ladder, and avoiding hazards.
Warning against attaching or hanging items not designed for the bunk bed.
Specifies recommended mattress and foundation sizes for twin and full beds.
Ensures mattress and foundation combined do not exceed 10 inches.
| Brand | Canyon |
|---|---|
| Model | 28-705 |
| Category | Indoor Furnishing |
| Language | English |