CAREL INDUSTRIES HQs
Via dell’Industria, 11 – 35020 Brugine – Padova (Italy)
Tel. (+39) 0499716611 – Fax (+39) 0499716600 – e-mail: carel@carel.com – www.carel.com
CAUTION
This equipment has been tested and found to comply with the limits for a Class B digital
device, pursuant to Part 15 of the FCC Rules. These limits are designed to provide reasonable
protection against harmful interference in a residential installation.
This equipment generates, uses and can radiate radio frequency energy and, if not installed
and used in accordance with the instructions, may cause harmful interference to radio
communications. However, there is no guarantee that interference will not occur in a
particular installation.
If this equipment does cause harmful interference to radio or television reception, which
can be determined by turning the equipment o and on, the user is encouraged to try to
correct the interference by one of the following measures:
• reorient or relocate the receiving antenna;
• increase the separation between the equipment and receiver.;
• connect the equipment into an outlet on a circuit dierent from that to which the
receiver is connected;
• consult the dealer or an experienced radio/TV technician for help.
FCC Caution: Any changes or modications not expressly approved by the party responsible
for compliance could void the user's authority to operate this equipment.
This device complies with Part 15 of the FCC Rules. Operation is subject to the following
two conditions:
(1)
this device may not cause harmful interference, and
(2)
this device must accept any interference received, including interference that may
cause undesired operation.
FCC RF Radiation Exposure Statement:
1. This Transmitter must not be co-located or operating in conjunction with any other
antenna or transmitter.
2. This equipment complies with FCC RF radiation exposure limits set forth for an
uncontrolled environment. This equipment should be installed and operated with a
minimum distance of 20 centimeters between the radiator and your body.
CAUTION
1. “CAUTION” Risk of explosion if the battery is replaced by an incorrect type or short
circuit;
2. Never open the equipment. For safety reasons, the equipment should be opened only
by qualied skilled person; only front cover can be removed to insert SIM;
3. can only be safely used lower than 2000 meters altitude
DO1
DO2
Vdc
DI1
GND
I/O
G
G0
2
LAN
FIELD
SD
24V~/2 4V
20VA/9W
Relay 3
Relay 2
Relay 1
R1
R2
R3
24 Vdc
Dig. Input 24V
NC1
NO1
C1
GND
V in
GND
C548P042/R1
Power input
Expansion board
Relay 1
NC2
NO2
C2
Relay 2
NC3
NO3
C3
Relay 3
L N
230 Vac
BMESTRLA00 (relays module)
24 Vac
digital input
GND + –
coppia intrecciata
interfaced couple
shield
collegare a terra funzionale /
connect to functional earth
DO1
DO2
Vdc
DI1
GND
I/O
G
G0
2
LAN
FIELD
SD
24V~/2 4V
20VA/9W
Relay 3
Relay 2
Relay 1
R1
R2
R3
24 Vdc
Dig. Input 24V
NC1
NO1
C1
GND
V in
GND
C548P042/R1
Power input
Expansion board
Relay 1
NC2
NO2
C2
Relay 2
NC3
NO3
C3
Relay 3
+ –
24 Vdc
BMESTRLA00 (relays module)
digital input
shield
shield
GND + –
coppia intrecciata
interfaced couple
collegare a terra funzionale /
connect to functional earth
AVVERTENZE GENERALI /
MAIN WARNINGS
REGOLE PER LO SMALTIMENTO / GUIDELINES FOR DISPOSAL
• L’apparecchiatura (o il prodotto) deve essere oggetto di raccolta separata in conformità alle
vigenti normative locali in materia di smaltimento.
• Non smaltire il prodotto come riuto solido urbano ma smaltirlo negli appositi centri di
raccolta.
• Il prodotto contiene una batteria ed è quindi necessario rimuoverla separandola dal
resto del prodotto seguendo le istruzioni riportate di seguito prima di procedere al suo
smaltimento.
• Un uso improprio o uno smaltimento non corretto potrebbe avere eetti negativi sulla
salute umana e sull’ambiente.
• In caso di smaltimento abusivo dei riuti elettrici ed elettronici sono previste sanzioni
stabilite dalle vigenti normative locali in materia di smaltimento.
•
The appliance (or the product) must be disposed of separately in accordance with the local
waste disposal legislation in force.
•
Do not dispose of the product as municipal waste; it must be disposed of through
specialist waste disposal centres.
•
The product contains a battery that must be removed and separated from the rest of the
product according to the instructions provided, before disposing of the product.
•
Improper use or incorrect disposal of the product may negative eects on human health
and on the environment.
•
In the event of illegal disposal of electrical and electronic waste, the penalties are specied
by local waste disposal legislation.
AVVERTENZE IMPORTANTI /
IMPORTANT WARNINGS
Il prodotto CAREL è un prodotto avanzato, il cui funzionamento è specicato
nella documentazione tecnica fornita col prodotto o scaricabile, anche anteriormente
all’acquisto, dal sito internet www.carel.com. Il cliente (costruttore, progettista o installatore
dell’equipaggiamento nale) si assume ogni responsabilità e rischio in relazione alla fase
di congurazione del prodotto per il raggiungimento dei risultati previsti in relazione
all’installazione e/o equipaggiamento nale specico. La mancanza di tale fase di studio, la
quale è richiesta/indicata nel manuale d’uso, può generare malfunzionamenti nei prodotti
nali di cui CAREL non potrà essere ritenuta responsabile. Il cliente nale deve usare il
prodotto solo nelle modalità descritte nella documentazione relativa al prodotto stesso. La
responsabilità di CAREL in relazione al proprio prodotto è regolata dalle condizioni generali di
contratto CAREL editate nel sito www.carel.com e/o da specici accordi con i clienti.
The CAREL product is a state-of-the-art product, whose operation is specied in the
technical documentation supplied with the product or can be downloaded, even prior to
purchase, from the website www.carel.com. - The client (builder, developer or installer of the
nal equipment) assumes every responsibility and risk relating to the phase of conguration
the product in order to reach the expected results in relation to the specic nal installation
and/or equipment. The lack of such phase of study, which is requested/indicated in the
user manual, can cause the nal product to malfunction of which CAREL can not be held
responsible. The nal client must use the product only in the manner described in the
documentation related to the product itself. The liability of CAREL in relation to its own
product is regulated by CAREL’s general contract conditions edited on the website www.carel.
com and/or by specic agreements with clients.
Se si remotano entrambe le antenne fuori del quadro, devono essere poste ad una distanza
di almeno 30 cm tra loro.
In ogni caso la/le antenne devono essere installate ad una distanza di almeno 20cm
dal corpo umano.
Una tensione di alimentazione elettrica diversa da quella prescritta può danneggiare
seriamente il sistema.
Utilizzare capicorda adatti per i morsetti in uso. Allentare ogni vite ed inserirvi i
capicorda, quindi serrare le viti. Ad operazione ultimata tirare leggermente i cavi per
vericarne il corretto serraggio. Non collegare il dispositivo a linee esterne al building.
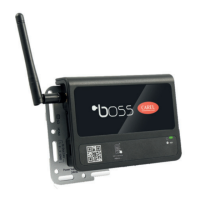
INSERIMENTO E SOSTITUZIONE DELLA SIM:
scollegare l’alimentazione e togliere il
coperchietto premendo lateralmente
con le dita. Assumere prevenzione
contro le scariche elettrostatiche.
PROCEDURA DI PRIMO ACCESSO
La prima volta che si accede a µboss è necessario completare la procedura di primo
accesso per congurare l’accessibilità al dispositivo. La procedura può essere eettuata
in 2 modi:
• se µboss è collegato ad una rete locale, tramite un PC in rete che possa accedere
a µboss;
• tramite la connessione Wi-Fi integrata (solo nei modelli con Wi-Fi).
ACCESSO TRAMITE RETE LOCALE DA UN ALTRO PC
Assicurarsi che µboss sia collegato ad una rete locale e che sia accessibile da un PC
collegato alla stessa rete. Accendere µboss, attendere qualche istante, quindi aprire
un browser nel PC e collegarsi all’indirizzo: https://uboss-nnnn. Le ultime 4 cifre sono
riportate sull’adesivo sul lato del dispositivo. Quindi seguire la procedura guidata di
primo accesso.
ACCESSO TRAMITE WI-FI INTEGRATA
Accendere µboss, attendere qualche istante, quindi eettuare una ricerca delle reti
Wi-Fi disponibili da tablet, telefono o PC. Selezionare la rete mboss-nnnn, le ultime 4
cifre sono riportate sull’adesivo sul lato del dispositivo. La prima volta che si accede
alla rete Wi-Fi non sarà necessario inserire alcuna password. Dopo aver eettuato la
connessione alla rete Wi-Fi, avviare il browser e collegare all’indirizzo: https://uboss-
nnnn o https://192.168.42.1 e seguire la procedura guidata di primo accesso.
ASSEGNAZIONE IP TEMPORANEO
Per assegnare un IP sso temporaneo alla porta LAN di µboss in modo da potervi
accedere in caso di non conoscenza dell'IP di quest'ultimo, procedere come indicato
di seguito:
• tenere premuto per più di 2s il "Pulsante abilitazione IP temporaneo" (5);
• il LED allarme comincerà a lampeggiare in verde;
• da questo momento in poi il µboss è raggiungibile all'IP 172.16.0.33/16 per circa
un'ora, allo scadere della quale l’IP temporaneo verrà disabilitato automaticamente.
Nota: l'IP temporaneo non è visibile nella congurazione di rete del µboss.
FACTORY RESET (RIPRISTINO VALORI DI FABBRICA)
Nel caso vi sia la necessità di riportare il µboss alle condizioni di prima accensione
(cancellazione della congurazione, dei dati storici e degli eventuali aggiornamenti
installati), procedere come indicato di seguito:
• togliere alimentazione al Cloudgate;
• dare tensione tenendo premuto per circa 5s il "Pulsante abilitazione IP temporaneo"
(4);
• il LED "motore SW" (D) inizierà a lampeggiare lentamente;
• quando inizierà a lampeggiare velocemente rilasciare il tasto;
• il LED "motore SW" (D) tornerà quindi a lampeggiare lentamente per circa 5s;
• quando il LED ricomincerà a lampeggiare velocemente premere di nuovo il tasto e
attendere il ritorno del lampeggio lento;
• a questo punto la procedura di "factory reset" è in corso e si può rilasciare il tasto e
attendere il riavvio di µboss.
FUNZIONE WPS (PER MODELLI WI-FI)
Per accoppiare attraverso la funzionalità WPS il proprio dispositivo alla rete Wi-Fi di µboss,
procedere come indicato di seguito:
• tenere premuto per circa 10s il "Pulsante abilitazione IP temporaneo" (5);
• il LED "potenza segnale radio minimo" (E) si accenderà in verde;
• stimolare ora la funzionalità WPS nel proprio dispositivo per connettersi alla rete Wi-
Fi di µboss.
Nota: la funzionalità WPS rimane attiva (in attesa di accoppiamento) per circa 2
minuti.
If both antennas are located outside the panel, they must be placed at a distance of at
least 30 cm between them.
Anyway antennas must be installed at minimum distance of 20cm from the human
body.
A power supply voltage other than that specied will seriously damage the system.
Use cable ends suitable for the corresponding terminals. Loosen each screw and insert
the cable ends, then tighten the screws. When the operation is completed, slightly tug
the cables to check they are suciently tight. Do not connect the device to external
line of building.
INSERTING AND REPLACING SIM CARD:
disconnect the power supply and
remove the cover by pressing on the
side with ngers.
Take precaution of electrostatic
discharge.
FIRST COMMISSIONING PROCEDURE
The rst time you power up your µboss, you need to setup its access properties. You can
choose to do that in one of two ways:
• in case µboss is plugged in a LAN network, you can access it through another PC
in the LAN;
• using the integrated Wi-Fi connection;
ACCESS THROUGH ANOTHER PC IN THE SAME LAN
Check the µboss will be connected to a LAN and it is accessible from a PC connected
to the same network. Power up µboss, wait a few seconds, then access its first setup
procedure by opening a browser on your PC and connecting to the URL: https://uboss-
nnnn. The last 4 digits are printed on the sticker on the side of device. Now, follow th
rst commissioning procedure.
ACCESS THROUGH INTEGRATED WI-FI
Power up µboss, wait a few seconds, and enable Wi-Fi on your PC or mobile device.
From the list of available devices, choose the mboss-nnnn network; the last 4 digits of
the name are printed on the sticker on the side of device. The first time you access that
Wi-Fi network, no password is required. Once connected to the Wi-Fi, open a browser
on your PC or device, type the URL https://uboss-nnnn or https://192.168.42.1 and follow
the online procedure.
TEMPORARY IP ASSIGNMENT
To assign a temporary IP address to the µboss LAN port for access when the actual IP is
not known, proceed as follows:
• press and hold the “Enable temporary IP button” (5) for 2 seconds;
• the alarm LED will start ashing green;
• µboss can now be accessed at IP address 172.16.0.33/16 for around one hour, after
which the temporary IP will be automatically disabled.
NB: the temporary IP address is not visible in the boss mini network conguration.
FACTORY RESET (FACTORY DATA RESET)
If it is necessary to reset the µboss to the default settings (initial start-up, deleting the
conguration, historical data and any updates installed), proceed as follows:
• disconnect power from the Cloudgate;
• power on pressIng and holding the “Enable temporary IP button” (4) for about 5s;
• "SW motor" LED (D) will start ashing slowly;
• when it starts ashing quickly, release the button;
• the "SW motor" LED (D) will start to ash slowly for about 5s;
• when LED re-starts ashing quickly, press the button again and wait for the slow
ashing;
• the "factory reset" procedure is in progress and the key can be released and µboss
restarted.
WPS FUNCTION (FOR WI-FI MODELS)
To pair your device to the µboss Wi-Fi network via the WPS, proceed as follows:
• keep the “Enable temporary IP button” (5) pressed for about 10s;
• the "minimum radio signal strength" LED (E) will turn green;
• stimulate the WPS functionality in your device to connect to the µboss Wi-Fi network.
Note: the WPS function remains active (waiting for pairing) for approx. 2 minutes.
SUPPORTO
SUPPORT
in caso di malfunzionamenti del
dispositivo contattare personale di
supporto CAREL. Per ogni dubbio o
segnalazione rivolgersi a sw.support@
carel.com
in case of device malfunctions contact
CAREL support personnel. For any
questions or concerns, please contact
sw.support@carel.com
Alimentazione a 24Vac /
24Vac Power supply
Alimentazione a 24Vdc /
24Vdc Power supply
SCHEMA DI COLLEGAMENTO /
CONNECTIONS DRAWING
NOTA
NOTE
Il foglio istruzione è disponibile in altre
lingue, ed è scaricabile sul sito www.carel.
com (alla sezione "Cloudgate/Technical
Lefalet: https://www.carel.com/product/
cloudgate).
the technical leaet is available in other
languages and can be downloaded from
the website www.carel.com (in the section
"Cloudgate/Technical Lefalet: https://www.
carel.com/product/cloudgate).
"µboss" +0500152IE- rel. 1.1 - 20.10.2020
 Loading...