32
Table 7 - Heat pump operation
Zone Air temperature
Dry bulb Wet bulb
Indoor
Maximum 27°C-
Outdoor
Maximum 24°C18°C
Minimum -15°C-
OPTIONS AND ACCESSORIES
Option Accessory
Head pressure control kit x x
Electric heating x x
Compressor crankcase heater (standard on 50PZ) x x
Hot water coil x x
Economizer x
Outdoor air filter x x
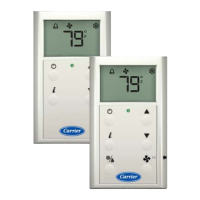
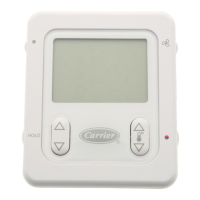
User interface x
Protection grille x x
Minimum opening potentiometer x x
Volt-free contacts x
Optional communications x x
Return air sensor x x
Superior drive x
38VZ/PZ for vertical discharge x
Hot water heating coil
This option/accessory consists of the water heating coil, the air
flow equalising plate, the side access panel and fixing
components.
The heating coil performances are in accordance with Eurovent
conditions and are shown in tables 8 and 9.
Table 8
Unit 015 025 030 031 040 045 055 065 075
Heating capacity kW* 9.6 17.5 19.6 19.6 27.3 33.4 35.3 41 43.8
Water flow l/s 0.46 0.84 0.94 0.94 1.31 1.60 1.69 1.96 2.09
Pressure drop kPa 13 20 14.5 14.5 13.5 21 23 33.5 37.5
* Indoor air temperature 20°C and entering/leaving water temperature 50°C/45°C.
Table 9
Unit 015 025 030 031 040 045 055 065 075
Heating capacity kW* 15.2 27.9 30.4 30.4 43.4 51.5 54.6 63.9 68.5
Water flow l/s 0.36 0.67 0.72 0.72 1.04 1.23 1.31 1.52 1.64
Pressure drop kPa 9 13 9 9 9 13 14.5 21 24
* Indoor air temperature 20°C and entering/leaving water temperature 70°C/60°C.
Water connection
The entering and leaving water connections are all threaded
male gas connections with the diameters shown in Table 10.
Table 10
Unit 015 025 030 031 040 045 055 065 075
Ø connection 1” 1” 1-1/4” 1-1/4” 1-1/4” 1-1/2” 1-1/2” 1-1/2” 1-1/2”
- Remove the gas from the refrigerant circuit using recovery
equipment to avoid harming the atmosphere.
- Electrically disconnect the compressor.
- Unbraze or unscrew the suction and discharge lines,
taking care not to damage the rest of the components.
- Remove the fastenings from the compressor.
- Replace the compressor, ensuring that it contains
sufficient oil.
- Braze or screw in the lines.
- Connect the compressor according to the wiring diagram.
- Evacuate the compressor.
- Fill in the refrigerant charge indicated on the nameplate,
plus the required charge for the refrigerant connection
lines, if the system is a split system.
NOTE: This operation must be done by a qualified technician.
Description of unit protection devices
The unit includes the following unit protection devices:
- Internal compressor protector to avoid overheating.
- Short-cycle protection (included in the main electronic
board).
- Outdoor fan motor thermomagnetic switch.
- Indoor fan motor thermomagnetic switch.
- High pressurestat - This protects the unit against
excessive condensing pressure. The high pressurestat has
factory-fixed non-adjustable settings. To check, see
section Initial checks.
- Low pressurestat - This protects the unit against
excessive low pressure in the evaporator. The low
pressurestat has factory fixed non-adjustable settings. To
check, see section Initial checks.
CAUTION: When any of these cuts out, the unit stops and will
not re-start until the contacts have been reclosed after
rectification of the fault.
Table 5 - Pressure switch settings
Cut-out Cut-in Reset
High pressurestat *2844 kPa 1863 kPa Automatic
Low pressurestat *265 kPa 363 kPa Automatic
* Factory-fitted
WARNING: Alteration of factory settings other than the design
set-point, without manufacturer's authorisation, may void the
warranty.
Operating limits
These units have been designed to operate within the following
limits:
Table 6 - Cooling operation
Zone Air temperature
Dry bulb Wet bulb
Indoor
Maximum 35°C21°C
Minimum 19°C14°C
Outdoor
Maximum 46°C-
Minimum 19°C* -
* With the optional head pressure control, the unit can operate with temperatures below 19°C.
 Loading...