Manufacturer reserves the right to discontinue, or change at any time, specifications or designs without notice and without incurring obligations.
Catalog No. 04-53420021-01 Printed in U.S.A. Form 42-8SI Pg 1 3-23 Replaces: 42-7SI
Installation, Start-Up, and Service Instructions
CONTENTS
Page
SAFETY CONSIDERATIONS . . . . . . . . . . . . . . . . . . . 1
INTRODUCTION . . . . . . . . . . . . . . . . . . . . . . . . . . . . . . 3
PHYSICAL DATA . . . . . . . . . . . . . . . . . . . . . . . . . . . . . 3
PRE-INSTALLATION . . . . . . . . . . . . . . . . . . . . . . . . . . 3
Unpack and Inspect Units . . . . . . . . . . . . . . . . . . . . . 3
Unit Protection from Damage . . . . . . . . . . . . . . . . . . 3
Prepare Jobsite for Unit Installation . . . . . . . . . . . . . 3
Identify and Prepare Units . . . . . . . . . . . . . . . . . . . . . 3
Unit Clearance and Service Access . . . . . . . . . . . . . 4
• 42C HORIZONTAL CEILING UNIT CLEARANCE AND
SERVICE ACCESS CLEARANCE
• 42D HI-PERFORMANCE UNIT CLEARANCE AND
SERVICE ACCESS CLEARANCE
• 42V VERTICAL V*D SERVICE AND OPERATING
CLEARANCES
INSTALLATION . . . . . . . . . . . . . . . . . . . . . . . . . . . . . 64
Step 1 — Horizontal Ceiling and Hi-Performance
Ceiling Unit Installation . . . . . . . . . . . . . . . . . . . . 64
Step 2 — Place Units in Position . . . . . . . . . . . . . . . 64
• 42C UNITS
• SUSPENSION MOUNTING
• 42D UNITS
• FLOOR/WALL MOUNT INSTALLATION
• 42V UNITS
• FLOOR/WALL MOUNT INSTALLATION
• CABINET FRONT PANEL INSTALLATION AND
REMOVAL
Decorative Wall Panels Installation (42VAD) . . . . . 67
Optional Trim Kit Installation (42VBD/VFD Units) . 68
Step 3 — Make Piping Connections . . . . . . . . . . . . 69
Cooling and Heating Connections . . . . . . . . . . . . . 69
• HORIZONTAL CEILING DRAIN PAN REMOVAL
(42C UNITS)
• CONDENSATE DRAIN PAN (ALL UNITS)
• VALVE PACKAGES
• AUXILIARY DRAIN PAN
• VALVE PACKAGE INSTALLATION
(WHEN APPLICABLE)
• STEAM CONNECTIONS
• DIRECT EXPANSION (DX) REFRIGERANT PIPING
• TEST AND INSULATE
Step 4 — Make Electrical Connections . . . . . . . . . . 76
Step 5 — Make Ductwork Connections . . . . . . . . . . 77
• HORIZONTAL PLENUM TYPE
• HI-PERFORMANCE PLENUM TYPE
Step 6 — Frame and Finish Unit . . . . . . . . . . . . . . . 78
• EXPOSED UNIT FINISH, TOUCH-UP AND REPAINT
Step 7 — Cut Out Openings for Grilles and
Thermostats . . . . . . . . . . . . . . . . . . . . . . . . . . . . . 78
Step 8 — Make Final Preparations . . . . . . . . . . . . . 78
START-UP . . . . . . . . . . . . . . . . . . . . . . . . . . . . . . . . . .78
General . . . . . . . . . . . . . . . . . . . . . . . . . . . . . . . . . . . .78
Cooling/Heating System . . . . . . . . . . . . . . . . . . . . . .78
Direct Expansion (DX) Systems . . . . . . . . . . . . . . . .79
Air System Balancing . . . . . . . . . . . . . . . . . . . . . . . .79
Maximum External Static Pressures . . . . . . . . . . . .79
Water System Balancing . . . . . . . . . . . . . . . . . . . . . .79
Water Treatment . . . . . . . . . . . . . . . . . . . . . . . . . . . . .79
Board Components and Specifications . . . . . . . . . .80
SERVICE . . . . . . . . . . . . . . . . . . . . . . . . . . . . . . . . . . .80
General . . . . . . . . . . . . . . . . . . . . . . . . . . . . . . . . . . . .80
Motor/Blower Assembly . . . . . . . . . . . . . . . . . . . . . .80
To Clean Coil . . . . . . . . . . . . . . . . . . . . . . . . . . . . . . .80
Drain . . . . . . . . . . . . . . . . . . . . . . . . . . . . . . . . . . . . . .80
Electric Heater Assembly . . . . . . . . . . . . . . . . . . . . .80
• TYPICAL HEATER TYPES
Electrical Wiring and Controls . . . . . . . . . . . . . . . . .81
Filters, Throwaway . . . . . . . . . . . . . . . . . . . . . . . . . . .81
Filters, Permanent . . . . . . . . . . . . . . . . . . . . . . . . . . .81
Replacement Parts . . . . . . . . . . . . . . . . . . . . . . . . . . .81
Valves and Piping . . . . . . . . . . . . . . . . . . . . . . . . . . .81
APPENDIX A . . . . . . . . . . . . . . . . . . . . . . . . . . . . . . . .82
APPENDIX B . . . . . . . . . . . . . . . . . . . . . . . . . . . . . . . .88
APPENDIX C . . . . . . . . . . . . . . . . . . . . . . . . . . . . . . . .89
START-UP CHECKLIST FOR 42C,D,V SERIES FAN
COIL AIR CONDITIONERS . . . . . . . . . . . . . . . . . . .CL-1
SAFETY CONSIDERATIONS
Installation and servicing of air-conditioning equipment can be
hazardous due to system pressure and electrical components. Only
trained and qualified service personnel should install, repair, or
service air-conditioning equipment.
Untrained personnel can perform basic maintenance functions of
cleaning coils and filters and replacing filters. All other operations
should be performed by trained service personnel. When working
on air-conditioning equipment, observe precautions in the
literature, tags and labels attached to the unit, and other safety
precautions that may apply.
Follow all safety codes. Wear safety glasses and work gloves. Use
quenching cloth for unbrazing operations. Have fire extinguisher
available for all brazing operations.
It is important to recognize safety information. This is the
safety-alert symbol
. When you see this symbol on the unit and
in instructions or manuals, be alert to the potential for personal
injury.
Understand the signal words DANGER, WARNING, CAUTION,
and NOTE. These words are used with the safety-alert symbol.
DANGER identifies the most serious hazards which will result in
severe personal injury or death. WARNING signifies hazards
which could result in personal injury or death. CAUTION is used
to identify unsafe practices, which may result in minor personal
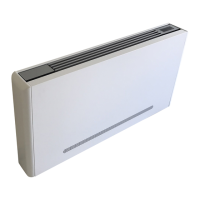
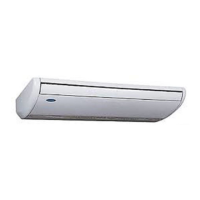
42C,D,V Series
Fan Coil Air Conditioners