12
Table 2 – Maximum Gas Flow Capacity*
NOMINAL
IRON PIPE
SIZE (IN.)
INTERNAL
DIAMETER
(IN.)
LENGTH OF PIPE ft (m)†
10
(3.0)
20
(6.1)
30
(9.1)
40
(12.1)
50
(15.2)
60
(18.3)
70
(21.3)
80
(24.4)
90
(27.4)
100
(30.5)
125
(38.1)
150
(45.7)
175
(53.3)
200
(61.0)
1/2 .622 175 120 97 82 73 66 61 57 53 50 44 40 — —
3/4 .824 360 250 200 170 151 138 125 118 110 103 93 84 77 72
1 1.049 680 465 375 320 285 260 240 220 205 195 175 160 145 135
1 --- 1 / 4 1.380 1400 950 770 600 580 530 490 460 430 400 360 325 300 280
1 --- 1 / 2 1.610 2100 1460 1180 990 900 810 750 690 650 620 550 500 460 430
*Capacity of pipe in cu ft of gas per hr for gas pressure of 0.5 psig or less. Pressure drop of 0.5---in. wc (based on a 0.60 specific gravity gas). Refer to Table,
NFPA 54/ANSI Z223.1.
{ This length includes an ordinary number of fittings.
FIRE OR EXPLOSION HAZARD
Failure to follow this warning could result in fire, explosion,
personal injury, death and/or property damage.
S Connect gas pipe to unit using a backup wrench to avoid
damaging gas controls.
S Never purge a gas line into a combustion chamber. Never
test for gas leaks with an open flame. Use a commercially
available soap solution made specifically for the detection
of leaks to check all connections.
S Use proper length of pipe to avoid stress on gas control
manifo ld.
S If a flexible connector is required or allowed by authority
having jurisdiction, black iron pipe shall be installed at
furnace gas valve and extend a minimum of 2 in. (51 mm)
outside furnace casing.
S If codes allow a flexible connector, always use a new
connector. Do not use a connector which has previously
serviced another gas appliance.
!
WARNING
8. Check for gas leaks at the field--installed and
factory-- installed gas lines after all piping connections have
been completed. Use a commercially available soap solution
made specifically for the detection of leaks (or method
specified by local codes and/or regulations).
Install Electrical Connections
ELECTRICAL SHOCK HAZARD
Failure to follow this warning could result in personal
injury or death.
The unit cabinet must have an uninterrupted, unbroken
electrical ground. This ground may consist of an electrical
wire connected to the unit ground screw in the control
compartment, or conduit approved for electrical ground
when installed in accordance with NEC, NFPA 70
American National Standards Institute/National Fire
Protection Association (latest edition) (in Canada, Canadian
Electrical Code CSA C22.1) and local electrical codes.
!
WARNING
HIGH--VOLTAGE CONNECTIONS
The unit must have a separate electrical service with a
field-- supplied, waterproof disconnect switch mounted at, or within
sight from, the unit. Refer to the unit rating plate, NEC and local
codes for maximum fuse/circuit breaker size and minimum circuit
amps (ampacity) for wire sizing.
The field-- supplied disconnect may be mounted on the unit over
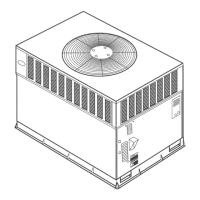
the high--voltage inlet hole (See Fig. 5 and 6).
Operation of unit on improper line voltage constitutes abuse and
may cause unit damage that could affect warranty.
UNIT COMPONENT DAMAGE HAZARD
Failure to follow this caution may result in damage to the
unit being installed.
1. Make all electrical connections in accordance with NEC
NFPA 70 (latest edition) and local electrical codes
governing such wiring. In Canada, all electrical
connections must be in accordance with CSA standard
C22.1 Canadian Electrical Code Part 1 and applicable
local codes. Refer to unit wiring diagram.
2. Use only copper conductor for connections between
field-- supplied electrical disconnect switch and unit. DO
NOT USE ALUMINUM WIRE.
3. Be sure that high --voltage power to unit is within
operating voltage range indicated on unit rating plate.
4. Insulate low--voltage wires for highest voltage contained
within conduit when low--voltage control wires are in
same conduit as high-- voltage wires.
5. Do not damage internal components when drilling
through any panel to mount electrical hardware, conduit,
etc.
!
CAUTION
ROUTING POWER LEADS INTO UNIT
Use only copper wire between disconnect and unit. The high
voltage leads should be in a conduit until they enter the duct panel;
conduit termination at the duct panel must be watertight. Run the
high-- voltage leads through the power entry knockout on the
power entry side panel. See Fig. 5 and 6 for location and size. For
single-- phase units, connect leads to the black and yellow wires.
CONNECTING GROUND LEAD TO GROUND SCREW
Connect the ground lead to the chassis using the ground screw on
the control plate near the inducer switch (See Fig. 13).
ROUTING CONTROL POWER WIRES
For detailed instruction on the low voltage connections to the User
Interface (UI), refer to the UI installation guide.
Form a drip-- loop with the control leads before routing them into
the unit. Route the low voltage control leads through grommeted,
low-- voltage hole provided into unit (See Fig. 5 and 6). Connect
user interface leads to unit control power leads as shown in Fig. 15.
The unit transformer supplies 24 --v power for complete system
including accessory electrical heater . A fuse is provided in the
24--v circuit as a protection device (See Fig. 17 and 18).
Transformer is factory wired for 230--v operation. If supply voltage
is 208--v , rewire transformer primary as described in Special
Procedures for 208 --v Operation section.
The furnace board is fused by a board--mounted automotive fuse
placed in series with transformer SEC1 and R circuit. The C circuit
of transformer circuit is referenced to chassis ground through a
printed circuit run at SEC2 and gas valve grounding wire. Check to
be sure control board is mounted securely using both
factory--installed screws.
48XT-- A
 Loading...