dampers should be fully closed. Turn the potentiom-
eter gradually counterclockwise until the desired po-
sition is reached.
c. Connect T and T1 to the 24-v power supply.
d. After installation is complete, calculate the mini-
mum airflow across the economizer. To calculate the
minimum airflow, the following data is needed: total
cfm (cfm
3
), temperature of the total cfm (T
3
), tem-
perature of the return air (T
2
), and temperature of
the entering outdoor air (T
1
). Cfm
1
is the outdoor air
cfm, which will be the minimum airflow.
MINIMUM
POSITION
OPEN
3
1
T
P
P1
T1
4
2
5
S
S
O
D
C
TR
B
REV. B
198818A
%
H
U
M
I
D
I
T
Y
90
70
60
30
10
D
C
B
A
60
65
70
75
55
50
85
80
DAMPER
DAMPER
CLOSED
OPEN
OUTDOOR TEMP.
°F
REV.
97-3672
CW–SETPOINTS–CCW
CONTACTS SHOWN IN HIGH ENTHALPY
RUSH AT 24VAC
3 mA MIN. AT 11 VDC
CONTACT RATINGS: 1.5A RUN, 3.5A IN
OR UNPOWERED STATE
1
2
3
TR
TR1
24VAC
ENTHALPY
CONTROL
*Outdoor-Air Thermostat or Enthalpy Control can be attached to ei-
ther side inside hood.
Fig. 21 — Durablade Economizer Outdoor-Air
Thermostat/Enthalpy Control Installation
Fig. 23 — Durablade Economizer Barometric Relief
Damper Characteristics
ECONOMIZER CONTROL
MODULE/DAMPER ACTUATOR
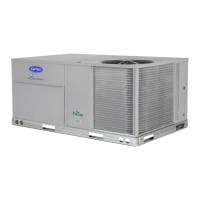
Fig. 24 — Parablade Economizer Installed in Unit
Fig. 22 — Wiring Connections for Outdoor-Air
Thermostat
15
 Loading...