ACCESSORY RECTANGULAR DUCT CONNECTION KIT
INSTALLATION (024-048 Only) — Refer to Fig. 18 for
duct adapter dimensions and hole locations.
1. Mark hole locations shown in Fig. 18.
2. At marked locations, drill holes using a no. 26 (.147-in.)
twist drill.
3. Partially secure duct flanges using 2 of the no. 10, 13-mm
(
1
⁄
2
-in.) screws provided.
4. See the following caution. Using remaining holes in duct
flanges as templates, drill the remaining holes with the
no. 26 (.147-in.) drill.
Do not drill deeper than 13 mm (
1
⁄
2
in.) into shaded
area shown in Fig. 18. Damage to refrigerant coil
could result.
5. Fully secure the duct flanges using the remaining screws
provided.
The finished kit installation accommodates a 375-mm x
375-mm (14
3
⁄
4
-in. x 14
3
⁄
4
-in.) duct.
NOTES:
1. An accessory duct cover is available as an alternative to field fabrication.
2. Construct duct cover out of 0.8 mm (22-gage) sheet metal.
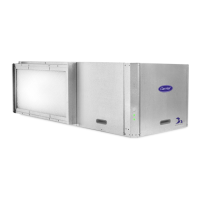
Fig. 17 — Field-Fabricated Horizontal Duct Cover
NOTE: Do not drill more than 13 mm (
1
⁄
2
in.) deep in shaded area.
Fig. 18 — Rectangular Duct Connection Kit —
Locating Holes
11
 Loading...