EasyManua.ls Logo

Carrier 50TC*17 Series User Manual

Carrier 50TC*17 Series
82 pages
To Next Page IconTo Next Page
Page #1 background imageLoading...
Page #1 background image
50TC*17- 30
Nominal 15 to 27.5 Tons
With Puron ® (R-410A) Refrigerant
Service and Maintenance Instructions
TABLE OF CONTENTS
TABLE OF CONTENTS 1.........................
SAFETY CONSIDERATIONS 1....................
UNIT ARRANGEMENT AND ACCESS 3...........
SUPPLY FAN (BLOWER) SECTION 4..............
STAGED AIR VOLUME (SAV) CONTROL: 2SPEED
FAN WITH VARIABLE FREQUENCY DRIVE (VFD) 6
ADDITIONAL VFD INSTALLATION AND
TROUBLESHOOTING 7..........................
CONDENSER COIL SERVICE 8...................
EVAPORATOR COILS 10.........................
HIMIDIMIZER DEHUMIDIFICATION SYSTEM 12
THERMOSTATIC EXPANSION VALVE (TXV) 17....
PURON (R410A) REFRIGERANT 19.............
COOLING CHARGING CHARTS 20................
COMPRESSORS 24..............................
TROUBLESHOOTING THE COOLING SYSTEM 26..
CONVENIENCE OUTLETS 27....................
SMOKE DETECTORS 28.........................
INDICATORS 34................................
PROTECTIVE DEVICES 35.......................
PREMIERLINK CONTROL 36...................
RTUOPEN CONTROL SYSTEM 38................
ECONOMI$ER SYSTEMS 40......................
PRESTARTUP/STARTUP 49....................
STARTUP, PREMIERLINK CONTROLS 50.......
STARTUP, RTUOPEN CONTROLS 51............
FASTENER TORQUE VALUES 51.................
APPENDIX I. MODEL NO. NOMENCLATURE 52...
APPENDIX II. PHYSICAL DATA 53................
APPENDIX III. FAN PERFORMANCE 61...........
APPENDIX IV. WIRING DIAGRAMS 67............
APPENDIX V. MOTORMASTER SENSOR
LOCATIONS 80.................................
UNIT START-UP CHECKLIST 81..................
SAFETY CONSIDERATIONS
Installation and servicing of air-conditioning equipment
can be hazardous due to system pressure and electrical
components. Only trained and qualified service personnel
should install, repair, or service air-conditioning
equipment. Untrained personnel can perform the basic
maintenance functions of replacing filters. Trained service
personnel should perform all other operations.
When working on air-conditioning equipment, observe
precautions in the literature, tags and labels attached to
the unit, and other safety precautions that may apply.
Follow all safety codes. Wear safety glasses and work
gloves. Use quenching cloth for unbrazing operations.
Have fire extinguishers available for all brazing
operations.
Follow all safety codes. Consult local building codes and
National Electrical Code (NEC) for special requirements.
Recognize safety information. This is the safetyalert
symbol . When you see this symbol on the unit and in
instructions or manuals, be aware of the potential for
physical injury hazards.
Understand the signal words DANGER, WARNING, and
CAUTION. These words are used with the safetyalert
symbol. DANGER identifies a hazardous situation which,
if not avoided, will result in death or severe personal
injury. WARNING indicates a hazardous situation which,
if not avoided, could result in death or personal injury.
CAUTION indicates a hazardous situation which, if not
avoided, could result in minor to moderate injury or
product and property damage. NOTICE is used to address
practices not related to physical injury. NOTE is used to
highlight suggestions which will result in enhanced
installation, reliability, or operation.
Question and Answer IconNeed help?

Do you have a question about the Carrier 50TC*17 Series and is the answer not in the manual?

Carrier 50TC*17 Series Specifications

General IconGeneral
BrandCarrier
Model50TC*17 Series
CategoryAir Conditioner
LanguageEnglish

Summary

SAFETY CONSIDERATIONS

UNIT ARRANGEMENT AND ACCESS

General

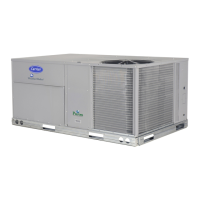
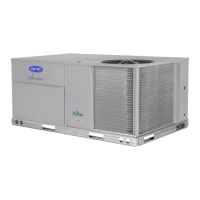
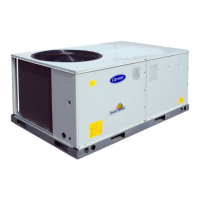
Illustrates general unit arrangement and identifies key access locations.

Routine Maintenance

Lists essential maintenance tasks for regular inspection and service.

Seasonal Maintenance

Outlines checks required at the beginning of each season for optimal performance.

SUPPLY FAN (BLOWER) SECTION

Removing the Return Air Filters

Procedure for removing and replacing return air filters.

Outdoor Air Hood

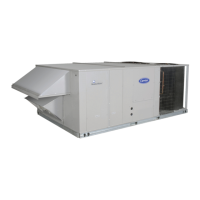
Instructions for cleaning the outdoor air hood inlet screens.

Economizer Inlet Air Screen

Details on the location and cleaning of the economizer inlet air screen.

Supply Fan Assembly

Description of the supply fan system, including vertical and horizontal models.

STAGED AIR VOLUME (SAV) CONTROL: 2-SPEED FAN WITH VARIABLE FREQUENCY DRIVE (VFD)

Staged Air Volume (SAV) Indoor Fan Speed System

Details on how the SAV system adjusts fan speed for ventilation, cooling, and heating.

Identifying Factory Option

Criteria for identifying if the unit is equipped with the VFD option.

Unit Installation with SAV Option

Notes on unit installation requirements when the SAV option is present.

ADDITIONAL VFD INSTALLATION AND TROUBLESHOOTING

Motor

Procedures and considerations for motor replacement.

CONDENSER COIL SERVICE

ROUND TUBE PLATE FIN (RTPF) CONDENSER COIL

Description of the condenser coil's construction and materials.

Recommended Condenser Coil Maintenance and Cleaning

Essential steps for maintaining and cleaning condenser coil surfaces.

Remove Surface Loaded Fibers

Methods for removing surface fibers and dirt from coil surfaces.

Periodic Clean Water Rinse

Benefits and procedure for rinsing coils with low-velocity water.

Routine Cleaning of Coil Surfaces

Detailed procedure for routine cleaning using approved coil cleaner.

EVAPORATOR COILS

Coil Maintenance and Cleaning Recommendation

Procedures for maintaining evaporator coil surfaces for longevity.

Removing Surface Loaded Fibers

Methods for removing surface fibers and dirt from coil surfaces.

Periodic Clean Water Rinse

Benefits and procedure for rinsing coils with low-velocity water.

Routine Cleaning of Evaporator Coil Surfaces

Detailed procedure for routine cleaning using approved coil cleaner.

Totaline® Environmentally Sound Coil Cleaner Application Equipment

Recommended equipment for applying the coil cleaner solution.

Totaline Environmentally Sound Coil Cleaner Application Instructions

Step-by-step instructions for applying the environmentally sound coil cleaner.

Evaporator Coil Metering Devices

Description of fixed-bore metering devices and troubleshooting for blockages.

Refrigerant System Pressure Access Ports

Information on the location and function of refrigerant system access ports.

HIMIDI-MIZER® ADAPTIVE DEHUMIDIFICATION SYSTEM

Humidi-MiZer® Modes

Explanation of Normal Cooling, Reheat1 (Subcooling), and Reheat2 (Hot Gas Reheat) modes.

Humidi-MiZer® System Components

Overview of the components that make up the Humidi-MiZer system.

Operating Sequences

Description of the three sub-modes of operation for the Humidi-MiZer system.

THERMOSTATIC EXPANSION VALVE (TXV)

TXV Operation

Explanation of how the TXV functions to regulate refrigerant flow.

Replacing TXV

Step-by-step procedure for replacing the thermostatic expansion valve.

Refrigerant System Pressure Access Ports

Information on the location and function of refrigerant system access ports.

PURON® (R-410A) REFRIGERANT

Refrigerant Charge

Procedures for checking and adjusting the refrigerant charge.

No Charge

Standard evacuating techniques and leak testing procedures.

Low-Charge Cooling

Guidance on charging units using specific charging charts and superheat.

Using the Cooling Charging Charts

Instructions on how to use the cooling charging charts for proper refrigerant adjustment.

COMPRESSORS

Lubrication

Information on the type and amount of oil used in the compressor.

Replacing the Compressor

Steps for replacing the compressor, including POE oil considerations.

Compressor Mounting Bolts

Periodic inspection of compressor mounting bolt tightness.

Compressor Rotation

Procedure to determine and correct compressor rotation direction.

Filter Drier

Guidance on replacing the filter drier whenever the refrigerant system is exposed.

TROUBLESHOOTING THE COOLING SYSTEM

CONVENIENCE OUTLETS

Non-Powered Type

Details on field installation of a general-purpose 125-volt circuit.

Unit-Powered Type

Description of the factory-installed transformer for unit-powered outlets.

Wet in Use Convenience Outlet Cover

Instructions for installing the weatherproof cover for GFCI receptacles.

Duty Cycle

Limitations and guidelines for the duty cycle of unit-powered outlets.

Installing a Weatherproof Cover

Procedure for installing the weatherproof while-in-use cover for outlets.

SMOKE DETECTORS

System

Overview of the smoke detector system, including controller and sensors.

Controller

Description of the smoke detector controller housing, PCB, and cover.

Sensor

Details on the smoke detector sensor, including its housing and LEDs.

Smoke Detector Locations

Information on sensor placement for supply air and return air configurations.

Supply Air

Description of the supply air smoke detector sensor location and access.

Return Air without Economizer

Location of the return air detector sampling tube without an economizer.

Return Air with Economizer

Location of the return air detector sampling tube when an economizer is present.

FIOP Smoke Detector Wiring and Response

Wiring and operational response of the FIOP smoke detector.

PremierLink and RTU-Open Controls

How smoke detector signals integrate with PremierLink and RTU-Open controls.

PROTECTIVE DEVICES

Compressor Protection

Details on overcurrent, overtemperature, and high/low pressure protection for compressors.

Low Pressure Switch

Information on the low pressure switch for system protection.

Supply (Indoor) Fan Motor Protection

Details on the overcurrent protection devices for the supply fan motor.

Condenser Fan Motor Protection

Information on the internal overtemperature protection for the condenser fan motor.

Control Circuit, 24-V

Details on the circuit breaker protecting the 24-V control circuit.

PREMIERLINKTM CONTROL

RTU-OPEN CONTROL SYSTEM

Sensory/Accessory Installation

Guidance on installing sensors and accessories for the RTU-OPEN system.

Additional RTU-OPEN Installation and Troubleshooting

Resources for further installation and troubleshooting of RTU-OPEN controls.

ECONOMISER SYSTEMS

EconoMi$er IV Standard Sensors

Information on standard sensors used with the EconoMi$er IV system.

EconoMi$er IV Control Modes

Explanation of different control modes available for the EconoMi$er IV.

Outdoor Dry Bulb Changeover

How the system uses outdoor dry bulb temperature for changeover control.

Differential Dry Bulb Control

Using differential dry bulb sensors for enhanced control.

Outdoor Enthalpy Changeover

Utilizing outdoor enthalpy for changeover control.

Demand Control Ventilation (DCV)

Using DCV for ventilation control based on CO2 or occupancy.

CO2 Sensor Configuration

Steps for configuring the CO2 sensor for demand control ventilation.

Differential Enthalpy

Procedure for checking differential enthalpy control.

DCV Minimum and Maximum Position

How to check and set DCV minimum and maximum damper positions.

Supply-Air Sensor Input

Procedure for checking the supply-air sensor input.

EconoMi$er IV Troubleshooting Completion

Procedure to return the EconoMi$er IV to normal operation after testing.

PRE-START-UP/START-UP

PRE-START-UP

Steps to follow for pre-start-up inspections and preparations.

START-UP, GENERAL

General unit preparation and important start-up sequence considerations.

Additional Installation/Inspection

Inspection of field-installed accessories and initial control insights.

START-UP, PREMIERLINK™ CONTROLS

Specific start-up procedures for PremierLink controls.

START-UP, RTU-OPEN CONTROLS

Specific start-up procedures for RTU-Open controls.

FASTENER TORQUE VALUES

APPENDIX I. MODEL NUMBER NOMENCLATURE

APPENDIX II. PHYSICAL DATA

Table 12 – PHYSICAL DATA – VERTICAL

Detailed physical data for vertical unit configurations.

Table 12 PHYSICAL DATA – VERTICAL (cont)

Continued physical data for vertical unit configurations.

Table 12 – PHYSICAL DATA – VERTICAL (cont)

Continued physical data for vertical unit configurations.

Table 13 PHYSICAL DATA – HORIZONTAL

Detailed physical data for horizontal unit configurations.

Table 13 PHYSICAL DATA – HORIZONTAL (cont)

Continued physical data for horizontal unit configurations.

Table 13 PHYSICAL DATA – HORIZONTAL (cont)

Continued physical data for horizontal unit configurations.

APPENDIX III. FAN PERFORMANCE

Table 14-50TC*D17 VERTICAL SUPPLY / RETURN

Fan performance data for 15-ton vertical units.

Table 15-50TC*D20 VERTICAL SUPPLY / RETURN

Fan performance data for 17.5-ton vertical units.

Table 17-50TC*D28 VERTICAL SUPPLY / RETURN

Fan performance data for 25-ton vertical units.

Table 18-50TC-D30 VERTICAL SUPPLY / RETURN

Fan performance data for 27.5-ton vertical units.

Table 19-50TC*D18 HORIZONTAL SUPPLY / RETURN

Fan performance data for 15-ton horizontal units.

Table 20-50TC*D21 HORIZONTAL SUPPLY / RETURN

Fan performance data for 17.5-ton horizontal units.

Table 21- 50TC*D25 HORIZONTAL SUPPLY / RETURN

Fan performance data for 20-ton horizontal units.

Table 22-50TC*D29 HORIZONTAL SUPPLY / RETURN

Fan performance data for 25-ton horizontal units.

APPENDIX IV. WIRING DIAGRAMS

Table 25 - Wiring Diagrams

Table listing part numbers for various wiring diagrams.

Fig. 57-50TC D17 – D28 Control Diagram – 208/230–3–60; 460/575-3–60

Control wiring diagram for 50TC units with 208/230V and 460/575V.

Fig. 58-50TC D30 Control Diagram – 208/230–3–60

Control wiring diagram for 50TC D30 units with 208/230V.

Fig. 63 – 50TC D17 – D30 Power Diagram 208/230–3–60 with Humidi-MiZer®

Power wiring diagram for 50TC units with Humidi-MiZer and 208/230V.

Fig. 64 – 50TC D17 – D30 Power Diagram 460–3–60 with Humidi-MiZer®

Power wiring diagram for 50TC units with Humidi-MiZer and 460V.

Fig. 65 – 50TC D17 – D30 Power Diagram 575–3–60 with Humidi-MiZer®

Power wiring diagram for 50TC units with Humidi-MiZer and 575V.

Fig. 66 – 50TC – PremierLink™ System Control Wiring Diagram

Wiring diagram for the PremierLink system control.

Fig. 67 – 50TC – RTU-OPEN Wiring Diagram

Wiring diagram for the RTU-Open control system.

Fig. 68 – 50TC – SAV – VFD System Control Wiring Diagram

Wiring diagram for the SAV-VFD system control.

APPENDIX V. MOTORMASTER SENSOR LOCATIONS

Fig. 69 – Motormaster Sensor Locations – D17, D20, and D24

Illustrates sensor locations for D17, D20, and D24 models.

Fig. 70 – Motormaster Sensor Location – D28

Illustrates sensor location for the D28 model.

UNIT START-UP CHECKLIST

I. PRELIMINARY INFORMATION:

Fields for model, serial number, date, and technician.

II. PRE-START-UP

Pre-start-up verification tasks to be checked before unit operation.

III. START-UP

Essential electrical, temperature, pressure, and general checks during unit start-up.

Related product manuals