EasyManua.ls Logo

Carrier 50TC Series User Manual

Carrier 50TC Series
60 pages
To Next Page IconTo Next Page
Page #1 background imageLoading...
Page #1 background image
Installation Instructions
50TC
Single Package Rooftop
Cooling Only
with Puronr (R ---410A) Refrigerant
Sizes 08, 12, and 14 with Novation
R
Coil
Sizes 08 --- 14 with Round Tube/Plate Fin Coil
NOTE: Read the entire instruction manual before starting
the installation.
TABLE OF CONTENTS
SAFETY CONSIDERATIONS 2....................
Rated Indoor Airfl ow (cfm) 3..................
INSTALLATION 8...............................
Jobsite Survey 8................................
Step 1 -- Plan for Unit Location 8..................
Roof Mount 8...............................
Step 2 -- Plan for Sequence of Unit Installation 8......
Curb--Mount Installation 9.....................
Pad--Mount Installation 9......................
Frame--Mount Installation 9....................
Step 3 -- Inspect Unit 9...........................
Step 4 -- Provide Unit Support 9...................
Roof Curb Mount 9..........................
Slab Mount (Horizontal Units Only) 9...........
Alternate Unit Support
(In Lieu of Curb or Slab Mount) 9..............
Step 5 -- Field Fabricate Ductwork 11...............
Step 6 -- Rig and Place Unit 12....................
Positioning on Curb 12.......................
Step 7 -- Convert to Horizontal and Connect Ductwork 12
Step 8 -- Install Outside Air Hood 12...............
Economizer and Two Position Damper Hoo d
Pack age Removal and Setup Factory Option 12..
Economizer Hood and Two--Position Hood 13.....
Step 9 -- Install External Condensate Trap and Line 14.
Step 10 -- Make Electrical Connections 14...........
Field Power Supply 14........................
Units with Factory--Installed
Non--Fused Disconnect 15.....................
Units without Factory--Installe d
Non--Fused Disconnect 16.....................
All Units 16................................
Convenie nce Outlets 16.......................
Factory--Option Thru--Base Connections 18.......
Units without Thru--Base Connections 18.........
Field Control Wiring 18.......................
Thermostat 18...............................
Unit without Thru--Base Connection Kit 18.......
Heat Anticipator Settings 19...................
Electric Heaters 19............................
Single Point Boxes and Supplementary Fuses 20...
Single Point Boxes without Fuses 20............
Low--Voltage Control Connections 20............
Humidi--MiZer
R
System Control Connections 21....
Humid i--MiZer System Space RH Con tro ller 21..
EconoMi$e r
R
X (Fact ory--Installed Option) 21......
PremierLinkt (Factory--Installed Option) 23.......
Supply Air Temperature (SAT) Sensor 26.........
Outdoor Air Temperature (OAT) Sensor 26.......
EconoMi$e r2 26.............................
Field Connections 26..........................
Space Sensors 28............................
Connect Thermostat 28.......................
Configure the Unit for Thermostat Mode 28......
Economizer Controls 29........................
Indoor Air Quality (CO
2
)Sensor 29.............
Outdoor Air Quality Sensor 29.................
Space Relative Humidity Sensor or
Humidistat Connections 30....................
Smoke Detector/Fire Shutdown (FSD) 30.........
Filter Status Switch 31........................
Supply Fan Status Switch 31...................
Remote Occupied Switch 31...................
Power Exhaust (output) 31.....................
CCN Communication Bus 31..................
RTU Open Cont roller System 33.................
Supply Air Temperature (SAT) Sensor 36.........
Outdoor Air Temperature (OAT) Sensor 36.......
EconoMi$e r2 36.............................

Table of Contents

Other manuals for Carrier 50TC Series

Question and Answer IconNeed help?

Do you have a question about the Carrier 50TC Series and is the answer not in the manual?

Carrier 50TC Series Specifications

General IconGeneral
BrandCarrier
Model50TC Series
CategoryAir Conditioner
LanguageEnglish

Summary

Safety Considerations

Electrical Shock Hazard

Warning about electrical hazards during service or maintenance operations.

Unit Operation and Safety Hazard

Hazards related to unit operation, refrigerant systems, and potential damage.

Personal Injury and Environmental Hazard

Hazards from handling refrigerants, including recovery and disposal procedures.

Cut Hazard

Warning about sharp sheet metal edges and burrs during handling.

Rated Indoor Airflow (cfm)

Installation

Jobsite Survey

Initial site assessment and checks before installation.

Step 1 - Plan for Unit Location

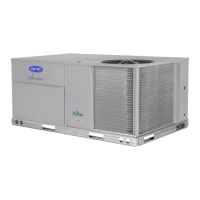
Selecting an appropriate location for the unit considering clearances.

Step 2 - Plan for Sequence of Unit Installation

Planning the order of installation steps based on unit type.

Step 5 - Field Fabricate Ductwork

Step 6 - Rig and Place Unit

Step 7 - Convert to Horizontal and Connect Ductwork

Modifying the unit for horizontal duct connections if required.

Step 8 - Install Outside Air Hood

Assembling and installing the economizer hood for outside air intake.

Step 9 - Install External Condensate Trap and Line

Step 10 - Make Electrical Connections

Connecting unit power supply, control wiring, and ensuring tight connections.

Units with Factory-Installed Non-Fused Disconnect

Units Without Factory-Installed Non-Fused Disconnect

Convenience Outlets

Installing 125-volt GFCI receptacles for power access.

Factory-Option Thru-Base Connections

Thermostat

Guidelines for selecting and installing thermostats for economizer function.

Field Control Wiring

Connecting external temperature control devices like thermostats and controllers.

Heat Anticipator Settings

Electric Heaters

Information on accessory electric heaters, their installation, and module types.

Single Point Boxes and Supplementary Fuses

Low-Voltage Control Connections

Wiring guidance for connecting low-voltage control leads from heater modules.

Humidi-MiZer® System Control Connections

EconoMi$er® X (Factory-Installed Option)

Operating details for units with the factory-installed EconoMi$er X option.

PremierLink™ (Factory-Installed Option)

Supply Air Temperature (SAT) Sensor

Outdoor Air Temperature (OAT) Sensor

Information about the OAT sensor and its use with EconoMi$er2.

Field Connections

How to make field connections for accessory sensors and input devices.

Space Sensors

Connect Thermostat

Wiring a 7-wire thermostat to the PremierLink controller.

Configure the Unit for Thermostat Mode

Changing PremierLink controller mode from Sensor to Thermostat.

Indoor Air Quality (CO2) Sensor

Outdoor Air Quality Sensor

Monitoring CO2 levels in outdoor ventilation air and wiring the OAQ sensor.

Space Relative Humidity Sensor or Humidistat Connections

Smoke Detector/Fire Shutdown (FSD)

How the smoke detector system implements unit shutdown.

Filter Status Switch

Supply Fan Status Switch

Monitoring supply fan operation using a differential pressure switch.

Remote Occupied Switch

Using a remote timeclock to override occupancy schedules.

Power Exhaust (output)

Connecting the accessory Power Exhaust contactor coils.

CCN Communication Bus

Connecting the PremierLink controller to the bus using daisy chain.

RTU Open Controller System

Field Connections

Space Temperature (SPT) Sensors

Details on different types of SPT sensors and their wiring to RTU Open controller.

Indoor Air Quality (CO2) Sensor

Monitoring space CO2 levels and wiring the IAQ sensor to RTU Open controller.

Space Relative Humidity Sensor or Humidistat

Humidistat

How the humidistat provides RH data to the RTU Open controller.

Smoke Detector/Fire Shutdown (FSD)

How smoke detector configuration works with RTU Open controller.

Connecting Discrete Inputs

Connecting filter status, fan status, and remote occupancy inputs.

Communication Wiring - Protocols

Local Access

Field Assistant

Using the Field Assistant software for setup, service, or downloading software.

RTU Open Controller Troubleshooting

Interpreting LEDs to diagnose RTU Open controller status and network issues.

The LEDs on the RTU Open controller

Outdoor Air Enthalpy Control

Using the enthalpy control accessory with EconoMi$er2 for air management.

Differential Enthalpy Control

Comparing outside and return air enthalpy for control.

Return Air Enthalpy Sensor

Smoke Detectors

Information on factory-installed smoke detectors and their configuration.

Step 11 - Adjust Factory-Installed Options

Smoke Detectors

Connecting smoke detectors to the Central Terminal Board.

EconoMi$er IV Occupancy Switch

Managing external occupancy control via CTB connection.

Step 12 - Install Accessories

Step 13 - Check Belt Tension

Pre-Start and Start-Up

UNIT START-UP CHECKLIST

PRE-START-UP

Verification items before initiating unit start-up procedures.

START-UP

Checks for electrical, temperature, and pressure parameters during start-up.

III. HUMIDI-MIZER® SYSTEM START-UP

STEPS

Procedures for checking CTB, humidistat, and unit operation in cooling mode.

OBSERVE AND RECORD

Recording suction pressure, discharge pressure, and temperatures.

OBSERVE

Observing system behavior during high-latent and dehumidify modes.

Related product manuals