WIRING DIAGRAM
See Fig. 21 for Wiring Diagram.
TROUBLESHOOTING
Use the Troubleshooting Guide, the status code LED on the
cotntrol and the Component Test to isolate furnace operation
problems.
STATUS CODES
For an explanation of status codes, refer to service label located on
back of main furnace door or Fig. 20.
NOTE: Removing the blower access door will open the blower
access door switch and terminate 115-v power to the control. This
will erase all stored status codes.
To read current status code, remove main furnace door. The status
code LED can be viewed through the sight glass in the blower
access door.
NOTE: NO thermostat signals should be present at control and all
blower off delays must be completed to view previous codes.
Fig. 16—Control Center
A02100
BLW
NUETRAL
STATUS CODE LED
SEC-2 SEC-1
EAC-2 L2
FUSE 3-AMP
0.5 AMP@24VAC
HUM
TEST/TWIN
G Com W Y R
24V
120 180
90 150
BLOWER OFF-DELAY
PLT 1
COOL HEAT
SPARE-1 SPARE-2
EAC-1
1-AMP@
115VAC
PR-1
L1
PL2 1
24-V THERMOSTAT
TERMINALS
3-AMP FUSE
LED OPERATION &
DIAGNOSTIC LIGHT
115-VAC(L2)NEUTRAL
CONNECTIONS
COOL
HEAT
SPARE-1
SPARE-2
BLOWER SPEED
SELECTION TERMINALS
EAC-1 TERMINAL
(115-VAC 1.0 AMP MAX.)
115 VAC (L1) LINE
VOLTAGE CONNECTION
PL2-HOT SURFACE
IGNITER & INDUCER
MOTOR CONNECTOR
PL1-LOW VOLTAGE MAIN
HARNESS CONNECTOR
TRANSFORMER 24-VAC
CONNECTIONS
HUMIDIFIER TERMINAL
(24-VAC 0.5 AMP MAX.)
TWINNING AND/OR
COMPONENT TEST
TERMINAL
BLOWER OFF-DELAY
J2
J2 JUMPER
PLT
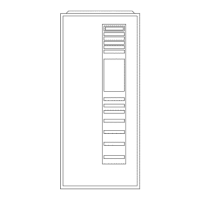
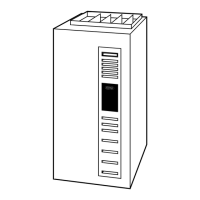
Fig. 17—Winterizing the Furnace
A93058
32°F MINIMUM INSTALLED
AMBIENT OR FREEZE
PROTECTION REQUIRED
11

 Loading...