Installation Instructions
NOTE: Read the entire instruction manual before starting the installation.
This marker indicates a change from prior revision.
Table of contents
PAGE NO. PAGE NO.
SAFETY CONSIDERATIONS . . . . . . . . . . . . . . . . . . . . . . . . . . . . . . 2
Inverter Cover . . . . . . . . . . . . . . . . . . . . . . . . . . . . . . . . . . . . . . . . 2
Installation Recommendations . . . . . . . . . . . . . . . . . . . . . . . . . . . . . . . 2
Installation . . . . . . . . . . . . . . . . . . . . . . . . . . . . . . . . . . . . . . . . . . . . . . 3
Step 1 – Check Equipment and Job Site . . . . . . . . . . . . . . . . . . . . . . . . 3
Unpack Unit . . . . . . . . . . . . . . . . . . . . . . . . . . . . . . . . . . . . . . . . . 3
Inspect Equipment . . . . . . . . . . . . . . . . . . . . . . . . . . . . . . . . . . . . 3
Step 2 – Install on a Solid, Level Mounting Pad . . . . . . . . . . . . . . . . . 3
Step 3 – Clearance Requirements . . . . . . . . . . . . . . . . . . . . . . . . . . . . . 4
Step 4 – Operating Ambient . . . . . . . . . . . . . . . . . . . . . . . . . . . . . . . . . 4
Step 5 – Elevate Unit . . . . . . . . . . . . . . . . . . . . . . . . . . . . . . . . . . . . . . 4
Step 6 – In Long-Line Applications, Install Liquid-Line Solenoid Valve
(LSV) . . . . . . . . . . . . . . . . . . . . . . . . . . . . . . . . . . . . . . . . . . . . . . . . . . 4
Step 7 – Make Piping Connections. . . . . . . . . . . . . . . . . . . . . . . . . . . . 4
Table 1 – Refrigerant Connections and Recommended Liquid and Va-
por Tube Diameters (in.). . . . . . . . . . . . . . . . . . . . . . . . . . . . . . . . . . 5
Table 2 – Accessory Usage. . . . . . . . . . . . . . . . . . . . . . . . . . . . . . . . 5
Outdoor Unit Connected to Factory-Approved Indoor Unit . . . . 6
Install Liquid-Line Filter Drier Indoor . . . . . . . . . . . . . . . . . . . . . 6
Refrigerant Tubing connection Outdoor. . . . . . . . . . . . . . . . . . . . 6
No Installation of Adapter Tube . . . . . . . . . . . . . . . . . . . . . . . . . . 6
Sweat Connections . . . . . . . . . . . . . . . . . . . . . . . . . . . . . . . . . . . . 6
Evacuate Refrigerant Tubing and Indoor Coil . . . . . . . . . . . . . . . 6
Deep Vacuum Method . . . . . . . . . . . . . . . . . . . . . . . . . . . . . . . . . 6
Final Tubing Check . . . . . . . . . . . . . . . . . . . . . . . . . . . . . . . . . . . 7
Step 8 – Make Electrical Connections . . . . . . . . . . . . . . . . . . . . . . . . . 7
Route Ground and Power Wires . . . . . . . . . . . . . . . . . . . . . . . . . . 7
Connect Ground and Power Wires . . . . . . . . . . . . . . . . . . . . . . . . 7
Connect Control Wiring . . . . . . . . . . . . . . . . . . . . . . . . . . . . . . . . 7
General Information . . . . . . . . . . . . . . . . . . . . . . . . . . . . . . . . . . . 7
Final Wiring Check. . . . . . . . . . . . . . . . . . . . . . . . . . . . . . . . . . . . 7
Step 9 – Compressor Stator Heat . . . . . . . . . . . . . . . . . . . . . . . . . . . . . 7
Airflow Setup for Infinity Control Furnace or FE Fan Coil (communi-
cating). . . . . . . . . . . . . . . . . . . . . . . . . . . . . . . . . . . . . . . . . . . . . . . . 7
Step 10 – Install Accessories . . . . . . . . . . . . . . . . . . . . . . . . . . . . . . . . 7
Step 11 – Start-Up & Charging. . . . . . . . . . . . . . . . . . . . . . . . . . . . . . . 8
Follow these steps to properly start up the system: . . . . . . . . . . . 8
Step 12 – Heating Check Charge . . . . . . . . . . . . . . . . . . . . . . . . . . . . 10
Step 13 – Pumpdown & Evacuation . . . . . . . . . . . . . . . . . . . . . . . . . . 11
Evacuation and Recovery of Refrigerant from within 25VNA . 11
Step 14 – System Functions and Major Components . . . . . . . . . . . . . 12
Primary Control Module . . . . . . . . . . . . . . . . . . . . . . . . . . . . . . . 12
Utility Interface With Infinity Control . . . . . . . . . . . . . . . . . . . . 12
Infinity Control, Green Communications (COMM) Light . . . . . 12
Amber Status Light. . . . . . . . . . . . . . . . . . . . . . . . . . . . . . . . . . . 14
5x7 LED Matrix . . . . . . . . . . . . . . . . . . . . . . . . . . . . . . . . . . . . . 14
VFD Communications Light . . . . . . . . . . . . . . . . . . . . . . . . . . . 14
Bluetooth® Module . . . . . . . . . . . . . . . . . . . . . . . . . . . . . . . . . . 14
Variable Frequency Drive (VFD). . . . . . . . . . . . . . . . . . . . . . . . 14
Table 3 – VFD LED Indicator Functions . . . . . . . . . . . . . . . . . . . . 14
Input Filter Board . . . . . . . . . . . . . . . . . . . . . . . . . . . . . . . . . . . . 15
Reactors . . . . . . . . . . . . . . . . . . . . . . . . . . . . . . . . . . . . . . . . . . . 15
Variable Speed Compressor . . . . . . . . . . . . . . . . . . . . . . . . . . . . 15
Time Delays . . . . . . . . . . . . . . . . . . . . . . . . . . . . . . . . . . . . . . . . 15
Heating Electronic Expansion Valve (EXV-H) . . . . . . . . . . . . . 15
Vapor Injection Electronic Expansion Valve (EXV-VI) . . . . . . 15
BLDC Inverter-Controlled Fan Motor . . . . . . . . . . . . . . . . . . . . 15
Pressure Equalization Valve (PEV) . . . . . . . . . . . . . . . . . . . . . . 15
High Pressure Switch . . . . . . . . . . . . . . . . . . . . . . . . . . . . . . . . . 15
Outdoor Pressure Transducers . . . . . . . . . . . . . . . . . . . . . . . . . . 15
Stator Heater Operation . . . . . . . . . . . . . . . . . . . . . . . . . . . . . . . 15
Infinity Controlled low ambient cooling . . . . . . . . . . . . . . . . . . 15
Defrost . . . . . . . . . . . . . . . . . . . . . . . . . . . . . . . . . . . . . . . . . . . . 15
Troubleshooting . . . . . . . . . . . . . . . . . . . . . . . . . . . . . . . . . . . . . . . . . 16
Systems Communication Failure . . . . . . . . . . . . . . . . . . . . . . . . 16
Model Plug . . . . . . . . . . . . . . . . . . . . . . . . . . . . . . . . . . . . . . . . . 16
Table 4 – Model Plug Information . . . . . . . . . . . . . . . . . . . . . . . . . 16
Pressure Switch Protection . . . . . . . . . . . . . . . . . . . . . . . . . . . . . 16
Compressor Protection . . . . . . . . . . . . . . . . . . . . . . . . . . . . . . . . 16
Line Voltage Diagnostics . . . . . . . . . . . . . . . . . . . . . . . . . . . . . . 16
Forced Defrost Pins (J9) . . . . . . . . . . . . . . . . . . . . . . . . . . . . . . . 16
Temperature Thermistors . . . . . . . . . . . . . . . . . . . . . . . . . . . . . . 16
Table 5 – Resistance Values versus Temperature . . . . . . . . . . . . . 16
Table 6 – ODT Resistance Values versus Temperatures . . . . . . . . 16
Outdoor Air Thermistor . . . . . . . . . . . . . . . . . . . . . . . . . . . . . . . 16
Outdoor Coil Thermistor . . . . . . . . . . . . . . . . . . . . . . . . . . . . . . 17
Suction Thermistor (OST) . . . . . . . . . . . . . . . . . . . . . . . . . . . . . 17
Discharge Thermistor (ODT) . . . . . . . . . . . . . . . . . . . . . . . . . . . 17
Failed Thermistor Default Operation . . . . . . . . . . . . . . . . . . . . . 17
Variable Speed Compressor Winding Resistance . . . . . . . . . . . 17
Table 7 – Variable Speed Compressor Resistances
(winding resistance at 68°F? (20°F) . . . . . . . . . . . . . . . . . . . . . . . . 17
Fan Motor . . . . . . . . . . . . . . . . . . . . . . . . . . . . . . . . . . . . . . . . . . 17
Status Codes . . . . . . . . . . . . . . . . . . . . . . . . . . . . . . . . . . . . . . . . 18
Status Code Recall Mode . . . . . . . . . . . . . . . . . . . . . . . . . . . . . . 18
Emergency Mode Connections with a Conventional Thermostat18
Table 8 – Fault Code Table . . . . . . . . . . . . . . . . . . . . . . . . . . . . . . 19
Table 9 – Malfunction Lockout Durations . . . . . . . . . . . . . . . . . . . 21
FINAL CHECKS. . . . . . . . . . . . . . . . . . . . . . . . . . . . . . . . . . . . . . 22
CARE AND MAINTENANCE. . . . . . . . . . . . . . . . . . . . . . . . . . . 22
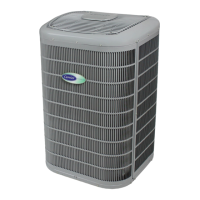
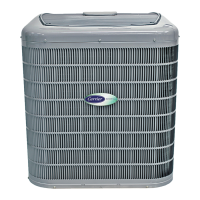
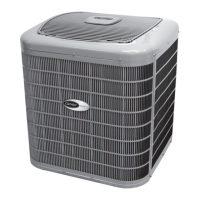
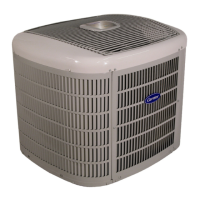
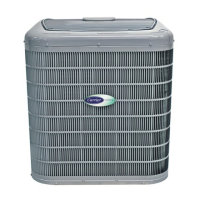
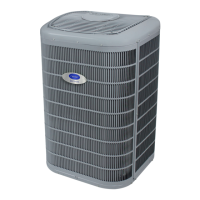
25VNA4
Infinity™ Variable Speed Heat Pump
with Greenspeed™ Intelligence
2 to 5 Nominal Tons