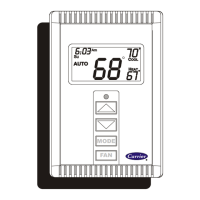
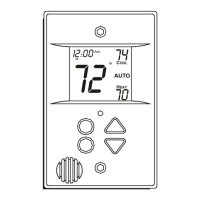
Fig.2-Programmable/Non-Programmable Keypad Labels
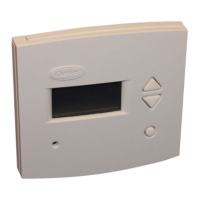
PROGRAMMABLE CONFIGURATION
(OPTION t7 OFF)
Step 5--System Start-Up and Checkout
The Thermidistat Control is designed with a built-in installer test
capability. It allows easy operation of equipment without delays
or set point adjustments to force heating or cooling.
To enable installer test mode. move DIP switch No. 4 to ON
position. To access this switch, open case as described in Step 2.
Use the corner of a small screwdriver to slide switch No. 4 to ON
position.
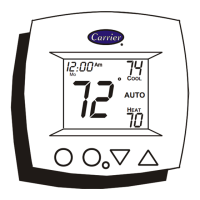
While in installer setup mode, clock will display "InSt." FAN
button will control fan, and MODE button will control heating
and cooling.
TO TEST FAN
Fan button switches FAN icon between AUTO and ON. While
ON is displayed, G output will be on, turning fan on. Allow up to
10 sec after button is pressed fnr fan to turn on and off. On some
fan coils, fan continues to operate for 90 sec after G signal is
removed.
TO TEST COOLING AND DEHUMIDIFICATION
Press MODE button until COOL icon turns on. Cooling begins
within 10 sec and remains on for 4 minutes. If system is 2-speed,
low speed comes on for first 2 minutes, followed by high speed
for second 2 minutes. At the end of 4-minute run, cooling stops,
and MODE reverts back to OFF. At any time during 4-minute
run time, cooling may be turned off by pressing MODE button
until OFF appears. While cooling is on, successive presses of
HUMIDITY button turn dehumidify output on and off. While
this output is active, "dh" appears in cool set point display.
Equipnmnt outputs for different equipment types are listed in
Table 2.
TO TEST PRIMARY HEATING AND HUMIDIFICATION
Press MODE button until HEAT icon turns on. Primary heating
begins within 10 sec and remains on for 4 minutes. This will be
furnace or electric heat in AC system and heat pump heating in
heat pump system. If system has 2 stages of primary heat, first
stage will be on for 2 minutes followed by second stage for 2
minutes. At the end of 4-minute run, heating stops, and MODE
reverts back to OFF. At any time during 4-minute run time,
heating may be turned off by pressing MODE button until OFF
appears. While heating is on, successive presses of HUMIDITY
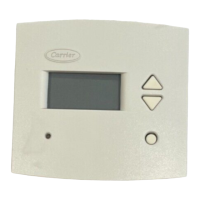
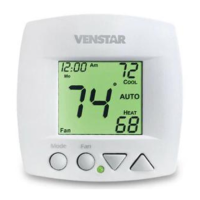
NON-PROGRAMMABLE CONFIGURATION
(OPTION 17 ON)
Aggo5g
button turn humidify output on and off. While this output is
active, "hu" appears in heat set point display. Equipment outputs
for different equipment types are listed in Table 2.
TO TEST AUXILIARY HEATING
Auxiliary heating only exists in heat pump systems. To test, press
MODE button until EHEAT icon turns on. This will be electric
heat in standard heat pump systems and furnace in Hybrid Heat
systems. Auxiliary heating begins within 10 sec and remains on
for 4 minutes. If there are 2 stages of auxiliary heat. first stage
comes on for 2 minutes followed by second stage for 2 minutes.
At the end of 4-minute run, heating stops and MODE reverts
back to OFF. At any time during 4-minute run time, heating may
be turned off by pressing MODE button until OFF appears.
Actual outputs for different equipment types are listed in Table 2.
Step 6--Final Settings
Be sure to return DIP switch No. 4 back to OFF position to exit
installer setup mode. Assuming system is to be left in operation
after installation is complete, use MODE button to select between
HEAT, COOL, or AUTO to provide desired operation of heating,
cooling, or both.
The default set points and programmed schedule conform to the
Energy Star@ requirements of the U.S. Department of Energy for
both heating and cooling. These provide energy saving
temperature settings. Refer to Table 3.
If programmed schedule is to be used, make sure HOLD icon is
off. This feature is turned on and off by HOLD button.
If fixed temperatures are desired, use HOLD button to turn on
HOLD icon. This will maintain set points, not allowing them to
change with programmed schedule.
The FAN button may be used to select between AUTO (fan on
only with equipment) and FAN (fan on continuously) fan modes.
For further information on temperature selection and
programming, refer to Homeowner's Guide.
HUMIDITY CONTROL FEATURES
The various humidity control features of the Thermidistat Control
are explained below. They are grouped into 2 sections,
humidification and dehumidification. At the end of each section,
instructions on how to select each feature are given.

 Loading...