@
@
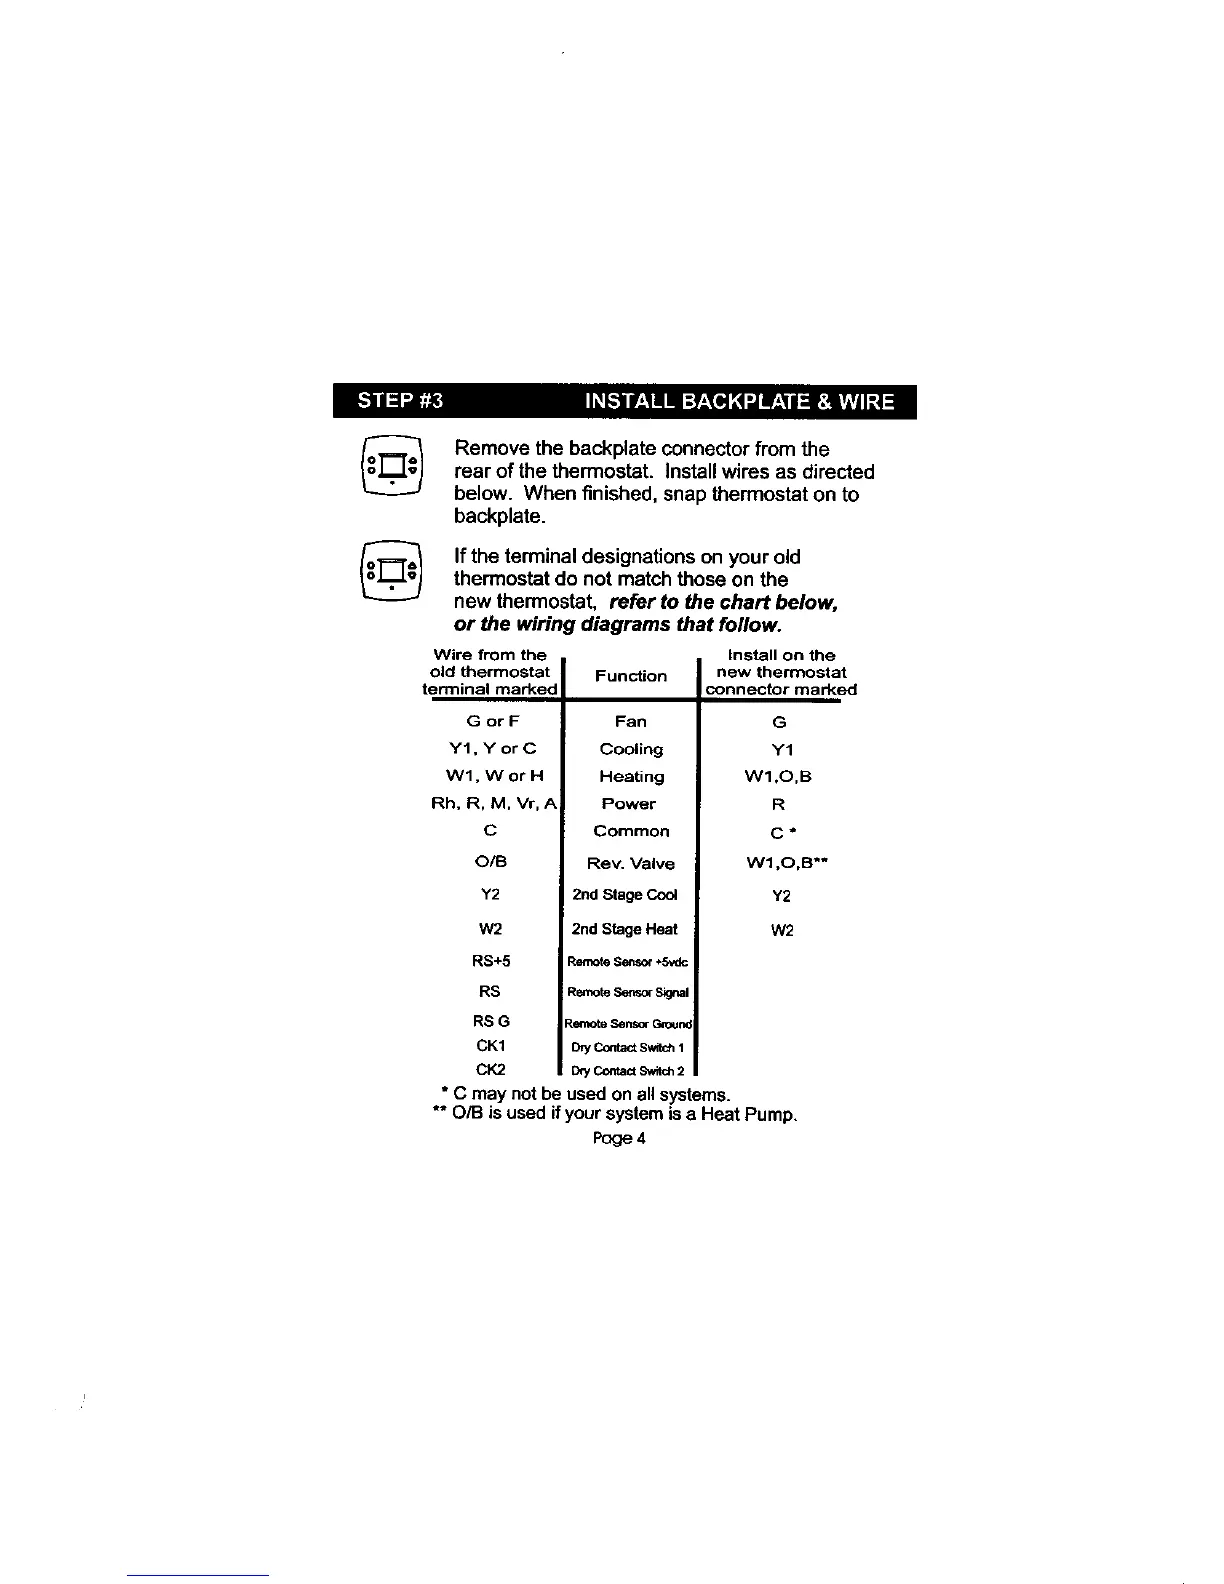
Remove the backplate connector from the
rear of the thermostat. Install wires as directed
below. When finished, snap thermostat on to
backplate.
Ifthe terminal designations on your old
thermostat do not match those on the
new thermostat, refer to the chart below,
or the wiring diagrams that follow.
Wire from the Install on the
old thermostat
terminal marked
GorF
Y1.YorC
Wl. Wor H
Rh. R. M. Vr./_
C
O/13
Y2
W2
RS+5
RS
RS G
CK1
CK2
Function
Fan
Cooling
Heating
Power
Common
Rev. Valve
2nd Stage Cool
2nd Stage Heat
RemoteSensor÷Svdc
RemoteSer-_ Sigttal
_emoteSensc_Gmum
DryConte_ swi_ 1
D_ Contact_itch 2
new thermostat
connector marked
G
Y1
Wl ,O.B
R
C*
Wl .O.B**
Y2
W2
* C may notbe usedon allsystems.
** O/B isusedif yoursystemis a HeatPump.
Pcge4