2000-16
STEP 76
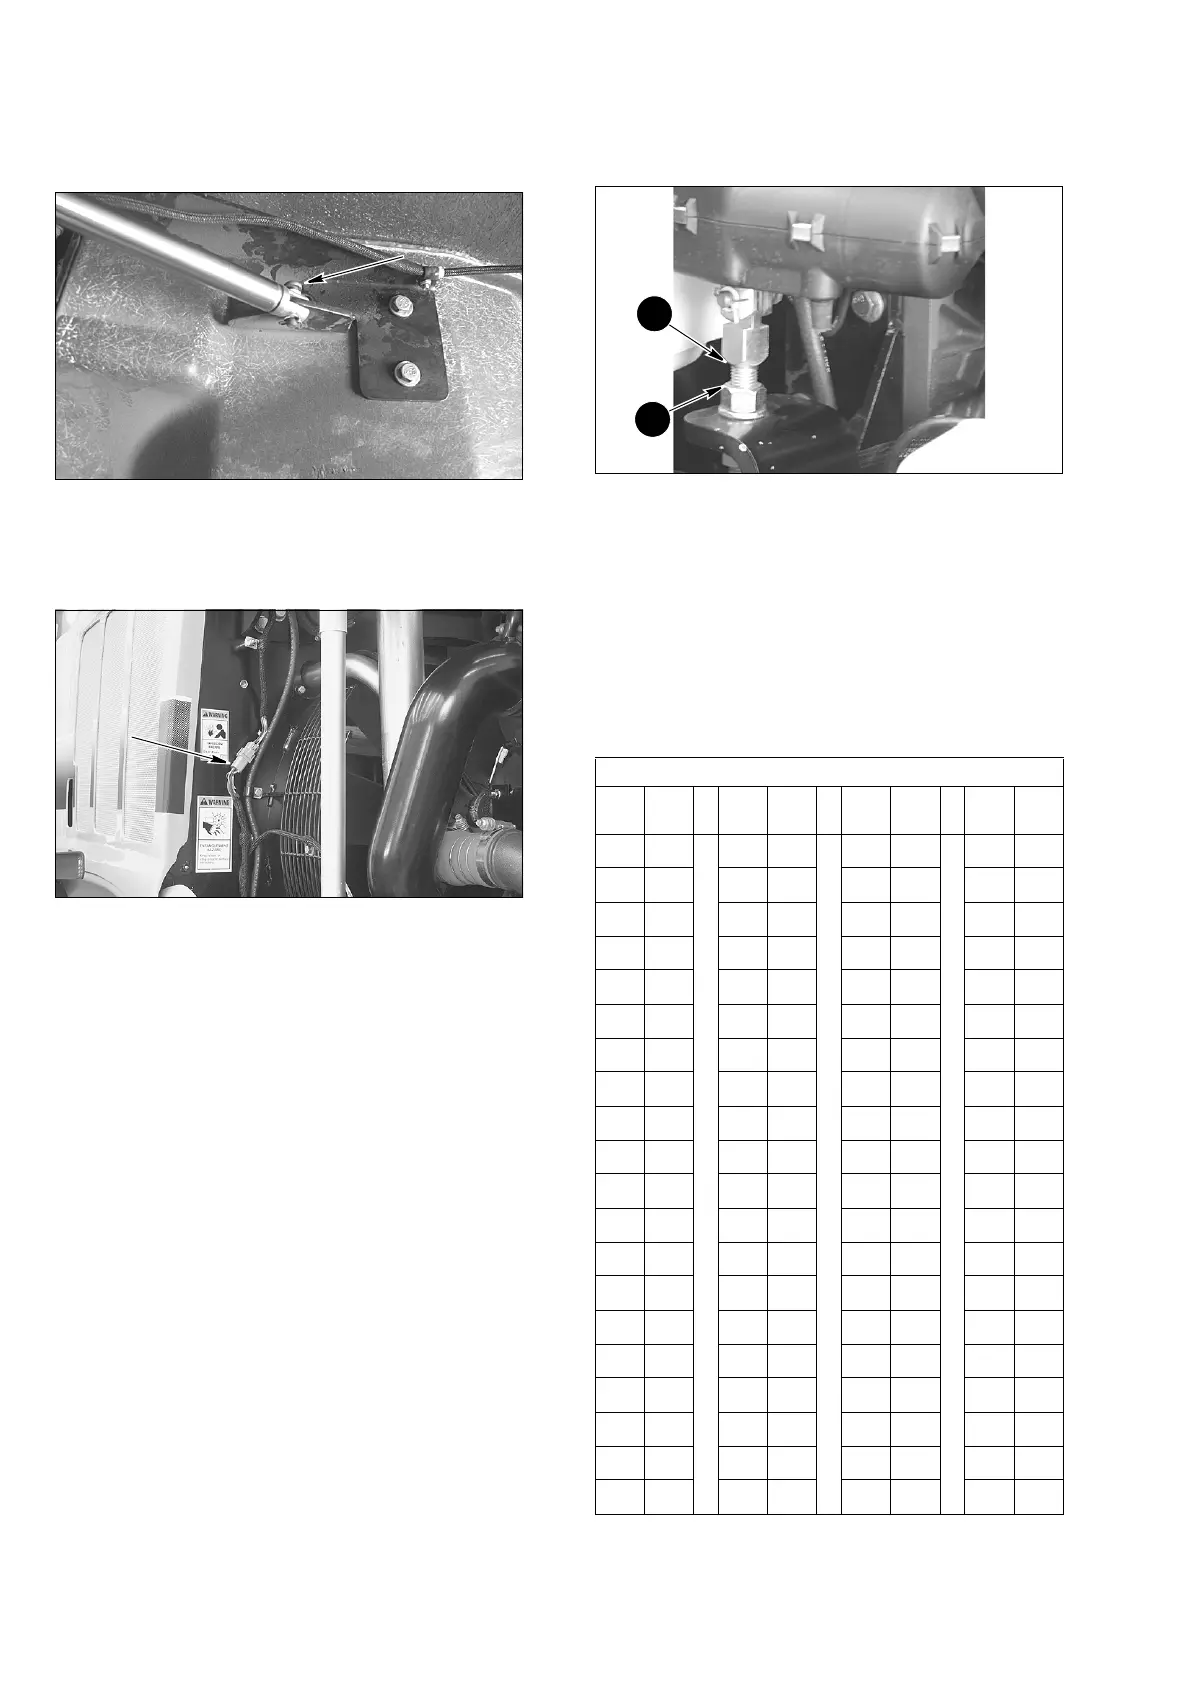
BD03A228
Install the pin from the top of the lifting motor, lower
and remove lifting equipment.
STEP 77
BD06F109
Connect hood wiring harness connector to rear
chassis wiring harness connector. Remove and
discard tag.
STEP 78
BD03A221
NOTE: If hood strut is not adjusted properly the
hood will be damaged.
When a hood is removed and replaced an initial
adjustment on the strut is necessary. Adjust between
the top of the lift motor adjusting jam nut (1) to the top
of the threads (2) to 20 mm (X). With the motor down
to its lowest point take a measurement between the
left hand side hood bumper and the counter weight,
record this measurement (Y). Use the following table
to adjust the strut (X).
Hood Adjustment Table
Y
(MM)
X
(MM)
Y
(MM)
X
(MM)
Y
(MM)
X
(MM)
Y
(MM)
X
(MM)
1
19
21
14
41
9
61
5
2
19
22
14
42
9
62
5
3
18
23
14
43
9
63
4
4
18
24
13
44
9
64
4
5
18
25
13
45
9
65
4
6
18
26
13
46
8
66
4
7
17
27
13
47
8
67
3
8
17
28
12
48
8
68
3
9
17
29
12
49
8
69
3
10
17
30
12
50
7
70
3
11
16
31
12
51
7
71
2
12
16
32
12
52
7
72
2
13
16
33
11
53
7
73
2
14
16
34
11
54
6
74
2
15
16
35
11
55
6
75
2
16
15
36
11
56
6
76
1
17
15
37
10
57
6
77
1
18
15
38
10
58
6
78
1
19
15
39
10
59
5
79
1
20
14
40
10
60
5
80
0