Operation Guide 2767
8
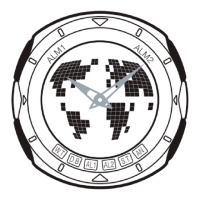
To perform bidirectional calibration
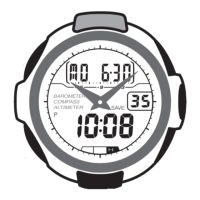
1. Press C to enter the Digital Compass Mode.
2. Hold down A for about one second until
x1x
appears on the display, which indicates the
setting screen.
• At this time, the magnetic north pointer
flashes at the 12 o’clock position to indicate
that the watch is ready to calibrate the first
direction.
3. Place the watch on a level surface facing any direction you want, and
press C to calibrate the first direction.
• “
xxx” is shown on the display while calibration is being performed. This
changes to
x2x and the magnetic north pointer flashes at the 6 o’clock
position when calibration of the first direction is complete. This means
that the watch is ready for calibration of the second direction.
4. Rotate the watch 180 degrees.
5. Press C again to calibrate the second direction.
• “xxx” is shown on the display while calibration is being performed. The
Digital Compass Mode screen (showing the angle value) appears when
calibration is complete.
• Note that the calibration operation will not start if you press C if the
seconds count of the Timekeeping Mode time is in the vicinity of 00, 20, or
40. If “
xxx” does not appear when you press C, wait a few seconds and
then try again.
• If “
xxx” appears and then changes to Err (error) on the calibration
screen, it means that there is something wrong with the sensor. Press A to
return to the Digital Compass Mode screen and then try starting the
calibration operation again. If
Err keeps appearing, contact your original
dealer or nearest authorized CASIO distributor to have the watch checked.
To perform northerly calibration
1. While in the Digital Compass Mode, hold
down A for about one second until
x1x
appears on the display, which indicates the
setting screen.
2. Press D to start the northerly calibration
procedure.
• At this time,
xNx (north) appears on the
display.
3. Place the watch on a level surface, and position it so that its 12 o’clock
position points north (as measured with another compass).
4. Press C to start the calibration operation.
• “
xxx” is shown on the display while calibration is being performed. The
Digital Compass Mode screen appears (with 0° indicated as the angle
value) when calibration is complete.
l
l
l
l
l
l
l
l
l
l
l
• Note that the calibration operation will not start if you press C if the
seconds count of the Timekeeping Mode time is in the vicinity of 00, 20, or
40. If “
xxx” does not appear when you press C, wait a few seconds and
then try again.
• If “
xxx” appears and then changes to Err (error) on the calibration
screen, it means that there is something wrong with the sensor. Press A to
return to the Digital Compass Mode screen and then try starting the
calibration operation again. If
Err keeps appearing, contact your original
dealer or nearest authorized CASIO distributor to have the watch checked.
Changing the Barometric Pressure and Temperature Units
Changing the barometric pressure units automatically restarts the barometric
pressure history graph.
4. Press D to move the flashing to the unit setting you want to change
(
°C/°F or hPa/inHg).
5. Use E to select the unit you want.
6. Press A to return to the Barometer/Thermometer Mode screen.
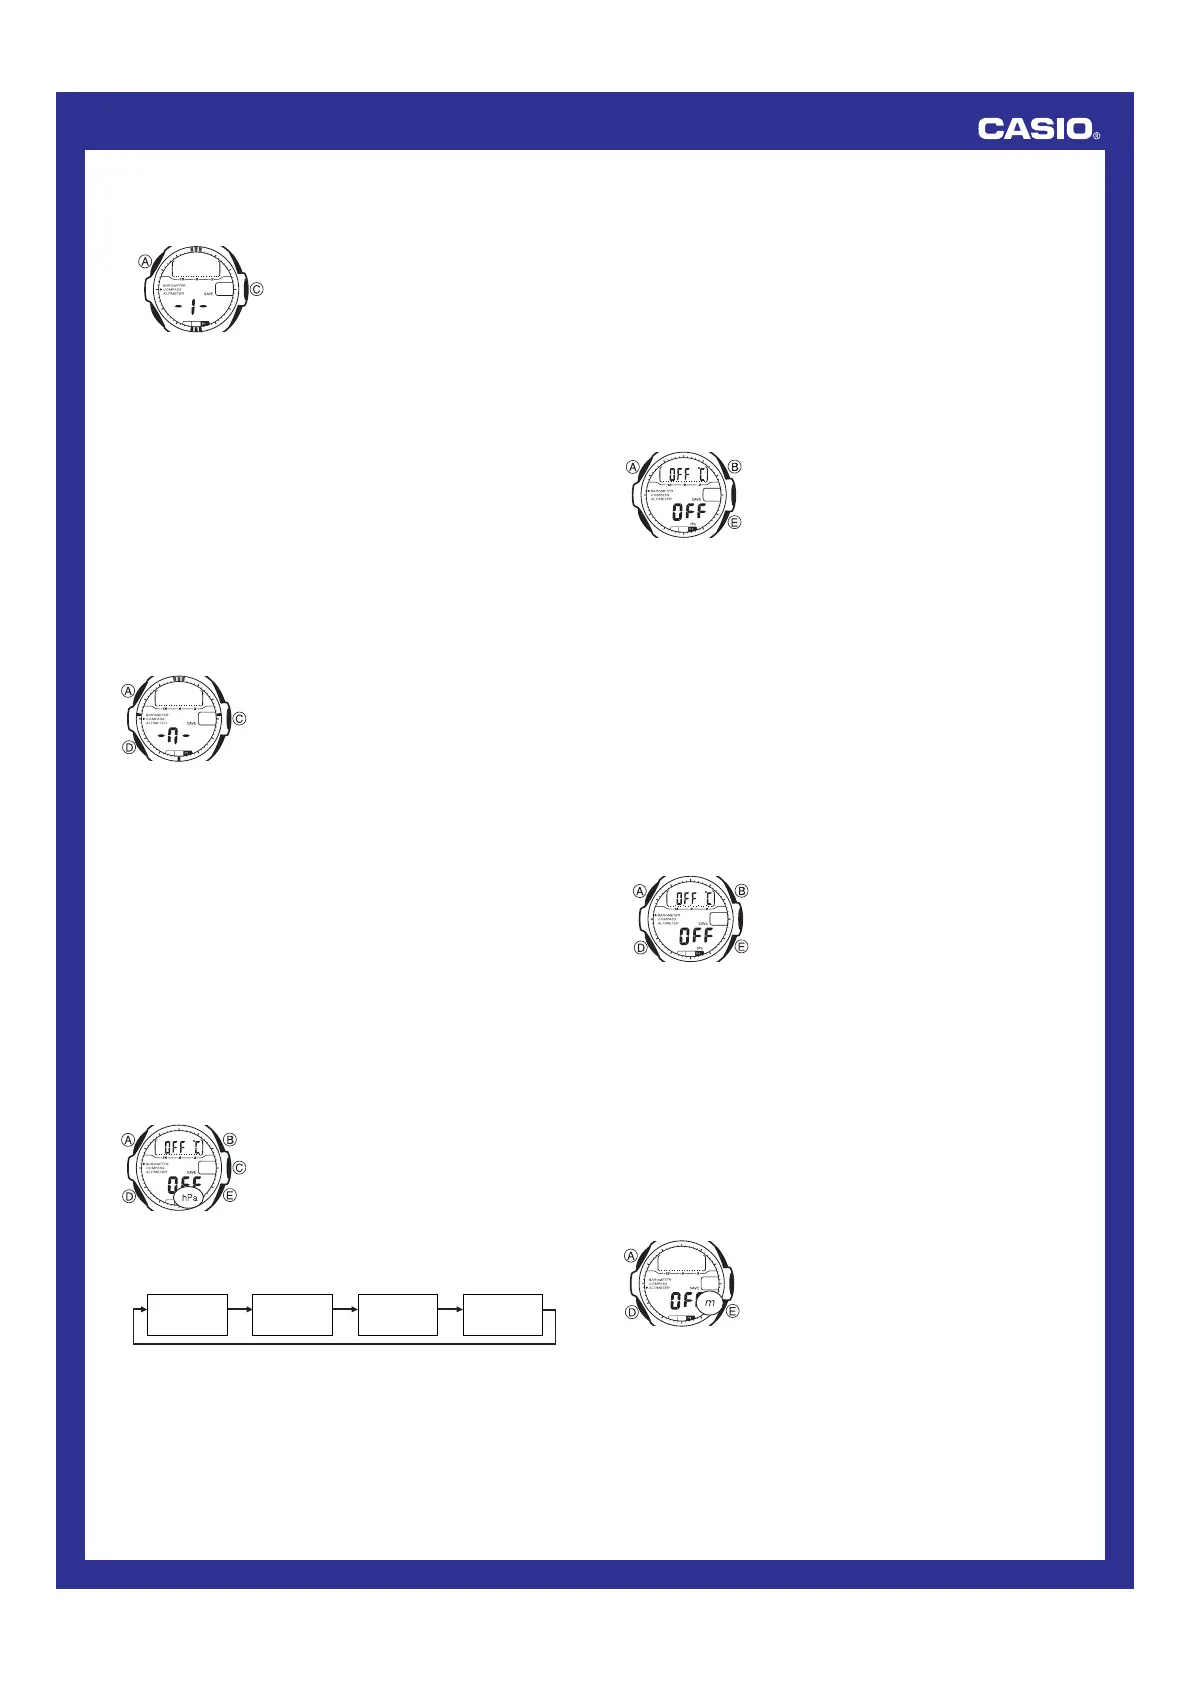
To calibrate the temperature sensor
1. Press B to enter the Barometer/
Thermometer Mode.
2. Hold down A until
OFF or xxx starts to
flash in the upper part of the display. This is
the setting screen.
• If the temperature sensor was previously
calibrated,
xxx will be replaced by a
temperature value in a few seconds.
• After about four or five seconds, the lower
part of the display will show
OFF or a
barometric pressure value (if set).
l
l
l
l
l
l
l
l
l
l
l
l
l
l
l
l
3. Press D to move the flashing in the sequence shown below.
Temperature
Sensor
Calibration
Pressure
Sensor
Calibration
°C / °F
hPa/inHg
To change the barometric pressure and temperature units
1. Press B to enter the Barometer/
Thermometer Mode.
2. Hold down A until
OFF or xxx starts to
flash in the upper part of the display. This is
the setting screen.
• If the temperature sensor was previously
calibrated,
xxx will be replaced by a
temperature value in a few seconds.
• After about four or five seconds, the lower
part of the display will show
OFF or a
barometric pressure value (if set).
l
l
l
l
l
l
l
l
l
l
l
l
l
l
l
l
Calibrating the Temperature Sensor
The temperature sensor of this watch is calibrated at the factory before
shipment, and further adjustment is normally not required. If you notice
serious errors in the temperature readings produced by the watch, you can
calibrate the sensor to correct the errors.
Important!
Incorrectly calibrating the temperature sensor can result in incorrect readings.
Carefully read the following before doing anything.
• Compare the readings produced by the watch with those of another reliable
and accurate thermometer.
• If adjustment is required, remove the watch from your wrist and wait for 20
or 30 minutes to give the temperature of the watch time to stabilize.
3. Press E (+) or B (–) to change the displayed temperature by 0.1°C (or
0.2°F).
• Pressing B and E at the same time returns to the factory calibration
(
OFF).
4. Press A to return to the Barometer/Thermometer Mode screen.
Calibrating the Barometric Pressure Sensor
The pressure sensor of this watch is calibrated at the factory before shipment
and further adjustment is normally not required. If you notice serious errors in
the barometric pressure readings produced by the watch, you can calibrate
the sensor to correct the errors.
Important!
Incorrectly calibrating the barometric pressure sensor can result in incorrect
readings. Before performing the calibration procedure, compare the readings
produced by the watch with those of another reliable and accurate barometer.
l
l
l
l
l
l
l
l
l
l
l
l
l
l
l
l
l
l
l
l
l
To calibrate the pressure sensor
1. Press B to enter the Barometer/
Thermometer Mode.
2. Hold down A until
OFF or xxx starts to
flash in the upper part of the display. This is
the setting screen.
• If the temperature sensor was previously
calibrated,
xxx will be replaced by a
temperature value in a few seconds.
• After about four or five seconds, the lower
part of the display will show
OFF or a
barometric pressure value (if set).
3. Press D to move the flashing to the pressure
sensor calibration setting.
• At this time,
OFF or the barometric pressure value should be flashing on
the display.
• If
OFF or the pressure value does not appear at this time, press A to
return to the Barometer/Thermometer Mode screen, and perform step 2
again.
4. Press E (+) or B (–) to change the displayed barometric pressure by 1
hPa (0.05 inHg).
• Pressing B and E at the same time returns to the factory calibration
(
OFF).
5. Press A to return to the Barometer/Thermometer Mode screen.
To change the altitude unit
1. Press E to enter the Altimeter Mode.
2. Hold down A for about two seconds until the
watch beeps and the display goes blank.
About four or five seconds after that,
OFF or
the current reference altitude value (if set) will
flash on the display.
• If
OFF or the current reference altitude
value does not appear at this time, press A
to return to the Altimeter Mode screen, and
perform step 2 again.
3. Press D to move the flashing to the altitude
unit setting.
l
l
l
l
l
l
l
l
l
l
l
4. Use E to select the unit you want (m or ft).
5. Press A to return to the Altimeter Mode screen.
• Performing the above procedure causes altitude values stored in memory
also to be converted to the unit you select.