— 7 —
6. Removal of keys
6-1. While plying the side partition plastics with tweezers, lift
the edge of the key toward front.
7. Removal of keyboard PCB
7-1. Lay the keyboard so that keyboard PCBs face upward.
7-2. Remove screws on keyboard PCBs (10 screws on PCBs
KY1M and KY3M, 12 screws on KY2M).
7-3. Unsolder the cable.
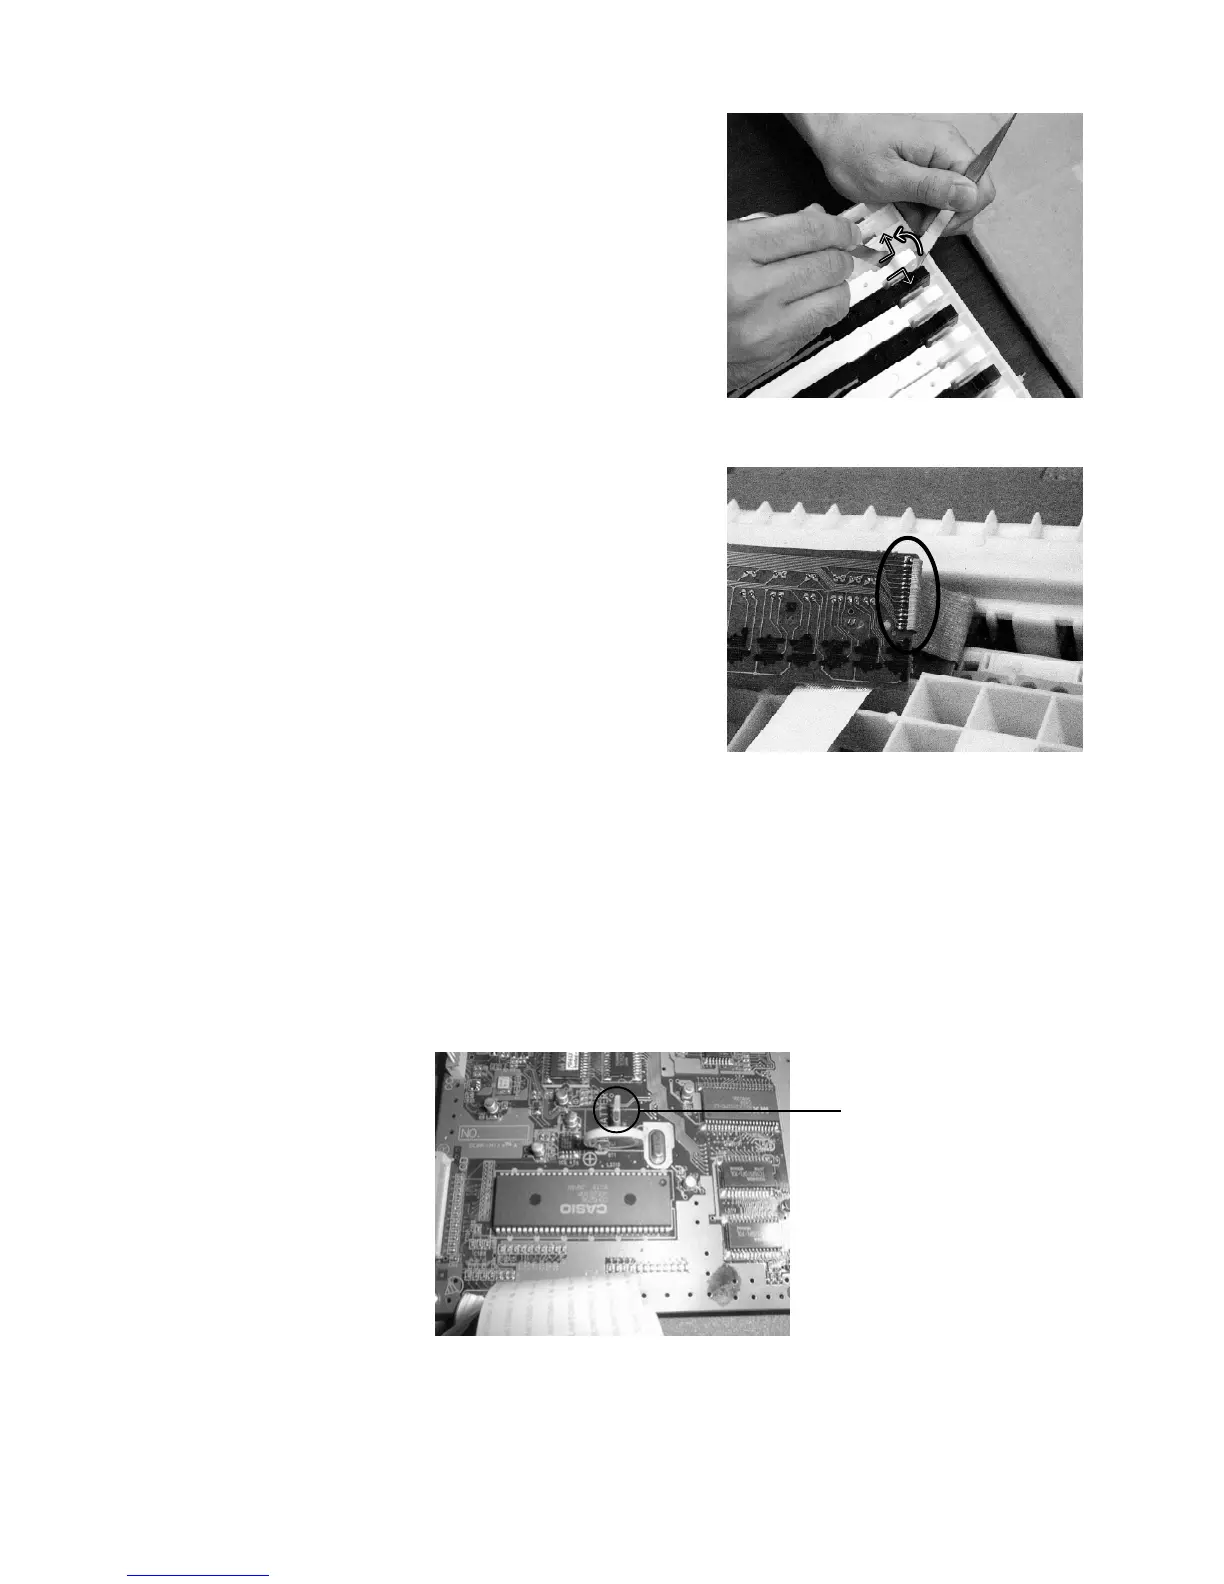
8. Totes on replacing the main PCB.
A lithium battery is set on the main PCB for memory protection.
When you replace the main PCB, disconnect the jumper to open battery circuit.
Since there is no jumper on a new main PCB, be sure to set a jumper.
jumper