— 8 —
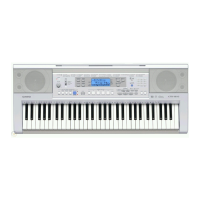
8. Unsolder two lead wires for the power source.
Unsolder one connector (CN1) and then remove the M627-MAA1 PCB.
Connector (CN1)
M627-MAA1 PCB
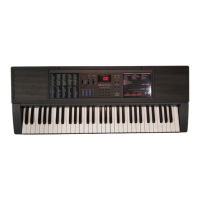
9. Remove 21 screws and the keys.
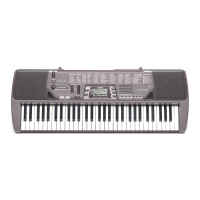
10. Remove five rubber keys on the keyboard.
Note: The length of this one rubber key is different.
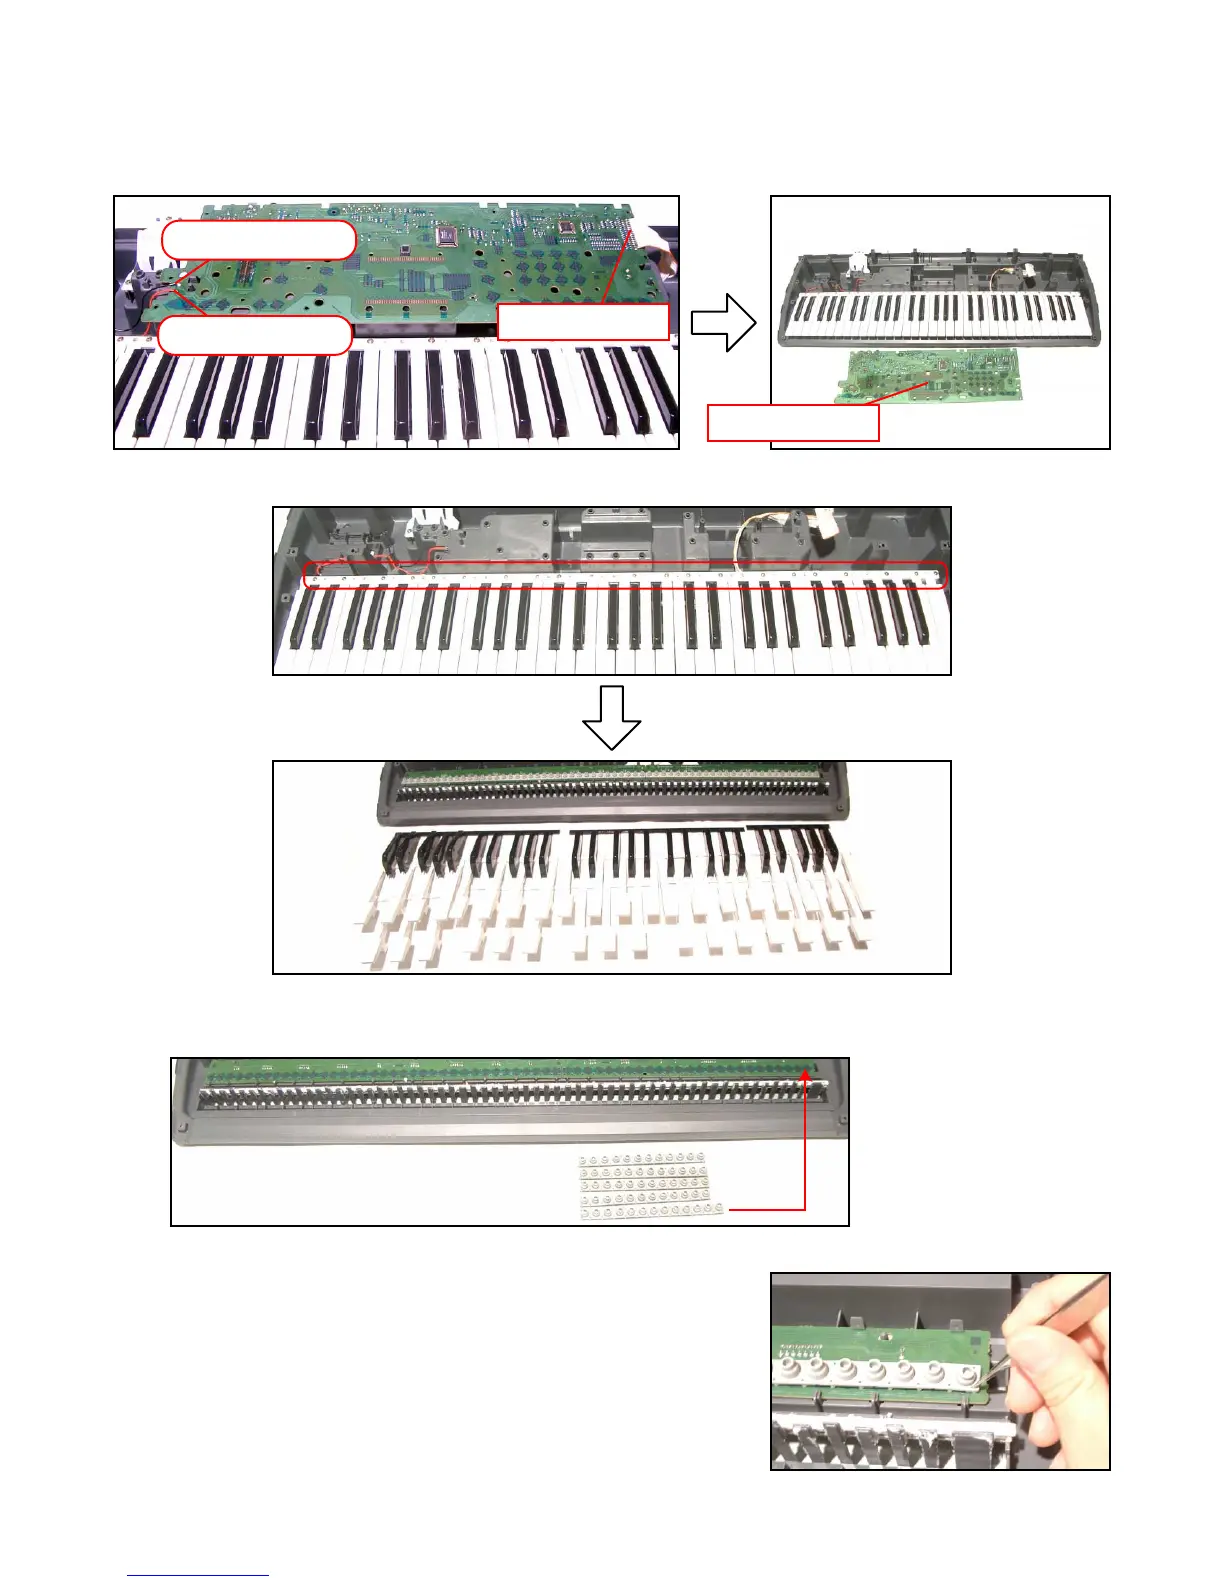
Note: Push the rubber keys all the way in by tweezers when
assembling.
Make sure that they are tightly fixed.
Power Cord (Black)
Power Cord (Red)
 Loading...