EasyManuals Logo

Casio DT-X200-10E Service Manual

Casio DT-X200-10E
85 pages
To Next Page IconTo Next Page
To Previous Page IconTo Previous Page
Page #66 background imageLoading...
Page #66 background image
– 63 –
DT-X200/DT-X8
(2) Removing the SCANNER-UNIT
1. Remove the screw S1 (1 pce.).
2. Remove the SCANNER-UNIT.
The following photo shows the model for 1D Laser model.
Note:
SCANNER-UNIT is fi xed with a double-face tape.
Screw S1
Double-face Tape
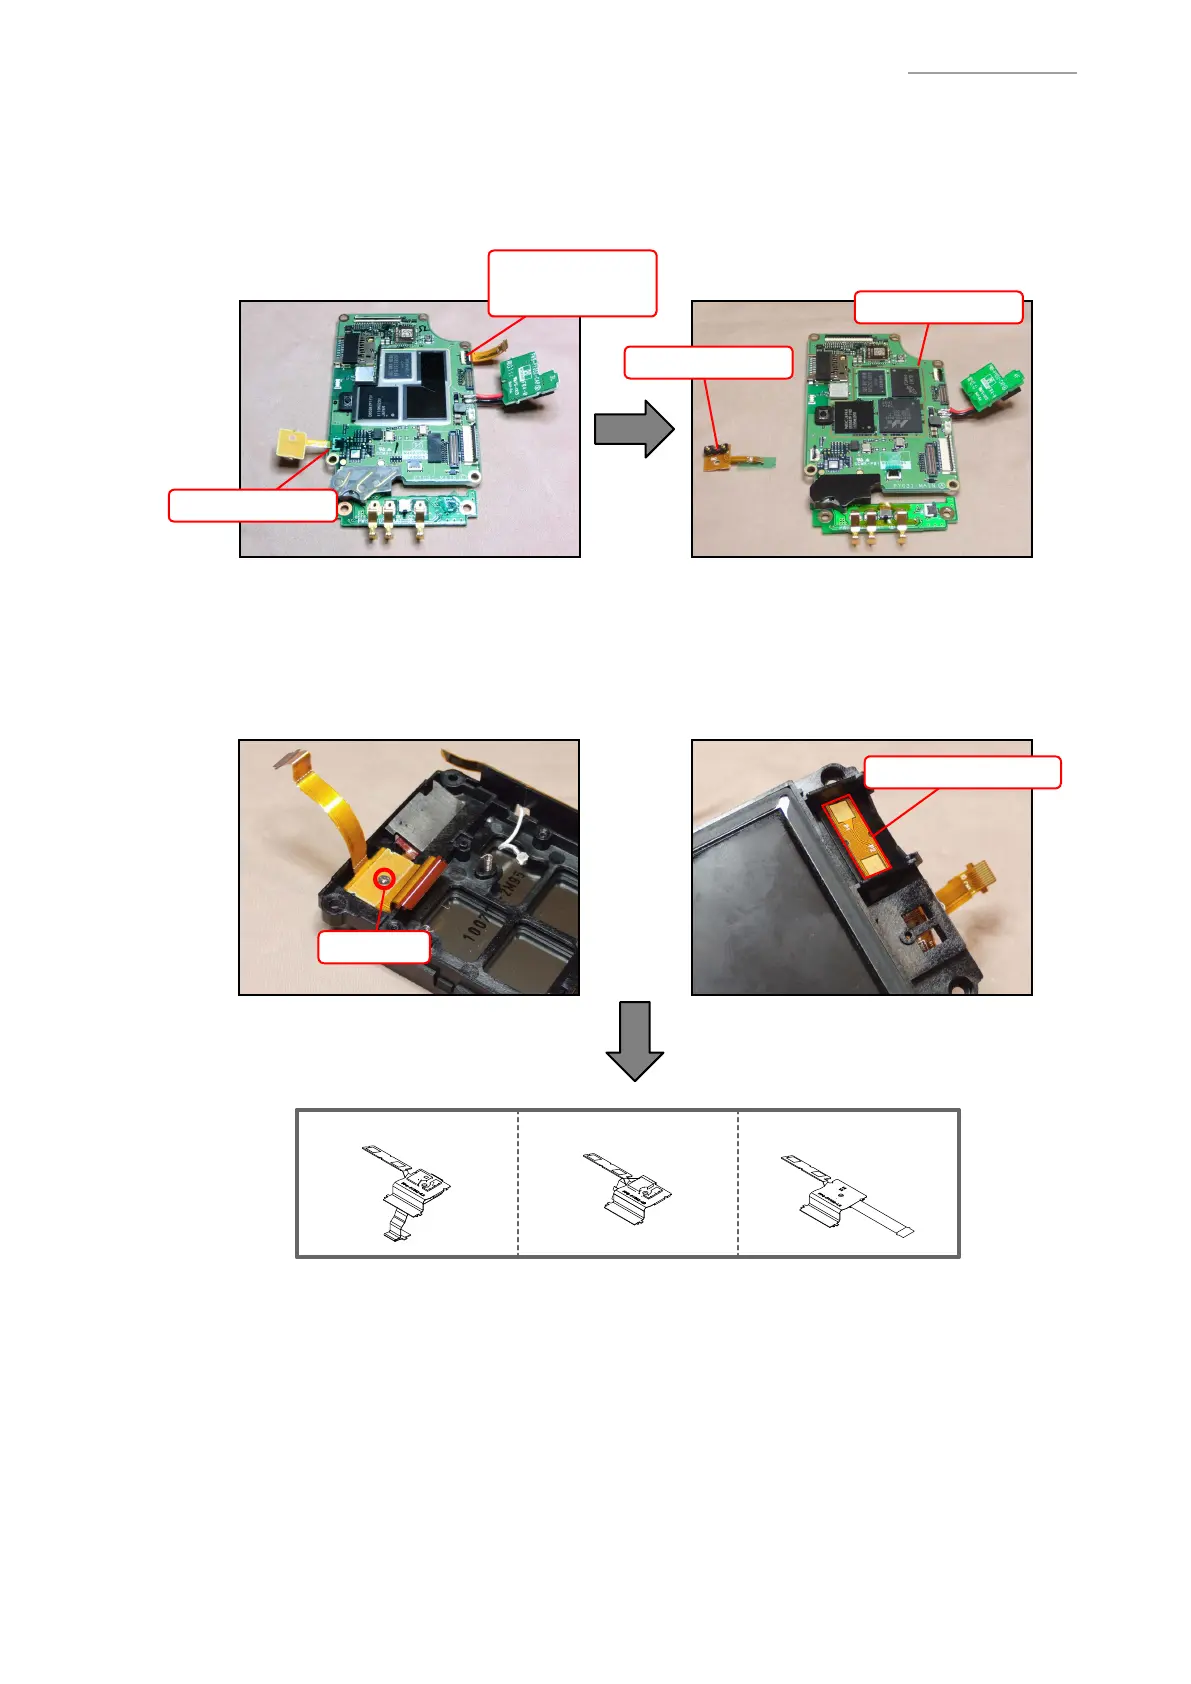
6. Peel off the tape, unlock the connector lock, and remove the FPC.
7. Remove the TR-IC-UNIT.
8. NFC type
Peel off the tape, unlock the connector lock, and remove the FPC.
TR-IC-UNIT
MAIN-PCB
FPC
FPC
(NFC type)
1D Laser model Full Range Imager model2D Scanner model

Other manuals for Casio DT-X200-10E

Questions and Answers:

Question and Answer IconNeed help?

Do you have a question about the Casio DT-X200-10E and is the answer not in the manual?

Casio DT-X200-10E Specifications

General IconGeneral
BrandCasio
ModelDT-X200-10E
CategoryHandhelds
LanguageEnglish

Related product manuals