— 14 —
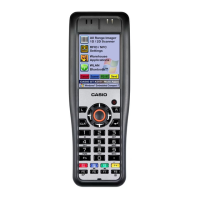
DT-X200/DT-X8
No. Name Description
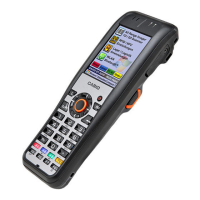
1 Speaker Generates audio and buzzer tones.
2 Indicator 1 Orange: Charging
Green: Charging complete
Red: Battery pack error or the surrounding temperature is out of the charging
temperature range.
3 Indicator 2 Flashes blue when operating via Bluetooth or orange when operating via W-LAN.
Lights red when there is a bar code scanning error and lights green when a bar
code scans successfully.
Lights red when the alarm function is activated.
Flashes magenta when the DT-X200 is ready to communicate.
4 Screen The screen displays texts, operations, indicators and so forth.
5 Cursor Key Perform the same functions as the up, down, left and right arrow keys on a PC
keyboard.
6 Center Trigger Key Used to perform bar code reading. Can be assigned an arbitrary function.
7 Power Key Turns the power on and off .
8 R Key Can be assigned an arbitrary function.
9 L Key Can be assigned an arbitrary function.
10 Enter Key Press when fi nishing entering numerical values or when moving to the next step.
11 Numeric Keys Used to enter numeric values and decimal points.
12 Function Keys F1: Similar function as the Alt key on a PC keyboard.
F2: Similar function as the Shift+Tab keys combination on a PC keyboard. Used to
move the cursor among entry or selection items.
F3: Similar function as the Tab key on a PC keyboard. Used to move the cursor
among entry or selection items.
F4: Not assigned.
F5: Enter a space.
F6: Similar function as the cursor left key on a PC keyboard.
F7: Similar function as the cursor right key on a PC keyboard.
F8: Select text entry mode.
(The mode changes in order of Numeric → Uppercase letter → Lowercase letter)
13 Microphone Used for audio input (including voice).
14 Fn Key Used to make various settings in combination with the numeric
keys or when starting a pre-registered application.
15 CLR Key Used to clear one letter to the left of the cursor.
16 Strap Holes Used to attach neck strap and hand belt.
17 microSD Card Slot microSD card slot.
18 R Trigger Key Used to perform bar code reading.
19 L Trigger Key Used to perform bar code reading.
20 USB and Charging Unit
Mount Holes
Used to attach the USB and Charging Unit.
21 Barcode Reader/
NFC Reader
Laser light or LED light is emitted from this window that reads bar codes.
When using NFC, hold the card or tag up to the reader.
22 Hand Belt Mount Used to attach the hand belt.
23 Extension Port Provided for future extension.
24 Battery Pack Cover
Lock Switches
Used to lock the battery cover and to release.
25 Mount Holes These holes hold the terminal seating in the optional USB Cradle or in the Ethernet
Cradle.
26 Battery Pack Cover Used to cover the battery compartment that holds the battery pack inside.
27 Reset Switch Used to reset the Handheld Terminal.
28 Power Supply/Data
Communication
Terminals
Used to receive power provided by the USB Cradle, Ethernet Cradle or USB and
Charging Unit. Also used for data communication.
 Loading...

