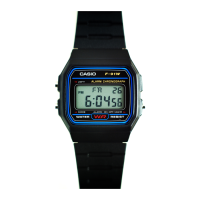
Do you have a question about the Casio F91W and is the answer not in the manual?
This document outlines the operation and setting procedures for a CASIO watch, covering its various display modes and functionalities.
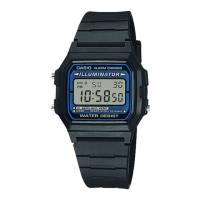
The watch features several display modes: Regular Timekeeping, Daily Alarm, Stopwatch, and Time/Calendar Setting.
Regular Timekeeping Mode: In this mode, the display shows the hour, minute, second, AM/PM indicator, date, and day of the week. The day abbreviations are: SU (Sunday), MO (Monday), TU (Tuesday), WE (Wednesday), TH (Thursday), FR (Friday), SA (Saturday). The time format can be switched between 12-hour and 24-hour by pressing button A.
Daily Alarm Mode: This mode displays the set alarm time (hour and minute). It also shows indicators for the alarm-on-mark and time-signal-on-mark.
Stopwatch Mode: The stopwatch displays minutes, seconds, and 1/100 seconds. It has a measuring capacity of up to 59 minutes and 59.99 seconds.
Time/Calendar Setting Mode: This mode allows for setting the time and calendar, displaying the date and day of the week.
The daily alarm, when set, will sound a buzzer for 20 seconds at the preset time each day until it is cleared. To stop the buzzer, press the L button. If the time signal is also set, the watch will sound an hourly chime.
Sound Demonstration: To hear the alarm sound, press and hold button A while in the alarm mode.
Setting the Hour: In the daily alarm mode, press button L to enter the hour setting. Each press of button A will advance the hour by one.
Setting the Minute: After setting the hour, press button L to move to the minute setting. Each press of button A will advance the minute by one. Press button L again to complete the setting.
Quick Digit Advance: When setting the hour or minute, pressing and holding button A for more than 2 seconds will cause the digits to advance quickly. Releasing button A will stop the rapid advance.
Reverting to Regular Timekeeping: If button C is pressed during the alarm setting process, the watch will revert to the regular timekeeping mode.
The watch allows for independent control of the daily alarm and the hourly time signal.
Alarm and Time Signal On: When both the alarm-on-mark and time-signal-on-mark appear on the display, both the daily alarm and the hourly time signal will sound.
Alarm and Time Signal Off: Press button A once from the "alarm and time signal on" state. The alarm-on-mark and time-signal-on-mark will disappear, indicating that neither the daily alarm nor the hourly time signal will sound.
Daily Alarm Only: Press button A again from the "alarm and time signal off" state. The alarm-on-mark will appear, while the time-signal-on-mark remains off. In this state, only the daily alarm will sound.
Time Signal Only: Press button A once more from the "daily alarm only" state. The time-signal-on-mark will appear, and the alarm-on-mark will disappear. In this state, only the hourly time signal will sound.
To cycle through these settings, continue pressing button A.
The stopwatch function allows for precise time measurement. A signal confirms the start/stop operation. The stopwatch's maximum measuring capacity is 59 minutes and 59.99 seconds. If a longer time needs to be measured, the stopwatch must be reset and started again.
Net Time Measurement:
Split Time Measurement:
1st-2nd Place Times: This mode is useful for timing two competitors.
The setting sequence for the time and calendar MUST BE FOLLOWED precisely when making any new settings.
Entering Time/Calendar Setting Mode: From the regular timekeeping mode, press button C three times to enter the time/calendar setting mode.
Adjusting Seconds: In the time/calendar setting mode, the seconds digits will be flashing. Press button A to adjust the seconds. This feature is useful for precise time synchronization, such as with a radio, TV, or telephone time signal, and can be done once a month for optimal accuracy.
Setting the Hour: Press button L to move to the hour setting. The hour digits will flash. Press button A to increase the hour.
Setting the Minute: Press button L to move to the minute setting. The minute digits will flash. Press button A to increase the minute.
Setting the Month: Press button L to move to the month setting. The month digits will flash. Press button A to increase the month.
Setting the Date: Press button L to move to the date setting. The date digits will flash. Press button A to increase the date.
Setting the Day: Press button L to move to the day setting. The day abbreviation will flash. Pressing button A will advance the day to the next day. After setting the day, press button C to complete the time and calendar setting.
Quick Digit Advance: When setting the hour, minute, month, or date, pressing and holding button A for more than 2 seconds will cause the digits to advance quickly. Releasing button A will stop the rapid advance.
Skipping Digits: If correction of a particular digit is not required, you can skip it by pressing button L repeatedly until you reach the desired setting.
Automatic Return to Regular Timekeeping: If no button is operated for a few minutes while a selection is flashing, the flashing will stop, and the watch will automatically return to the regular timekeeping mode.
The watch is designed for ease of use and reliability.
Button Misoperation: The unit components are designed not to be damaged or malfunction due to misoperation of buttons. If confusing information appears on the display, it indicates an incorrect entry sequence. In such cases, please re-read the manual and try again.
Battery Life: The watch uses one lithium battery (type: CR-2016, except Module 1271/BR-2020 for Module 1271 only). The approximate battery life is 7 years for CR-2016 (except Module 1271) and 10 years for BR-2020 (Module 1271 only), assuming alarm operation for 20 seconds per day and one light operation for 1 second per day.
| Display Type | Digital |
|---|---|
| Case Material | Resin |
| Band Material | Resin |
| Water Resistance | 30 meters |
| Weight | 21 grams |
| Accuracy | ±30 seconds per month |
| Model | F91W |
| Brand | Casio |
| Type | Digital Watch |
| Display | Digital |
| Case Thickness | 8.5 mm |
| Battery Life | 7 years |
| Functions | Alarm, Calendar, LED Light |
| Dimensions | 38.2 x 8.5 mm |
| Power Supply and Battery Life | CR2016 (7 years) |
| Features | LED backlight, Daily alarm |