E-5
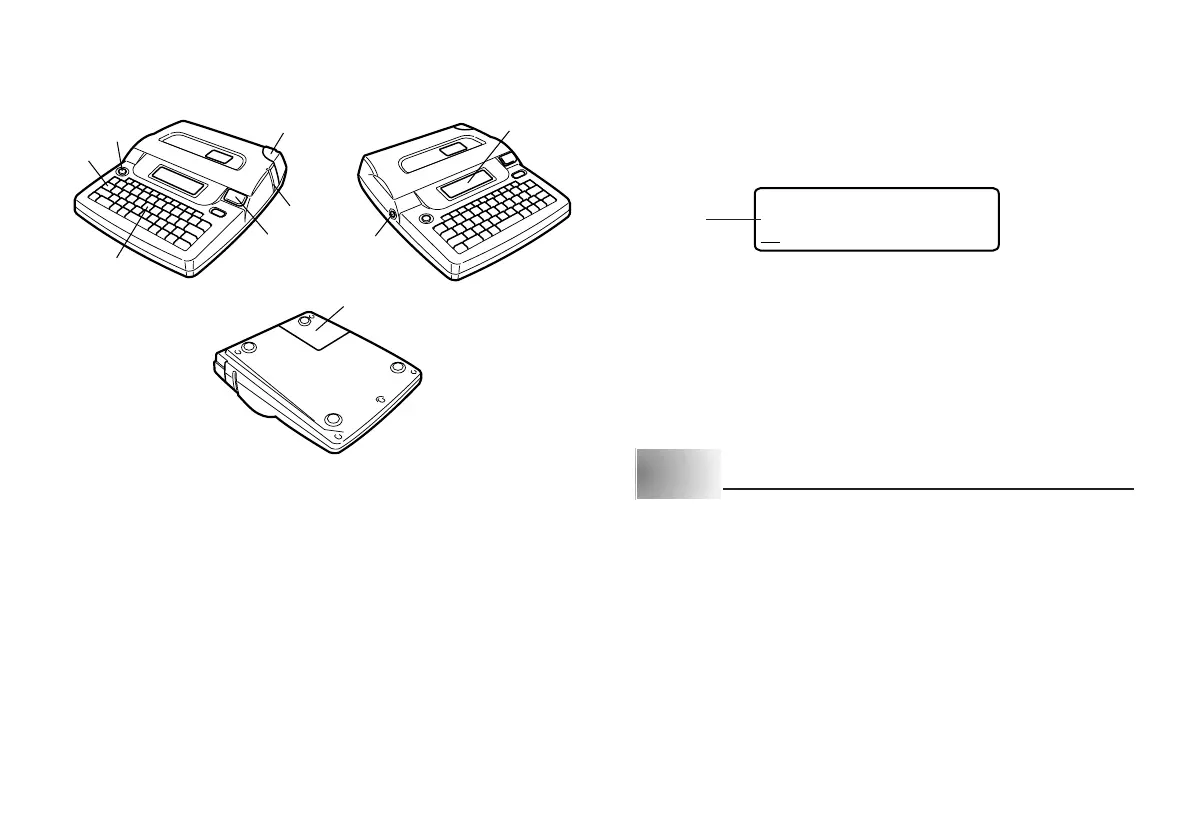
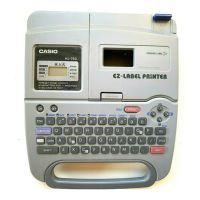
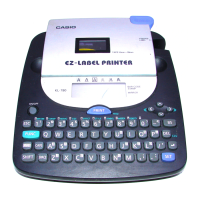
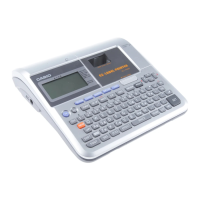
General Guide
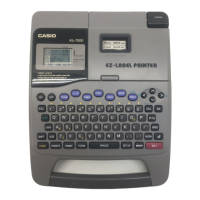
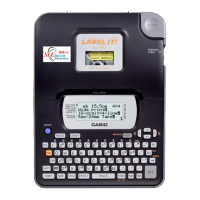
1 Power Key
Turn power on and off.
2 Function key
3 Letter keys
4 Cover release
5 Tape outlet
6 Tape cutter button
7 Optional AC Adaptor connector
8 Liquid crystal display (LCD)
9 Battery compartment
Label Printer Menus
Label Printer operation is designed to be as simple as possible, thanks to on-
screen menus that you can use to select the settings you need. Each menu is
described in detail in the sections that follow in this manual, but note the follow-
ing general points when using them.
• The item that is underlined in a menu is the one that is currently selected.
,.:;
.
‘’“”„?!
•Use H, J, K and L to move the underlining left, right, up and down and
change the selected item.
• Press SET to execute the underlined item, or ESC to exit the displayed menu
(and return to the previous menu or screen) without selecting anything.
• When you press SET to execute a menu item, the Label Printer either moves
on to the next menu, or it executes the selected function and returns to the
text input screen that you started from.
Part 2 Getting Ready
This part of the manual tells you how to load batteries and the tape cartridge,
and how to perform other basic setups for the Label Printer.
Important!
• Be sure to read this section before attempting to use the Label Printer.
Power Supply
The Label Printer can be powered by six AA-size alkaline batteries or an op-
tional AC adaptor (AD-A95100).
Currently
selected item
1
2
6
3
4
5
8
7
9