EasyManua.ls Logo

Casio LK-94TV - User Manual

Casio LK-94TV
69 pages
Print Icon
To Next Page IconTo Next Page
Loading...
LK94TVES1B
ES
USER’S GUIDE
GUÍA DEL USUARIO

Table of Contents

Questions and Answers

  • M
    Maria SullivanAug 19, 2025
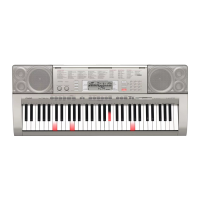
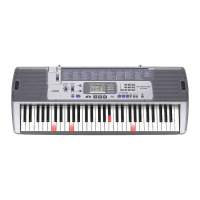
    Why does auto accompaniment not sound on my Casio LK-94TV Electronic Keyboard?
    • D
      davidsheppardAug 19, 2025
      If the auto accompaniment doesn't sound, it's possible that the accompaniment volume is set to 000. To fix this, use the SETTING button to increase the volume.
  • C
    Christian YangAug 21, 2025
    Why doesn't the Karaoke button work on my Casio LK-94TV?
    • J
      Joshua MckeeAug 21, 2025
      If the Karaoke button does not work, the keyboard is not in Karaoke Mode. Check to see if the Karaoke icon is shown on the display. If it isn’t, use the Song/Piano Bank Controller PLAY/STOP button.
  • J
    Jennifer EvansAug 25, 2025
    Why do auto accompaniment chords not sound on my Casio Electronic Keyboard?
    • N
      Natalie AndersonAug 25, 2025
      If auto accompaniment chords do not sound, the keyboard is in the Song Bank mode. Press the RHYTHM button to enter the rhythm mode, which is indicated by the rhythm indicator on the display.
  • M
    mmckayAug 26, 2025
    Why is there no sound from my Casio LK-94TV Electronic Keyboard?
    • J
      James GomezAug 26, 2025
      There might be several reasons: * There could be a power supply issue. Ensure the AC adapter is correctly attached, the batteries are properly inserted with the correct polarity (+/–), and the batteries are not depleted. * The power might not be turned on. Use the POWER button to turn on the power. * The volume setting might be too low. Increase the volume using the MAIN VOLUME slider. * The MODE switch could be in the CASIO CHORD or FINGERED position. Change the MODE switch setting to NORMAL. * LOCAL CONTROL might be off. Turn on LOCAL CONTROL.
  • A
    allisonzhangAug 28, 2025
    What to do if there is static noise when using a microphone with my Casio LK-94TV?
    • K
      Kimberly SalazarAug 28, 2025
      Static noise when using a microphone can be caused by: * Using a microphone that is not the recommended type. Use a recommended type microphone. * Using the microphone near fluorescent lighting. Move the microphone away from the source of the static.
  • A
    Angela BaileyAug 30, 2025
    Why is there no microphone sound on my Casio LK-94TV?
    • T
      Terri BurchAug 30, 2025
      If there's no microphone sound, it could be due to a few reasons: * The microphone volume might be set too low. Increase the microphone volume setting. * The microphone ON/OFF switch might be set to OFF. Change the microphone ON/OFF switch setting to ON.
  • J
    John PhillipsSep 1, 2025
    What to do if the sound output doesn't change with key pressure on my Casio Electronic Keyboard?
    • C
      Clayton WilliamsSep 1, 2025
      If the sound output does not change when key pressure is varied, it's likely that the touch response is turned off. To resolve this, press the SETTING button to turn it on.
  • M
    Megan FosterSep 3, 2025
    Why are the keys lit but no sound is produced on my Casio LK-94TV Electronic Keyboard?
    • M
      meredith54Sep 3, 2025
      If the keys are lit but no sound is being produced, the power on alert is reminding you that power was left on without any operation being performed. Press any button or keyboard key to restore power to normal.
  • M
    Mikayla Flores DDSSep 5, 2025
    What to do if a key light stays on on my Casio Electronic Keyboard?
    • Q
      qbaileySep 5, 2025
      If a key light stays on, the keyboard is likely waiting for you to play the correct note during Step 1 or Step 2 play. You can either: * Press the lit key to continue with Step 1 or Step 2 play. * Press the PLAY/STOP button to quit Step 1 or Step 2 play.
  • H
    Heather ClarkSep 7, 2025
    Why can't I record auto accompaniment or rhythm on my Casio LK-94TV Electronic Keyboard?
    • C
      Christopher GomezSep 7, 2025
      If you cannot record auto accompaniment or rhythm, it might be because a track other than Track 1 is selected as the recording track. Use the track select buttons to select Track 1. (Track 2 is melody track.)

Summary

FCC Compliance and Safety Notices

Safety Precautions: Understanding Symbols

Safety Symbol Definitions

Explains DANGER, WARNING, CAUTION symbols for user safety.

Safety Precautions: Electrical and Battery Hazards

Battery Handling and Safety

Detailed instructions for battery insertion, safety, and warnings against misuse.

AC Adaptor and Cord Safety

Precautions for using the AC adaptor, cord care, and preventing electrical shock.

Fire and Injury Prevention Measures

Steps to mitigate risks from smoke, overheating, and battery explosions.

Safety Precautions: Product Handling and Placement

Protecting Against Physical Damage

Guidelines for preventing injury from dropping, impact, and plastic bag misuse.

Main Features Overview

Musical Capabilities and Functions

Details on tones, rhythms, lessons, karaoke, and song memory.

General Guide: Control Panel Layout

Left Section Controls

Identification of MIC VOLUME, KEY CONTROL/TRANSPOSE, PLAY/STOP, KARAOKE buttons.

Center Section Controls

Identification of SETTING, REVERB/CHORUS, SONG MEMORY, KEY LIGHT, RHYTHM, TONE buttons.

Right Section Controls

Identification of LESSON PART, METRONOME, SPEAK, PRACTICE PHRASE, STEP buttons.

Playback and Mode Controls

Identification of PLAY/STOP, TEMPO, SONG BANK, PIANO BANK, SPLIT, LAYER buttons.

General Guide: Setup and Rear Panel

Rear Panel Connections Explained

Details on USB, VIDEO OUT, SUSTAIN/ASSIGNABLE, DC 9V, and PHONES/OUTPUT jacks.

Quick Reference: Lesson Playback Steps

Following Lesson Steps 1 and 2

Guidance on how to play along with lessons, including note and key light instructions.

Power Supply Options and Safety

Battery Installation and Warnings

Instructions for loading batteries and critical safety warnings for battery use.

AC Adaptor Usage and Specifications

Guidelines for using the AD-5 AC adaptor and its connection.

Connections: Audio and Pedal Interfaces

Headphones and Audio Output

Connecting headphones, speakers, and audio equipment via output jacks.

Connections: Microphone and Video Output

Microphone Jack and TV Connection

Connecting a microphone and viewing lesson/lyric data on a TV.

Basic Operations: Getting Started

Selecting and Changing Tones

Procedure for selecting and changing tones from the instrument's library.

Playing Built-in Tunes: Song Bank Mode

Selecting and Playing Song Bank Tunes

Step-by-step instructions for choosing and playing songs from the Song Bank.

Playing Built-in Tunes: Piano Bank and Tempo Adjustment

Selecting and Playing Piano Bank Tunes

Procedure for accessing and playing tunes from the Piano Bank.

Advanced 3-Step Lesson System

Lesson Structure and Progress Tracking

Overview of the 3-step lesson system and how to monitor progress.

Detailed Lesson Stages Explained

Explains Step 1 (timing), Step 2 (notes), and Step 3 (normal speed) of the lessons.

Advanced 3-Step Lesson: Evaluation and Guidance

Evaluation Mode Functionality

How the evaluation mode assesses performance with points and feedback.

Tone and Voice Guidance Features

Using tone changes and simulated voice for learning feedback.

Advanced 3-Step Lesson: Performance Evaluation Steps

Evaluating Step 1 Performance

Guide to checking evaluation results for Step 1 of the lesson.

Using Lesson Functions for Mastery

Steps to master tunes using lesson features and performance evaluation.

Evaluating Step 2 Performance

Guide to checking evaluation results for Step 2 of the lesson.

Advanced 3-Step Lesson: Step-by-Step Evaluation

Detailed Evaluation for Step 1

Process for evaluating Step 1 play, understanding results, and identifying weak areas.

Detailed Evaluation for Step 2

Process for evaluating Step 2 play, including key lighting guidance.

Advanced 3-Step Lesson: Final Steps and Practice Tools

Playing at Normal Speed (Step 3)

How to play tunes at normal speed after completing lesson steps.

Evaluating Step 3 Performance

Guide to checking evaluation results for Step 3 of the lesson.

Using a Microphone for Karaoke

Microphone Connection and Setup

Instructions for connecting a microphone and setting its volume.

Using a Microphone for Karaoke: Song Selection and TV Display

Auto Accompaniment: Rhythm Selection and Playback

Auto Accompaniment: Chord Methods

Using Auto Accompaniment Feature

Step-by-step guide to activate and use the auto accompaniment.

Auto Accompaniment: Chord Methods (Continued)

Song Memory Function: Recording Basics

Song Memory Overview and Capacity

Introduction to Song Memory for recording lessons and performances, including capacity.

Song Memory Function: Data Recording and Indicators

Song Memory Function: Recording and Playback Procedures

Song Memory Function: Performance Recording Details

Recording Keyboard Performances Step-by-Step

Detailed steps for recording keyboard performances.

Keyboard Settings: Layering Tones

Keyboard Settings: Splitting the Keyboard

Keyboard Settings: Layer and Split Combination

Keyboard Settings: Volume and Tuning Adjustments

Connection to a Computer: USB MIDI Setup

Installing the USB MIDI Driver

Steps required to install the USB MIDI driver from the bundled CD-ROM.

Connection to a Computer: Software and USB Port Usage

Using the USB Port for Data Exchange

Connecting the keyboard to a computer using a USB cable for data transfer.

Connection to a Computer: MIDI Settings

Troubleshooting: Common Keyboard Problems

Resolving No Keyboard Sound Issues

Step-by-step guide to diagnose and fix problems related to no sound output.

Troubleshooting Battery Operation Issues

Identifying and resolving common issues encountered when using battery power.

Troubleshooting: Specific Operational Issues

Product Specifications: Features and Capabilities

Product Specifications and Keyboard Care

Keyboard Care and Maintenance Instructions

Guidelines for protecting the keyboard from environmental factors and proper cleaning methods.

Appendix: Chord Charts

Appendix: MIDI Message Reference (Transmitted)

Casio LK-94TV Specifications

General IconGeneral
BrandCasio
ModelLK-94TV
CategoryElectronic Keyboard
LanguageEnglish

Related product manuals