EasyManua.ls Logo

CDA EIN60 - User Manual

CDA EIN60
16 pages
Print Icon
To Next Page IconTo Next Page
Loading...
www.cda.eu
EIN60
Extractors
Installation, use and maintenance
Cod:0103086436-00.03
Question and Answer IconNeed help?

Do you have a question about the CDA EIN60 and is the answer not in the manual?

Overview

This document provides comprehensive information for the EIN60 extractor, covering its installation, use, and maintenance.

Function Description

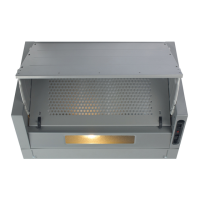
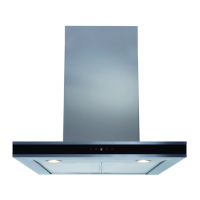
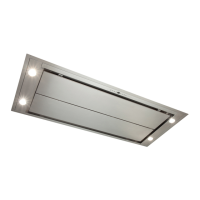
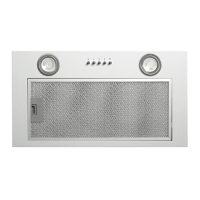
The EIN60 extractor is designed to remove cooking fumes and odours from the kitchen environment. It can operate in either extraction mode (venting air outside) or re-circulating mode (filtering air and returning it to the room). For optimal performance, it is recommended to switch on the extractor 15 minutes before cooking and leave it running for approximately 15 minutes after cooking. The extractor features a control panel with a light switch, a power indicator light, and a power switch to adjust motor speed.

Important Technical Specifications

The EIN60 extractor is a Class II appliance (double insulated) and is not intended to be earthed. It operates on a mains electrical voltage of 230-240Vac with a total rated power consumption of 49W. Key energy efficiency information includes:

  • Annual Energy Consumption (AECHood): 26.6 kWh
  • Fluid Dynamic Efficiency (FDEHood): 8.6
  • Energy Efficiency Index (EEIHood): 69.1
  • Measured airflow at Best Efficiency Point (QBEP): 99.2 m³/h
  • Measured Pressure at Best Efficiency Point (PBEP): 120 Pa
  • Maximum airflow (QMAX): 193.2 m³/h
  • Measured electric power at Best Efficiency Point (WBEP): 38.2 W
  • Nominal lighting power (WL): 4 W
  • Average illumination of the lighting system on the cooking surface (EMiddle): 55 Lux
  • Sound power level (LWA): 62 dBA
  • Grease Filter Efficiency (GFEHood): 70 (D) for EIN60SI/2 and 46.2 (F) for EIN60FSI/2
  • Lamp efficiency (LEHood): 14 (D) %

The extractor is designed for use in a room with a volume of less than 36 m³. For installation above an electric hob, the minimum distance between the hob and extractor must exceed 600mm for ceramic and solid plate hobs, and 550mm for induction hobs. For gas hobs, this distance must exceed 650mm. If the gas hob instructions specify a greater distance, that distance must be observed. The width of any hob should not be greater than the width of the extractor installed above it.

Usage Features

The control panel allows for easy operation:

  • Light Switch (A): Slide to position A1 for off, or A2 for on.
  • Power Switch (C): Slide to the desired position (C1, C2, C3, C4) to switch on the extractor or change the motor speed. Position C1 is for off.
  • Power Indicator Light (B): Indicates when the extractor is powered on.

For optimal performance, the extractor should be switched on 15 minutes before cooking and left on for approximately 15 minutes after cooking.

Maintenance Features

Regular maintenance is crucial for the extractor's performance and safety. Always switch off the electricity supply before performing any maintenance or cleaning.

Cleaning:

  • Use a non-abrasive cleaner and a dilute solution of water and mild detergent with a clean microfibre cloth. Avoid abrasive cleaners like Cif, as they can scratch the surface and erase control panel markings.
  • Steam cleaners must not be used.

Grease Filter Cleaning: The extractor may have either acrylic or aluminium grease filters. These filters capture grease particles and should be cleaned at a maximum of 2-month intervals to prevent fire hazards.

  • Acrylic Grease Filter:

    1. Remove the cover panel by pushing up the fixing clips and lifting the panel forwards.
    2. Remove filter retaining wires from the cover panel.
    3. Remove the grease filter and wash by hand in a lukewarm solution of water and mild detergent. Squeeze, but do not wring out. Clean the filter holder.
    4. Allow the filter to dry completely before reassembly.
    5. Replace the grease filter and retaining wires in the cover panel.
    6. Replace the cover panel by inserting the lugs on the upper side and refastening the fixing clips on the lower side.
  • Aluminium Grease Filters:

    1. Remove filters and wash in a solution of warm water and neutral liquid detergent, then soak.
    2. Rinse thoroughly with warm water and dry.
    3. Alternatively, filters can be washed in a dishwasher. Note that aluminium panels may change colour after several washes, which is not a fault.

Charcoal Filter Replacement (re-circulating only): Charcoal filters cannot be washed and should be replaced every four to six months, depending on use, to ensure best performance.

  1. Remove the cover panel (acrylic filter model) or grease filter (aluminium filter model).
  2. Place the charcoal filter on the centre of the motor support and turn it clockwise 90° until it locks into position.
  3. Replace the cover panel or grease filter.

Changing the Light: ENSURE THE EXTRACTOR IS SWITCHED OFF AT THE MAINS AND ALLOW THE BULB TO COOL BEFORE REMOVING IT. The extractor uses an E14 LED 4Wx1 DR-4-H-E14-37 bulb.

  1. Remove the cover panel.
  2. Unscrew the light bulb and replace it with the required LED bulb (4W max LED, SES).
  3. Replace the cover panel.
  • Do not touch bulbs or adjacent areas during or immediately after prolonged use.
  • The light is for cooking use, not general room illumination. Extended use can reduce bulb lifespan.
  • Bulb replacement is not covered by the guarantee.
  • Only use recommended bulbs; do not fit bulbs of a higher power rating. Lower wattage bulbs may last longer and use less energy.
  • Spare bulbs are available from CDA Customer Care or local DIY shops.

Ducting: Rigid circular pipe made from fire-retardant material (BS 476 or DIN 4102-B1) is recommended. Smooth interior rigid pipe is preferred over concertina-type ducting. Optimal ducting lengths with minimal performance effect are:

  • 4 metres with 1 x 90° bend.
  • 3 metres with 2 x 90° bends.
  • 2 metres with 3 x 90° bends. Longer ducting can reduce performance and increase noise.

Electrical Connection: This appliance must be connected to the mains supply by a competent person using fixed wiring via a double pole switched fused spur outlet, protected by a 3A fuse. The wires are coloured BLUE (Neutral) and BROWN (Live). The isolation switch must be accessible after installation. Using a 13A fuse can damage internal wiring and invalidate the warranty.

Guarantee: The product comes with a 5-year parts guarantee and a 2-year labour guarantee. Incorrect installation, misuse, or commercial use may invalidate the guarantee.

CDA EIN60 Specifications

General IconGeneral
BrandCDA
ModelEIN60
CategoryScrubber
LanguageEnglish

Related product manuals