www.cel-robox.com
Hardware Setup
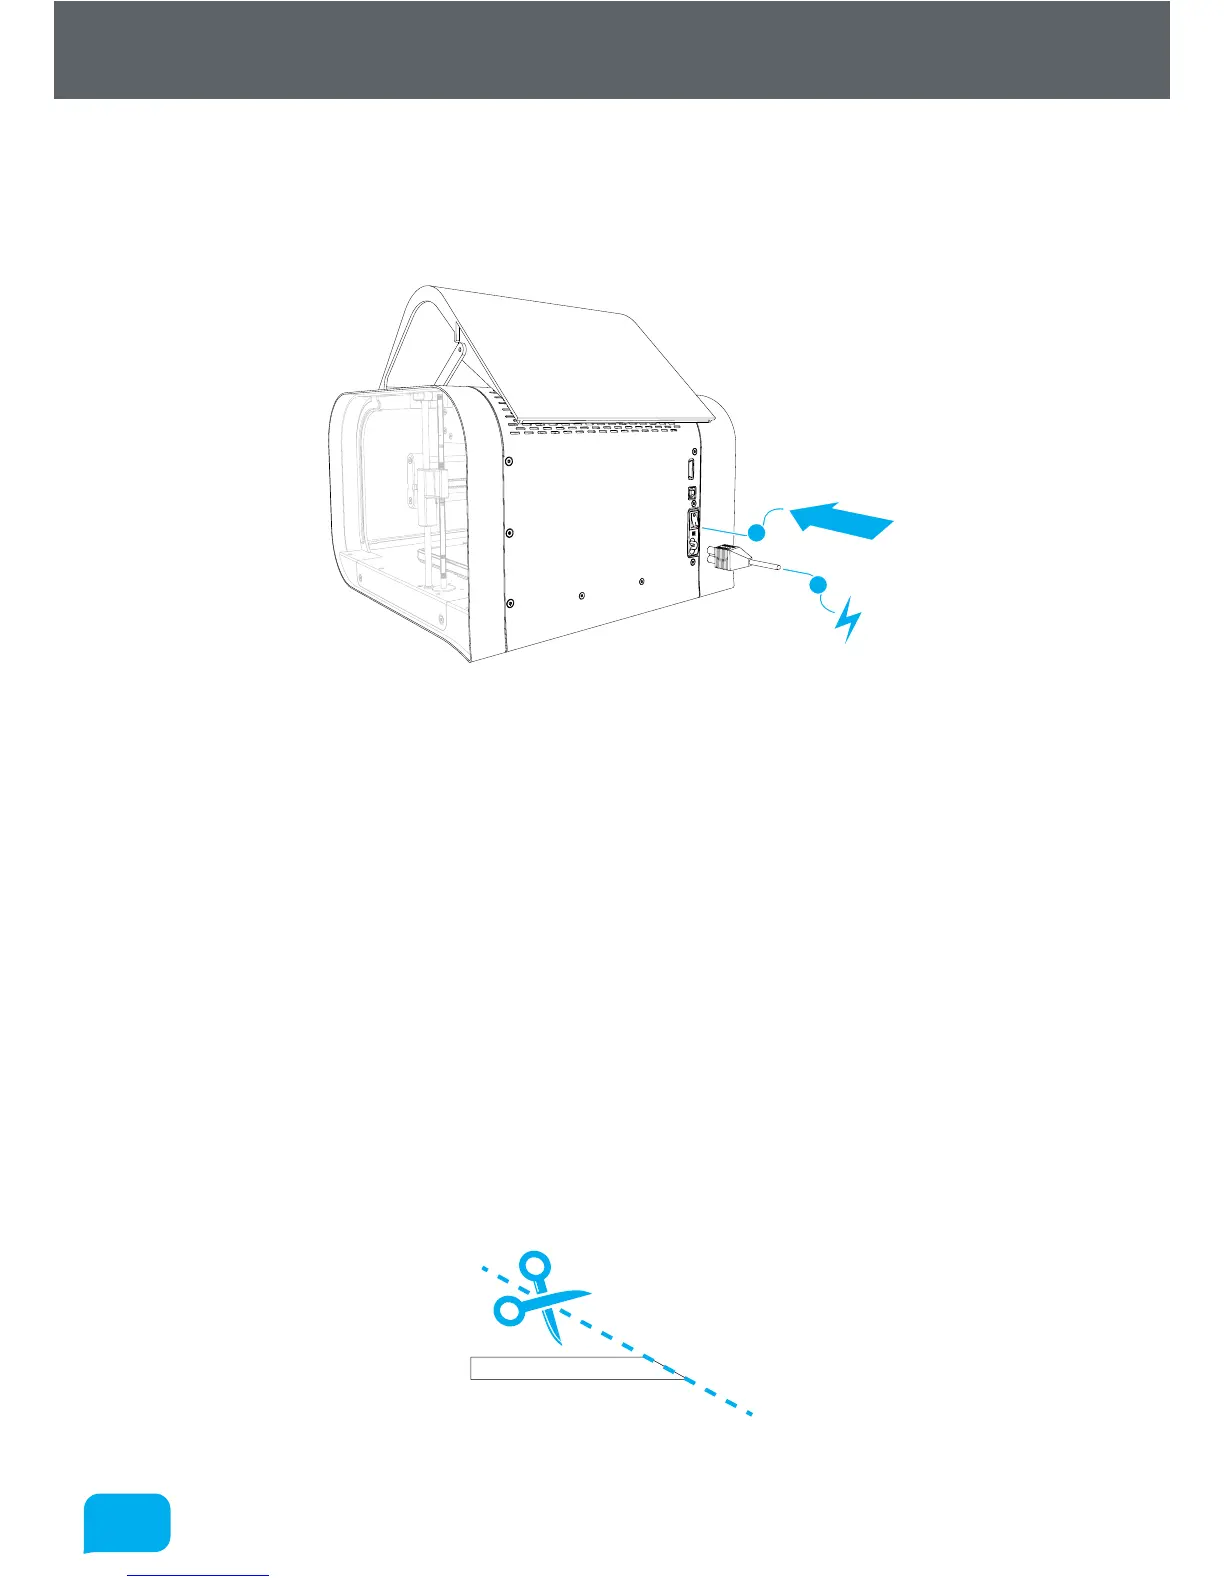
Attaching the Power Cable and Powering On
Connect the supplied AC power lead to Robox® and switch on using the rear
power switch.
1
2
This will install the necessary drivers for connecting your Robox® and could take
a few minutes. When correctly installed and switched on, it should appear in
Device Manager as a COM port called “Robox v1.0 (COM3)” (COM number may
vary). It should also appear on the Status Page of AutoMaker™, along with what
reel and head are installed - for more information please refer to the user manual.
Loading Filament
This section explains how to load your chosen 3D printing plastic filament
into Robox® ready to produce your first print! It is designed to be a very simple
process with most functions taking place automatically.
Preparing the Filament
Before attempting to load filament, it is advisable to cut the end at a shallow
angle using a knife or sharp scissors to produce a sharp tip as shown below. This
will allow the filament to enter the extruder and melt chamber more easily.