Do you have a question about the CEL Robox and is the answer not in the manual?
Lists all items included in the Robox product package.
Guides through the safe unpacking of the Robox printer and its accessories.
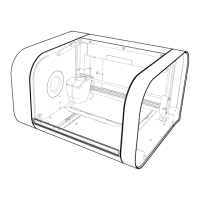
Highlights the major components and features of the Robox printer with a labelled diagram.
Shows the rear connections of Robox and the location of the SmartReel.
Details the step-by-step process for installing the AutoMaker software on your computer.
Explains how to create a user account for registration, support, and warranty.
Guides on connecting the Robox printer to your PC using the supplied USB cable.
Instructions for connecting the AC power lead and switching on the Robox printer.
Explains how to prepare and load 3D printing filament into the Robox for printing.
Describes feeding filament into the extruder entrance before installing the reel.
Details the process of installing the SmartReel into the dock.
Introduces the simplest workflow for producing a model from an .stl file.
Describes the initial AutoMaker screen showing printer status and options.
Explains how to lay out and manipulate 3D models within AutoMaker.
Details modifying print settings like quality, fill density, and support material.
Setting to choose the 'solidness' of the finished object.
Controls the printing of support structures for overhangs.
Defines loops around the part for bed adhesion and warp prevention.
Guides on initiating the print process after layout and settings are finalized.
Provides information on how to get product support via a ticketing system.
Details contact information for purchasing accessories and consumables.
Offers an email address for submitting general feedback on the product.
Instructs users to find reseller contact details for initial enquiries.
| Brand | CEL |
|---|---|
| Model | Robox |
| Category | 3D Printers |
| Language | English |