Do you have a question about the Celestron 8 and is the answer not in the manual?
Select a suitable location, ensuring sky visibility and managing cables to avoid hazards.
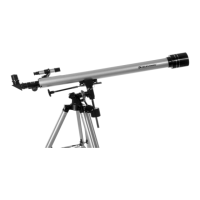
Assemble the tripod, which serves as the telescope's backbone, ensuring stability.
Use a disk and rod to stabilize the tripod legs from the inside for enhanced rigidity.
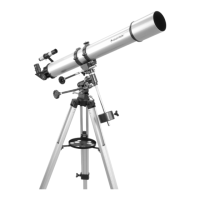
Place the mount onto the tripod base, aligning a chromed pin with its housing.
Thread the counterweight bar into the declination axis and attach counterweights.
Attach the telescope tube to the mount using its dovetail and clamp mechanism.
Connect the hand terminal and power supply to the mount's labeled ports.
Remove the protective cover from the telescope tube before further use.
Securely attach a sun filter to the tube using screws to prevent it from falling off.
Balance the telescope by adjusting counterweights and tube position for each axis.
Move the axes to their respective index positions as illustrated in the images.
Align the telescope mount, noting the automatic movement to index positions.
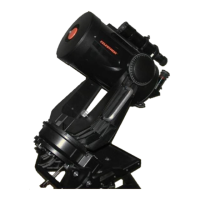
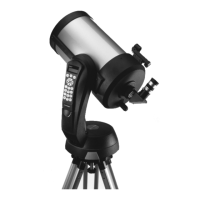
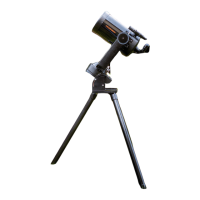
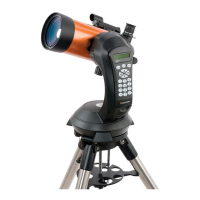
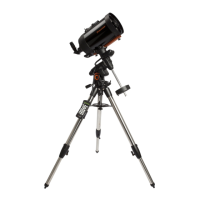
The Celestron 8 (C8) is a compact Schmidt Cassegrain telescope, ideal for observations that do not require binoculars or finderscopes. It is typically paired with a Celestron Advanced GT mount, designed for easy setup by a single person due to its compact construction.
The assembly process begins with selecting an appropriate location for the telescope. This choice is critical as it impacts visibility of the sky and cable management. For instance, the relevant part of the sky must be visible, and any obstructions, such as a dome, need to be considered. Additionally, power supply and camera cables should be routed to prevent tripping hazards. The manual highlights a common mistake: setting up the telescope in a laboratory-course room directly behind a door, which results in poor sky visibility and potential obstructions.
The tripod forms the backbone of the telescope's structure. To stabilize its legs, a specific disk is used. This disk is screwed into the base of the tripod from below, with the threaded side facing upwards. The rod must be screwed in until the thread is fully visible on the other side, ensuring the rod can slide vertically.
Next, the mount is placed onto the tripod base. A small chromed pin on the tripod base must align with the corresponding housing on the mount to ensure correct positioning.
The counterweight bar and counterweights are then attached to the back end of the mount. First, the counterweight bar is threaded into the opening of the declination axis. After this, the screw at the end of the counterweight bar is removed, allowing the counterweight to be placed and fixed onto the bar. The screw is then reattached to secure the counterweight.
Attaching the telescope tube to the mount is facilitated by a "dove tail," an orange-colored component on the tube designed for quick and easy attachment. The dovetail is inserted into the clamp on the mount, and the clamp's screw is tightened to secure the tube.
Once the main components are assembled, the hand terminal and power supply are connected to the telescope. Both simply plug into the labeled ports on the mount. For convenient and safe storage of the hand terminal, its corresponding holder should be attached to the tripod first. Finally, the protective cover is removed from the telescope tube.
If necessary, a sun filter can be attached to the tube. The screws on the side of the sun filter are threaded to prevent it from falling off when the telescope moves.
Before using the telescope, the rotation axes must be tared. This involves loosening the clutch knobs that fix the right-ascension axis, allowing the telescope to move freely around this axis. The counterweight's position is then adjusted until there is no movement along this axis. Once balanced, the clutch knobs are tightened. The same procedure is repeated for the declination axis. Since there are no counterweights for this axis, the tube is shifted along the clamp to tare the declination axis.
After taring, the axes need to be justified by moving them to their index positions, as illustrated in the manual. This step is crucial for accurate alignment.
Finally, the alignment procedure can be performed. This process is similar to that used for the C11 telescope, with the key difference being that the mount does not automatically move to the index positions. However, this has already been addressed in the previous step of justifying the axes.
The operation of the Advanced GT, including features like hibernation, is consistent with the CGE-Pro model. Detailed information on these functions can be found in the article pertaining to the C11 telescope.
For any issues encountered during operation, known error sources and their solutions are available in a dedicated troubleshooting section.
Further details regarding the Celestron Advanced GT and the C8 telescope, including comprehensive manuals, are accessible in the lab course room.
| Optical Design | Schmidt-Cassegrain |
|---|---|
| Focal Ratio | f/10 |
| Finderscope | 6x30 |
| Aperture | 203.2 mm (8 inches) |
| Focal Length | 2032 mm |