3
Screw the visual back threaded ring onto the short threaded tube on the back of the telescope. The
threaded ring can be loosened (and then reghtened) at any me during your observing session if
you need to lt the star diagonal and eyepiece to a dierent angle for easier access.
Insert the eyepiece with the largest MM number on it, most likely 25mm. The bigger the mm
number the wider eld of view the eyepiece provides. Having a wide eld of view usually make it
much easier to nd and observe objects than narrow eld eyepieces, such as a 10mm.
Provided the telescope is not aiming anywhere towards the Sun, remove the dustcover from the
front lens.
Aligning the nderscope with the telescope
Make sure you never point the telescope or nderscope towards the sun at any me!
If the nderscope does not point to the same patch of sky as the main telescope it will be very
dicult to complete the 2-star alignment procedure (explained below). In essence, the nderscope
and main telescope would be “cross-eyed”, and aim in dierent direcon.
There are three alignment screws (one is a nylon bolt) on the rear of the nderscope. By screwing
these screws in/out you can move where the crosshairs in the nderscope point. You need to
unscrew one side in order to be able to screw an opposite screw inwards.
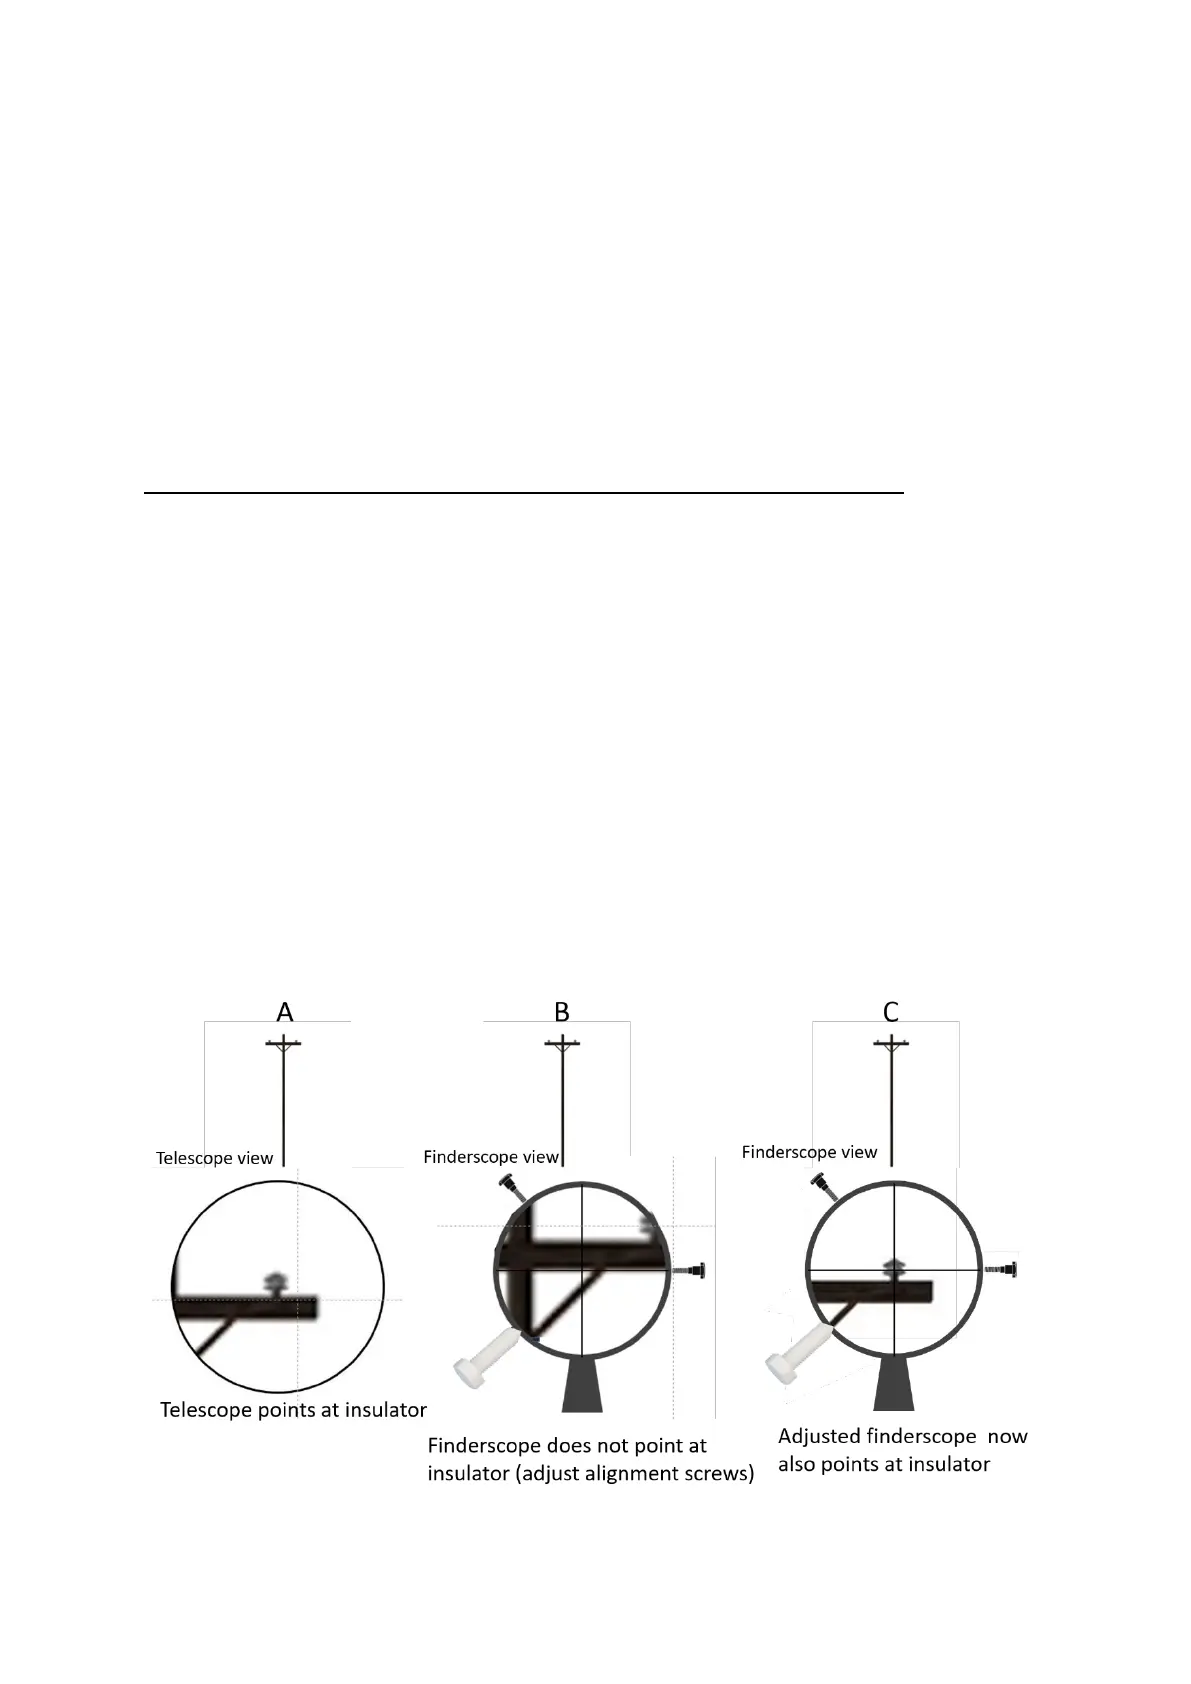
Unscrew the declinaon knob and the right ascension knob. Point the main telescope at a disncve
object, such as a power pole, about 100m or more away. Center a disncve point such as an
insulator on the pole top (example A below). Tighten both knobs again to stop the telescope from
moving.
Now look through the nderscope. It may not be poinng exactly at the insulator on the pole
(example B below). But you need to make it do so. Use the three adjustment screws on the rear of
the nderscope to place the crosshairs over the same insulator (example C below) centered in the
main telescope view.