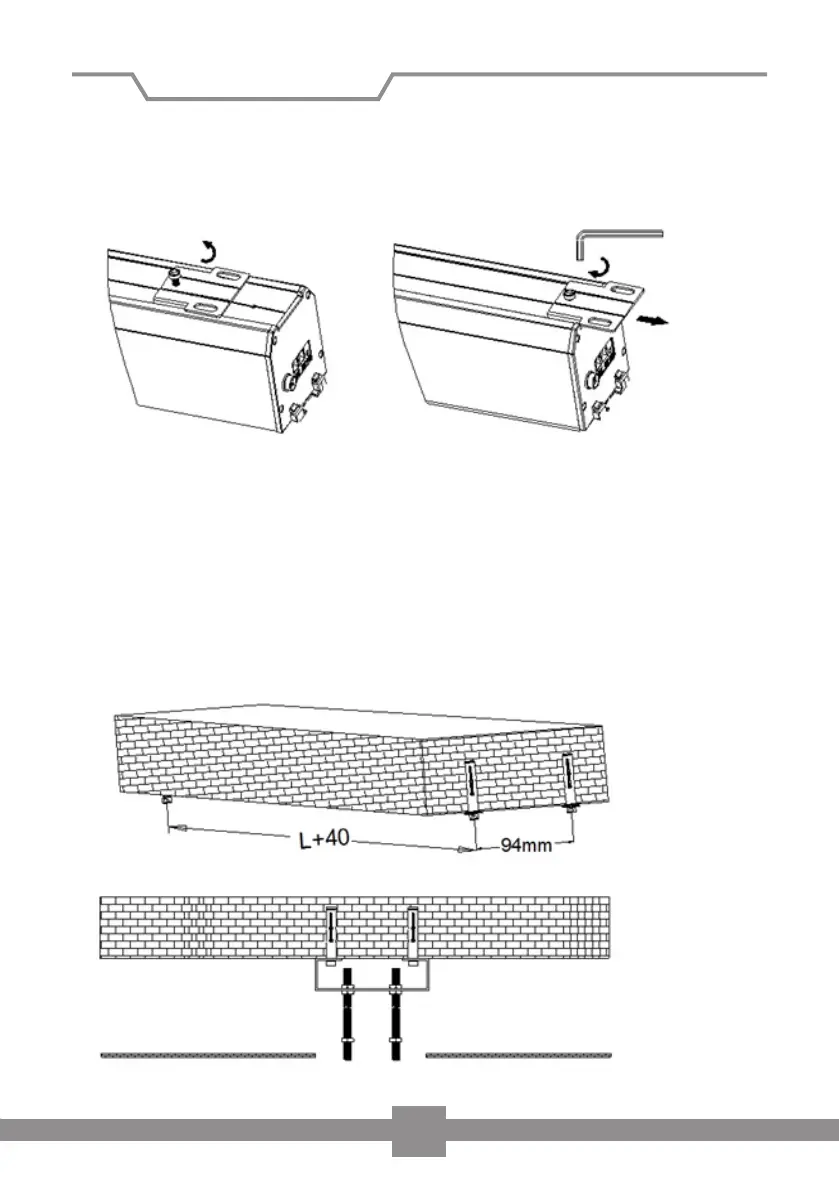
2. Loosen the screws of the mounting plate above the screen housing. Slide the
mounting plates to the ends of the housing and tighten the screws again (Figu-
re 2). Please ensure that the holes for the threaded rods are not covered by the
housing.
3. Drill 4 holes in the load bearing ceiling and insert the wall plugs E. The distance
between the holes should be L + 40mm x 94mm. If necessary, use other wall
plugs and screws suitable for your specific requirements.
Now attach the two mounting brackets (A) to your ceiling. Please ensure that
brackets are securely fastened and provide a safe installation. Then attach the 4
threaded rods (D) to the mounting brackets and attach a nut to each rod (Fig 3).
Figure 2
Figure 3
Installation of screen
6