Installation of screen
8
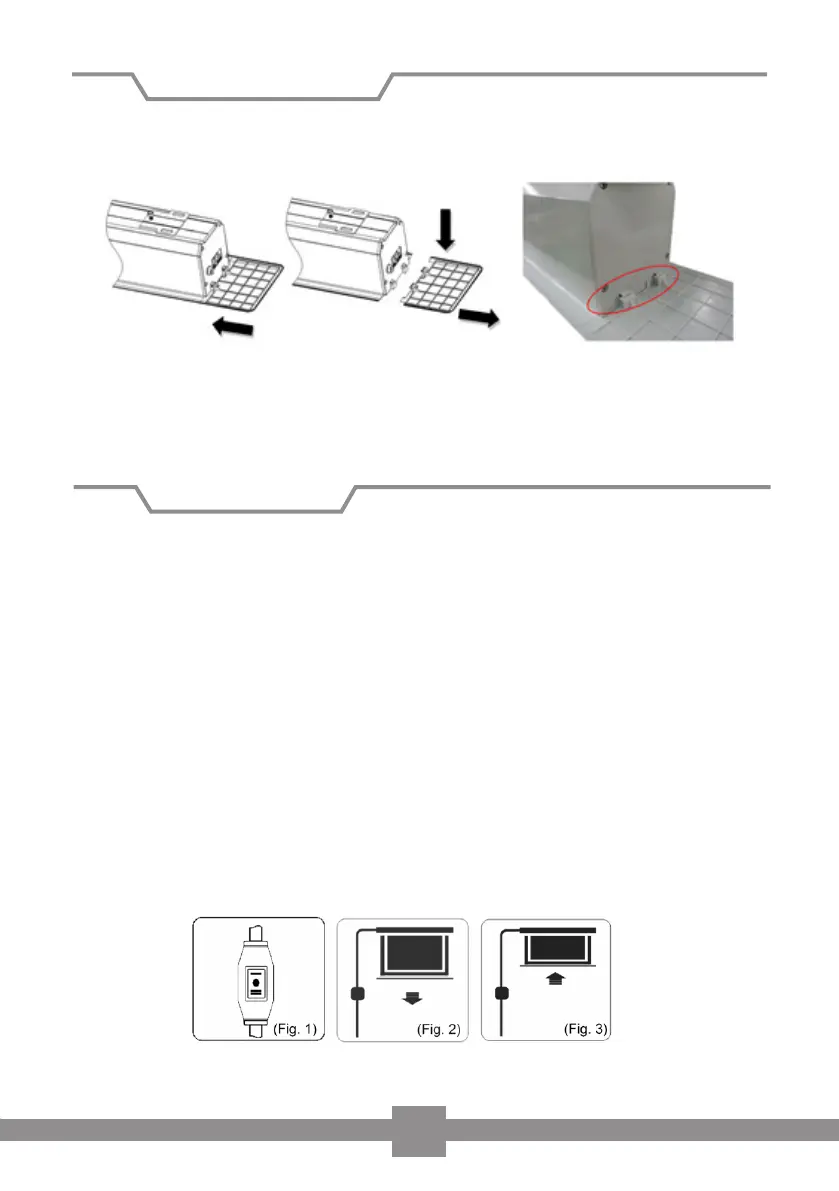
6. Finally attach the inspection covers (B) to the sides of the housing. To dismantle
the screen, pull the covers down and away from the housing (Fig 6).
Operating the screen via wall switch
Plug the power cable into the socket (ensure correct voltage). Position the cable so
that it does not present a hazard or comes into contact with hot surfaces. You may
require an extension lead.
To lower the screen (see fig 2)
When you set the switch to < + >, the screen will come down and stop automatical-
ly at the lower stop position.
To retract the screen (see fig 3)
When you position the switch to < - >, the screen will automatically retract into its
housing and stop at the upper stop position.
To stop the screen
If you position the switch to < 0 > , the screen will stop at that position.
Figure 6
This completes the installation.
Screen operation