- 9 - INSTALLATION MANUAL – RDO
2.5 Remove the U-bolt from the end of the garage door to which the Drive Unit will be fitted.
2.6 Having ensured that the prop is stable and firmly in position, remove the garage door mounting bracket from the
wall.
2.7 If not already disengaged, disengage the RDO II Drive Unit by pulling once on the release lever (Fig.11) - the
forked drive gear should now rotate freely
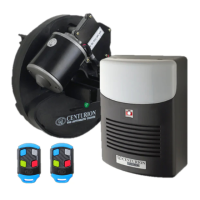
2.8 Orientate the Drive Unit as per Fig.9
2.9 Slide the centre of the Drive Unit over the garage door axle. Push the Drive Unit fully into the garage door and
ensure that one of the garage door drum wheel spokes slides in between the forks of the Drive Unit.
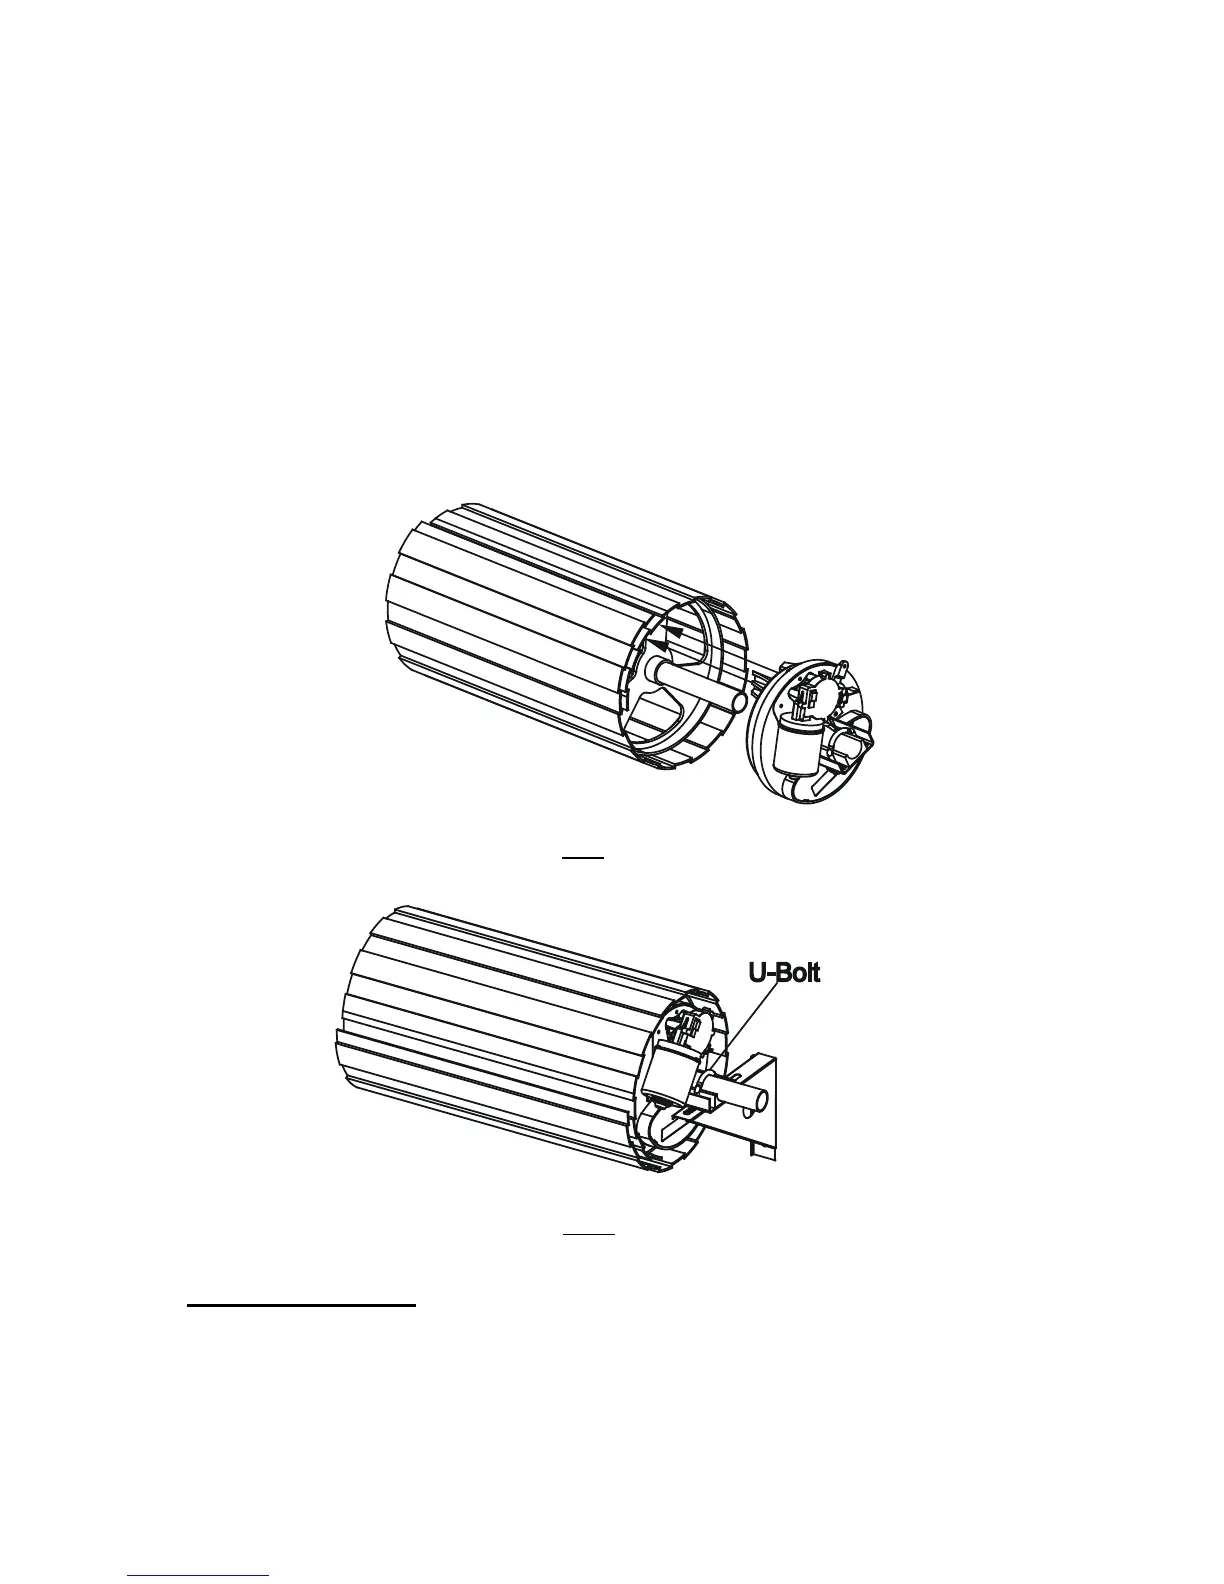
2.10 Refit the garage door mounting bracket to the wall. The U-Bolt slots in the door bracket must align with the
U-bolt mounting slots in the Drive Unit. (Fig.10)
2.11 Important Note: In some cases the door mounting bracket may need to be repositioned in order for the
U-Bolt holes align.
2.12 Fully insert the specially supplied U-bolt through the Drive Unit and garage door mounting bracket slots.
2.13 Affix and firmly tighten the U-Bolt with the two securing nuts provided.
2.14 Check the manual operation of the door by fully raising and lowering the door. The door should run smoothly
and should not catch on any part of the Drive Unit assembly.
Fig 9
Fig 10
3. Adjusting Release Cord
3.1 Unfurl the Red Disengage Cord and cut it to an appropriate length so that its end hangs approximately 1800mm
above the garage floor.