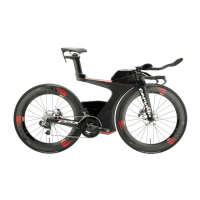
ROUTING DI2 FRAME WIRES
Down Tube E-wire
• RemovetheBatteryCoverandHiddenBatterycompartmentfromtheframeandputaside(Figure1).
• Usingelectricaltape,attachtheendoftheDownTubeE-wirethatconnectstotheDi2JunctionBoxtoamechanicalshiftercable.Feedtheshift
cablethroughtheholeonthebackverticalwallofthe“cablebucket”untilitexitstheBBshell(Figure2,Figure3,Figure4).
TIP:ThecableandE-WireshouldremainabovetheICS3tubeswithintheframe.
TIP:Useascrewdrivertopushtheziptiesthroughthehole,onebyone.Lightlypullontheshiftcableafterinsertingeachziptie(Figure5).
• RemovetheelectricaltapeandmechanicalshiftcablefromtheE-wire.
• Slideontheheatshrinktubingtothewire.ConnectthewiretothecolormatchedcableontheDi2JunctionBox,makingsuretolineupthe
cableproperly(Figure6).
Front Derailleur E-wire
• InserttheFrontDerailleurE-wireintothecableholeontheseattube(Figure7,Figure8).
• SlideontheheatshrinktubingandconnecttheE-wiretothecolormatchedcableontheDi2JunctionBox,makingsuretolineupthecableproperly.
Rear Derailleur E-wire
• Usingelectricaltape,attachtheendoftheE-wirethatconnectstotheJunctionBoxtoamechanicalshiftercable.Feedthecablethroughthe
cableexitholeonthedrivesidechainstay,andouttheBBshell(Figure9).
• SlideontheheatshrinktubingandconnecttheE-wiretothecolormatchedportontheDi2JunctionBox(Figure10).
• InstalltherubberDi2grommetsuppliedwiththeframe,ontothecableexitholeonthedrivesidechainstay(Figure11).
Battery Mount
• FeedthecablefromtheDi2BatteryMountthroughthebatterypocketintherearwheelcutoutandoutthedrivesideoftheBBshell(Figure12).
• SlideontheheatshrinktubingandconnectthewiretothecolormatchedcableontheJunctionBox,makingsuretolineupthecableproperly
(Figure13,Figure14).
• MountthefrontderailleurontheframeandconnecttheE-wire(Figure15).
• MounttherearderailleurontheframeandconnecttheE-wire(Figure16).
• Connectthebattery,frontwiringharness,andTTshifters.TesttheDi2systemforproperfunction(Figure17,Figure18,Figure19).
• Ifthesystemdoesnotwork,doublecheckallconnectionsandensurethereissufficientchargeinthebattery.Ifproblemspersist,pleasecontact
Shimanoforfurtherassistance(Figure20).
• Ifthesystemworksproperly,disconnectthefrontharness,shiftersandbattery.Setasideforthetimebeing.
3T ADURO AEROBAR INSTALLATION
• Dry fit the fork, headset, basebar, and any spacers needed to determine the cut length of the fork steer tube based on the customer’s fit
requirements.Westronglyrecommendadetailedmeasurementofthecustomer’scurrentbiketoensureproperforkcutlengthandt(Figure21).
NOTE:ThebearingcapisNOTneededwhenusingthe3TAdurobar.Itisrequiredwithatraditionalstemandaerobarcombination.
• Cuttheforkandinstalltheinsertintothesteertube(Figure22).
• Ifspacersarebeingused,installoneoftheantirotationspacerboltsintothefrontholeontheundersideofthe3TAdurobar(Figure23).
NOTE:If10mmofspacersormorearerequired,thefirstspacerbelowtheAdurobarneedstobea10mmspacer.Acombinationoftwo5mm
spacersshouldnotbeusedtogether.If10mmisneeded,two5mmspacerswillnotfittogetherproperly,pleaseusea10mmspacer.
• Afterplacingthefirstspaceronthebar,installanotherantirotationbolt.Thisprocessiscontinueduntilthelastspacerisinstalled.Thelast
spacerdoesnotneedanantirotationbolt(Figure24).
• Attachthefairingmounttoeitherthebottomspacerordirectlytotheaerobarifnospacersarerequired.
• Mountthespacer(s),ifnecessary,andbarontotheforksteerer.Installthetopcapandbolttoensurethesystempullstogetherproperly.Torque
theAdurosteerertubepinchboltsto5Nm(Figure25).
MAGURA BRAKE INSTALLATION
Magura Front Brake Lever Installation using the 3T Aduro Aerobar
• Removethefrontbrakecoverfromthebrake.Thisisdonewithnotools,asthecoversnapsontothebrakearm(Figure26).
TIP:Itiseasiesttoremovethebrakecoverbygraspingthecoverfromthebackedge,andgentlypullingawayfromthecaliper.
• Removethehydraulichosefromthecaliper(NOTTHELEVER)usingan8mmopenendedwrenchandplacethecaliperaside.Donotsqueeze
thecaliperbrakearmsnorthebrakeleverasmineraloilwillescape(Figure27,Figure28).
• UsingtheMagurahosecutter(orasharpknifeonahardsurface)cutthehosejustabovetheolive.Removethethreadednutandsetasidewiththecaliper
(Figure29,Figure30,Figure31).
• Putaslightbendintheendofthehydraulichoseandfeeditthroughthebar(Figure32,Figure33,Figure34).
Manual