Do you have a question about the CETAC ASX-260 and is the answer not in the manual?
Procedures for returning products, including authorization and shipment requirements.
Process for determining warranty status and repair/replacement.
Compliance information regarding FCC regulations for Class A digital devices.
Guidelines for using appropriate power cord sets that meet country-specific requirements.
Identifies the target audience and necessary prerequisites for effective manual use.
Explains the manual's structure and recommended reading order for users.
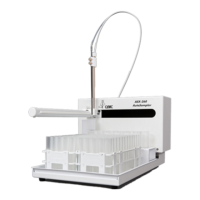
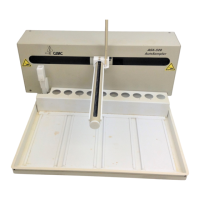
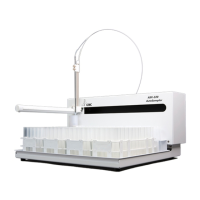
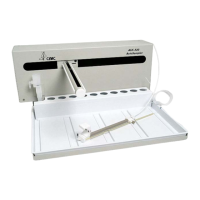
Lists and describes the standard parts and materials comprising the ASX-260 Auto Sampler.
Details available accessories to enhance functionality or compatibility of the ASX-260.
Factors for selecting an optimal laboratory location for the Auto Sampler.
Details electrical specifications and safe connection procedures for the Auto Sampler.
Step-by-step guide for attaching the Z-drive assembly to the Auto Sampler arm.
Procedure for installing the sample probe into the Z-drive assembly and proper alignment.
Instructions for establishing communication between the Auto Sampler and the host computer.
Procedures to verify the communication link between the Auto Sampler and host computer.
How to observe the sample probe's operation for correct alignment and function.
Steps to initiate the Auto Sampler sequence run after proper setup and rack arrangement.
Procedures for safely powering down the Auto Sampler and draining associated systems.
Explains the importance and methods for daily and weekly cleaning of the Auto Sampler.
Instructions for replacing the peristaltic pump tubing, a common wear item.
Steps to diagnose and resolve issues related to the Auto Sampler's power supply.
How to troubleshoot communication issues between the Auto Sampler and the host computer.
Steps to troubleshoot malfunctions related to the Z-drive assembly and sample probe movement.
| Type | Autosampler |
|---|---|
| Model | ASX-260 |
| Manufacturer | CETAC Technologies |
| Power Requirements | 100-240 VAC, 50/60 Hz |
| Compatibility | ICP, ICP-MS |
| Sample Volume Range | 1 µL to 1 mL |
| Dispensing Precision | Better than 1% RSD |
| Wash Stations | Integrated wash stations available |