Do you have a question about the Challenge XSS40E and is the answer not in the manual?
Explains symbols indicating safety measures and potential hazards.
Provides general safety guidelines for operation and assembly.
Details personal safety precautions, including PPE.
Lists all components provided with the lawnmower.
Lists the tools supplied in the package.
Important steps before starting the assembly process.
Detailed instructions for attaching the lower handle.
Steps for connecting and securing the upper handle.
Instructions for attaching the grass collection bag.
Final step for securing the cable to the handle.
Visuals and meanings of safety warning symbols for operation.
Broad safety rules for using the lawnmower.
Specific safety advice for the operator.
Crucial safety measures during lawnmower operation.
Safety tips for upkeep and storing the mower.
Clarifies the designed purpose of the lawnmower.
Detailed guide on adding engine oil before operation.
Instructions for adding fuel to the tank.
How to adjust the mower's cutting height.
Initial steps for engine ignition.
Further details on the engine starting procedure.
Solutions for engine starting problems.
Guidance on how to perform mowing.
Instructions for removing and emptying the grass catcher.
How to store the mower for brief periods.
Procedures for storing the mower long-term.
A timetable for upkeep tasks.
How to keep the mower clean.
Cleaning or replacing the air filter.
Cleaning and gapping the spark plug.
Step-by-step guide to changing engine oil.
Instructions for blade replacement.
Additional details for blade replacement.
Common issues and their solutions.
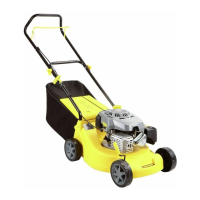
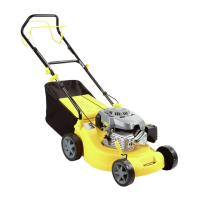
This document provides assembly, operation, and maintenance instructions for the Challenge 40cm Petrol Hand Push Lawnmower, model XSS40E.
The Challenge 40cm Petrol Hand Push Lawnmower is designed for domestic lawn mowing. It is a hand-push type lawnmower, meaning it does not have a self-propelled drive system and requires the user to push it manually. The machine is powered by a petrol engine and is equipped with a cutting blade to trim grass. It includes a grass collection bag to gather cuttings during operation.
Assembly: The lawnmower requires some assembly before first use. This involves attaching the lower handle to the main mower deck using self-tapping screws and handle tensioning knobs. The upper handle is then secured using quick-release levers and tensioning bolts. The grass collecting bag needs to be attached to its frame and then hooked onto the mower. Cable clips are provided to secure the cables to the lower handle.
Preparation for Operation: Before starting the engine, it is crucial to fill it with 400ml of SAE30 or equivalent 4-stroke engine oil. Running the engine without oil will cause irreparable damage and invalidate the warranty. The oil level should be checked using the dipstick, ensuring it is between the Min and Max marks. The fuel tank should be filled with clean, fresh unleaded petrol (maximum capacity 900ml). Refueling must be done outdoors, without smoking, and away from flames or sparks. The fuel filler cap should be tightened finger-tight after filling.
Starting the Engine: The starting procedure involves pressing the primer bulb 3-5 times (for a cold engine; not needed for a warm engine unless fuel ran out), pulling the Start/Stop bar towards the user, and then pulling the starter handle briskly until the engine starts. If the engine is flooded, a procedure to clear it is provided, which includes removing the spark plug, pulling the cord, drying the plug, and reinstalling it.
Cutting Height Adjustment: The lawnmower offers 5 cutting height positions. Adjustment is made by pulling a lever towards the wheel and moving it forward or backward to the desired height, then returning the lever into the securing plate. It is recommended not to use the lowest cutting height for the first cut of the season or in drought conditions, and only about one-third of the grass height should be cut.
Mowing: Users should maintain a firm grip on the upper handle with the stop/start bar closed. The lawnmower is a walk-behind model; users should walk, not run. Caution is advised when mowing on uneven or rough ground and when changing direction on slopes. Mowing across slopes (never up and down) is recommended, but not on slopes steeper than 15°. The best results are achieved on dry grass.
Grass Collection: The lawnmower is equipped with a 45L grass collecting bag. To empty the bag, the engine must be stopped. The discharge flap is raised, and the bag is removed by its handle. After emptying, the bag is refitted, and the discharge flap is released to cover the mulching plug. Any grass residues in the discharge chute should be cleaned with a brush.
The manual emphasizes regular maintenance to ensure long life and trouble-free use.
Maintenance Schedule: A detailed schedule is provided:
Cleaning: The machine should be kept clean and well lubricated. Grass cuttings and debris should not be allowed to dry and harden on mower surfaces, as this affects cutting and collection performance. The chute and underside of the deck should be cleared of wet debris. The lawnmower should never be cleaned with a water jet or high-pressure cleaner, and the engine must remain dry. Aggressive cleaning agents should be avoided.
Air Filter Maintenance: The air filter element should always be installed when running the engine. To clean or replace, loosen the fastener, open the cover, and remove the filter. Debris can be tapped off, or the filter replaced if excessively dirty.
Spark Plug Maintenance: Once the engine has cooled, the spark plug boot is removed. The spark plug is then removed using a socket spanner, cleaned with a wire brush, and the gap set to 0.7mm using a feeler gauge. It is reinstalled carefully by hand to avoid cross-threading, then tightened with a spanner.
Oil Change: To change the oil, the lawnmower is tilted towards the oil filler pipe, and the dipstick is removed to drain the oil into a container. After draining, 400ml of SAE30 or equivalent oil is refilled. The engine is run briefly, then stopped, and the oil level is checked after one minute, topping up if necessary.
Cutting Blade Replacement: The metal blade should be renewed after 50 hours of mowing or 2 years, whichever comes first. Regular inspection is advised, and blunt or damaged blades should be replaced or sharpened to prevent poor cutting, excessive vibration, and uneconomical engine running. Garden gloves and a spanner wrench are required. The blade is held while the blade bolt is unscrewed counterclockwise. The blade adaptor should be inspected for damage. A new blade is fitted onto the two studs on the blade flange, ensuring the washer is correctly placed (slightly domed) and the upturn of the blade projects into the motor compartment. The bolt is then firmly tightened. If unsure, professional help is recommended.
Troubleshooting: A troubleshooting table is provided for common issues such as loud running/heavy vibration, engine not starting, uneven mowing, and unsatisfactory grass collection, along with possible causes and solutions.
Consumable Parts: A list of consumable Challenge parts is provided, including spark plug (K7TC), collection grass bag (916901), blade (1181206), blade bolt (916204), and fixing knob (466018). These parts can be ordered via www.gardenservicecentre.co.uk.
Storage: For short periods, the lawnmower should be stored in a safe working condition with all nuts, bolts, and screws tight, and the grass bag checked. For extended periods, the fuel tank should be emptied using a petrol suction pump (never turn the mower upside down), and the engine should be run until it stops from lack of fuel. The engine oil should be changed, the spark plug removed to add 20ml of oil to the cylinder, and the engine turned over to distribute the oil. The engine and entire machine should be cleaned. The equipment should be stored in a well-ventilated place, allowing the engine to cool before storage. Fuel should not be stored in the tank inside a building where fumes could reach an open flame or spark.
Guarantee: The product comes with a 1-year guarantee covering material or manufacturing defects, provided claims are accompanied by proof of purchase. The guarantee is invalidated if the equipment is used for commercial, trade, or industrial applications. Exclusions include faults due to accidents, misuse, unauthorized repairs, consumable parts (blades, spark plugs, filters), lack of routine maintenance, failure to follow instructions, and adjustment of cables, drive belts, or recoil starters.
| Brand | Challenge |
|---|---|
| Model | XSS40E |
| Category | Lawn Mower |
| Language | English |