EasyManua.ls Logo

Chamberlain ELITE SERIES K1A6426-2 User Manual

Chamberlain ELITE SERIES K1A6426-2
4 pages
To Next Page IconTo Next Page
Page #1 background imageLoading...
Page #1 background image
CONTROL BOARD REPLACEMENT KIT
K1A6426-2
Before installing the new control board, be sure to note the locations of all terminal block connections.
After installing the new control board, the limits, force adjustments and remote controls will have to be reprogrammed.
1
1
2
3
4
5
6
7
8
9
10
11
12
To reduce the risk of SEVERE INJURY or DEATH:
Disconnect ALL electric and battery power BEFORE performing ANY service
or maintenance.
Without a properly installed safety reversal system, persons (particularly small children)
could be SERIOUSLY INJURED or KILLED by a closing gate.
Too much force on gate will interfere with proper operation of safety
reversal system.
NEVER increase force beyond minimum amount required to close gate.
NEVER use force adjustments to compensate for a binding or sticking gate.
If one control (force or travel limits) is adjusted, the other control may also need
adjustment.
After ANY adjustments are made, the safety reversal system MUST be tested. Gate MUST
reverse on contact with a rigid object.
READ AND FOLLOW ALL INSTRUCTIONS.
ANY maintenance to the operator or in the area near the operator MUST NOT be
performed until disconnecting the electrical power and locking-out the power via the
operator power switch. Upon completion of maintenance the area MUST be cleared and
secured, at that time the unit may be returned to service.
Disconnect power at the fuse box BEFORE proceeding. Operator MUST be properly
grounded and connected in accordance with local electrical codes.
NOTE: The operator should be on a separate fused line of adequate capacity.
NEVER let children operate or play with gate controls. Keep the remote control away
from children.
ALWAYS keep people and objects away from the gate. NO ONE SHOULD CROSS THE
PATH OF THE MOVING GATE.
Test the gate operator monthly. The gate MUST reverse on contact with a rigid object or
stop when an object activates the non-contact sensors. After adjusting the force or the
limit of travel, retest the gate operator. Failure to adjust and retest the gate operator
properly can increase the risk of INJURY or DEATH.
Activate gate ONLY when it can be seen clearly, is properly adjusted and there
are no obstructions to gate travel.
INSTALLATION
CHGR
OVLD
CTRL
AC PWR
/SOLAR
Cover
Dust Guard
Connector
Coaxial
Cable
Battery
Plug
Terminal
Blocks
Terminal
Blocks
Transformer or Solar Panel
Battery
Disconnect all electric power to the operator.
Remove the cover and dust guard from the operator.
Disconnect the battery.
Disconnect the coaxial cable and all terminal block connections
from the control board.
Remove the mounting screws from the control board.
Remove the control board.
Copy all settings from the existing control board to the new control board
(Force, Timer-To-Close, Bipart Delay, and Auto Open Jumper).
Install the new control board with the mounting screws.
Reconnect all terminal block connections and the coaxial cable.
Reconnect the battery.
Reconnect power to the operator.
Verify all other inputs and outputs as necessary (photoelectric sensors,
edges, loops, locks, alarm, reset, accessory power, open and single button).
Question and Answer IconNeed help?

Do you have a question about the Chamberlain ELITE SERIES K1A6426-2 and is the answer not in the manual?

Chamberlain ELITE SERIES K1A6426-2 Specifications

General IconGeneral
SeriesELITE SERIES
ModelK1A6426-2
Model NumberK1A6426-2
Power SourceBattery
Battery TypeCR2032
SecurityRolling code technology
Number of Buttons3
LED IndicatorYes
ColorBlack
CompatibilityChamberlain garage door openers
RangeUp to 1, 500 feet
MountingVisor clip

Summary

General Safety Warnings

Risk of Severe Injury or Death

Precautions to prevent severe injury or death, including disconnecting power and ensuring safety reversal systems.

Safe Operation Guidelines

Guidelines for safe operation, including keeping children away, maintaining clearance, and testing the gate operator monthly.

Control Board Installation

Pre-Installation Steps

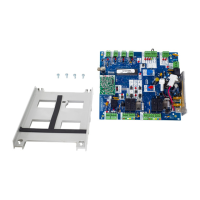
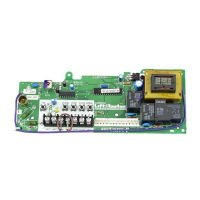
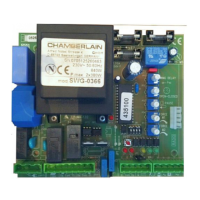
Before installing, note terminal block connections and be aware that limits, force, and remotes need reprogramming.

Installation Procedure

Step-by-step instructions for replacing the control board, including disconnecting power, removing old board, installing new board, and reconnecting components.

Gate Limit Adjustment

Learn Limit Assembly

Understanding internal settings for fully open and closed positions, requiring a minimum travel of 6 feet for programming.

Single Gate Programming (Left/Right Hand Side)

Procedure for programming open and close limits using specific buttons for left-hand or right-hand gate installations.

Gate Operation Adjustments

Troubleshooting Limit Programming

Steps to take if gate limits do not program correctly, involving resetting the operator and adjusting limit nuts.

Force Adjustment

Adjusting the obstruction sensing feature to prevent nuisance interruptions or ensure safety against obstructions.

Post-Adjustment Testing

Testing the gate operator after adjustments by checking limits, stopping at open/close points, and verifying obstruction reversal.

Gate Control Programming

Reprogramming Remote Controls

Instructions for adding or reprogramming remote controls to the operator by using the LEARN XMITTER button.

Programming Wireless Keyless Entry PIN

Steps to add, reprogram, or change a 4-digit personal identification number (PIN) on the keypad.

Erasing All Codes

Procedure to erase all previously programmed remote controls and keyless entry PINs from the control board.

Related product manuals