9
Assembly
STEP 5 Tighten the belt
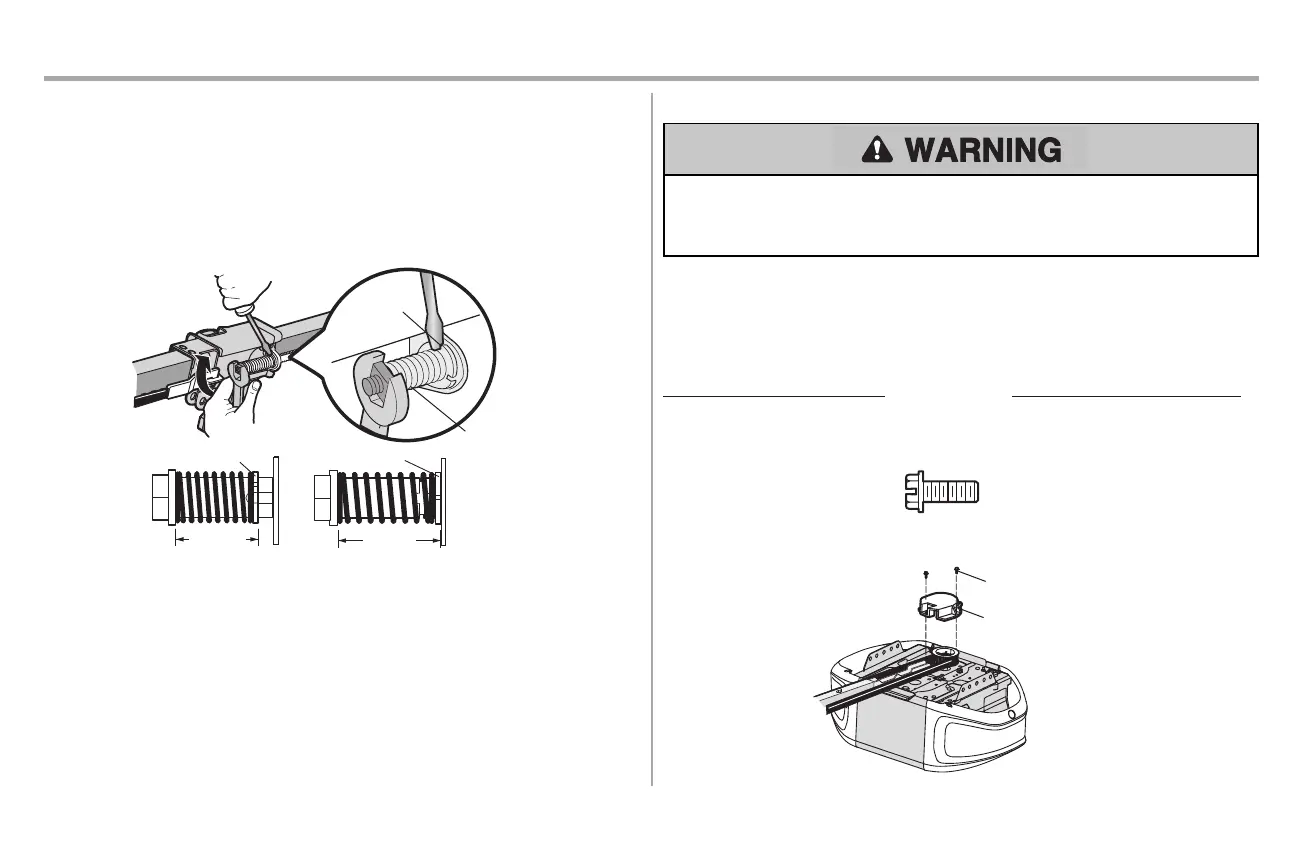
1. By hand, thread the spring trolley nut on the threaded shaftuntil it is finger tight againstthe
trolley.Do notuse any tools.Remove the screwdriver.
2. Inserta flathead screwdriver tip into one ofthe nutring slots and brace it firmly againstthe trolley.
3. Tighten the spring trolley nut with an adjustable wrench or a 7/16" open end wrench abouta
quarter turn until the spring releasesand snaps the nutring against the trolley.This sets the
spring to optimum belt tension.
Nut Ring
BEFORE
1"
(2.5
cm)
Nut Ring
AFTER
1-1/4"
(3.18 cm)
Nut Ring Slot
Spring Trolley
STEP 6 Install the sprocket cover
To avoid possible SERIOUS INJURY to finger from moving garage door opener:
l
ALWAYS keep hand clear of sprocket while operating opener.
l
Securelyattach sprocketcover BEFORE operating.
1. Position the sprocketcover over the sprocket as shown and fasten to the mounting plate with
8x3/8" hex screws provided.
You have now finished assembling your garage door opener. Please read the following warnings
before proceeding to the installation section.
Hex Screw #8x3/8"
(Packed with the
sprocket cover)
HARDWARE
Hex Screw #8x3/8"
Sprocket Cover
 Loading...