EasyManua.ls Logo

Chamberlain HD950WF User Manual

Chamberlain HD950WF
44 pages
To Next Page IconTo Next Page
Page #1 background imageLoading...
Page #1 background image
Please read this manual and the enclosed safety materials carefully!
Fasten the manual near the garage door after installation.
The door WILL NOT CLOSE unless the Protector System
®
is connected and
properly aligned.
Periodic checks of the garage door opener are required to ensure safe operation.
The model number label is located on the left side panel of your garage door
opener.
This garage door opener is compatible with MyQ
®
and Security+ 2.0™
accessories.
DO NOT install on a one-piece door if using devices or features providing
unattended close. Unattended devices and features are to be used ONLY
with sectional doors.
CONTENTS
Preparation. . . . . . . . . . . . . . . .1-4
Assembly . . . . . . . . . . . . . . . . .5-8
Installation . . . . . . . . . . . . . . .9-26
Adjustments . . . . . . . . . . . . . 27-29
Battery Backup. . . . . . . . . . . . . . 30
MyQ
®
Smartphone Control
Get Connected . . . . . . . . . . . . . . 31
Operation . . . . . . . . . . . . . . . 32-36
Maintenance . . . . . . . . . . . . . . . 37
Troubleshooting. . . . . . . . . . . 38-39
Accessories. . . . . . . . . . . . . . . . 40
Warranty. . . . . . . . . . . . . . . . . . 41
Repair Parts . . . . . . . . . . . . . 42-43
1-1/4 hps
*
Belt Drive
Garage Door Opener with
MyQ
®
Smartphone Control
and Battery Backup
The Chamberlain Group, Inc.
845 Larch Avenue
Elmhurst, Illinois 60126-1196
www.chamberlain.com
www.mychamberlain.com
Model HD950WF
FOR RESIDENTIAL USE ONLY
* Horsepower similar (hps) designates that this garage
door opener system meets Chamberlain’s pulling force
specification for a 1-1/4 horsepower garage door opener.
Write down the MyQ
®
serial number
located on the garage door opener:
Question and Answer IconNeed help?

Do you have a question about the Chamberlain HD950WF and is the answer not in the manual?

Chamberlain HD950WF Specifications

General IconGeneral
TypeChain Drive
Horsepower1/2 HP
Wi-Fi ConnectivityYes
Battery BackupYes
Motor TypeDC Motor
Smart Home CompatibilityYes
Max Door Height7 ft
Safety FeaturesSafety sensors
SecurityRolling code technology
WarrantyLifetime motor warranty, 5 years on parts

Summary

Preparation

Check the Door

Ensure door balance, binding, and seal are correct before installation.

Assembly

STEP 1 Assemble the rail and install the trolley

Instructions for assembling the opener rail and trolley mechanism.

STEP 2 Fasten the rail to the motor unit

Guides attaching the rail assembly to the motor unit securely.

STEP 4 Install the belt

Details on routing and connecting the drive belt to the opener.

STEP 5 Tighten the belt

Instructions for properly tensioning the drive belt for optimal operation.

Installation

IMPORTANT INSTALLATION INSTRUCTIONS

Critical safety and procedural guidelines before starting installation.

Installation

STEP 1 Determine the header bracket location

Guide for finding the correct header bracket mounting point on the wall or ceiling.

STEP 2 Install the header bracket

Instructions for securely mounting the header bracket to structural support.

STEP 3 Attach the rail to the header bracket

Connects the assembled rail to the installed header bracket.

STEP 5 Hang the garage door opener

Instructions for securely hanging the opener unit to ceiling or wall supports.

STEP 8 Install the door bracket

Guide for attaching the bracket to the garage door panel.

STEP 8 Install the door bracket (continued)

Continues instructions for attaching the door bracket to one-piece doors.

STEP 9 Connect the door arm to the trolley

Links the door bracket to the opener's trolley mechanism.

STEP 9 Connect the door arm to the trolley (continued)

Continues connecting door arms for one-piece doors.

STEP 10 Install the door control

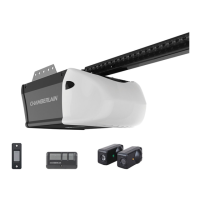
Guide for mounting and wiring the wall-mounted door control.

STEP 15 Connect power (continued)

Explains typical plug-in vs. permanent wiring options.

STEP 4 Position the garage door opener

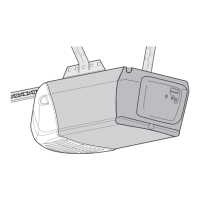
Guides placement of the main opener unit onto the ladder support.

STEP 7 Attach the emergency release rope and handle

Instructions for attaching the manual release cord and handle for emergency use.

STEP 15 Connect power

Instructions for connecting the garage door opener to electrical power.

Adjustments

Adjustments

STEP 2 Test the Safety Reversal System

Procedure for testing the door's safety reversal function with an obstruction.

Battery Backup

MyQ® Smartphone Control

Operation

IMPORTANT SAFETY INSTRUCTIONS

Critical safety guidelines for operating the garage door opener safely.
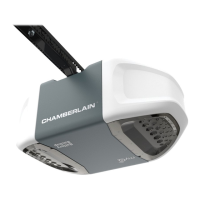
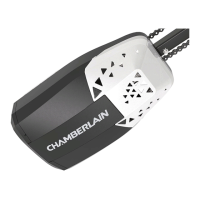
Operation

Troubleshooting

Related product manuals