8
Assembly
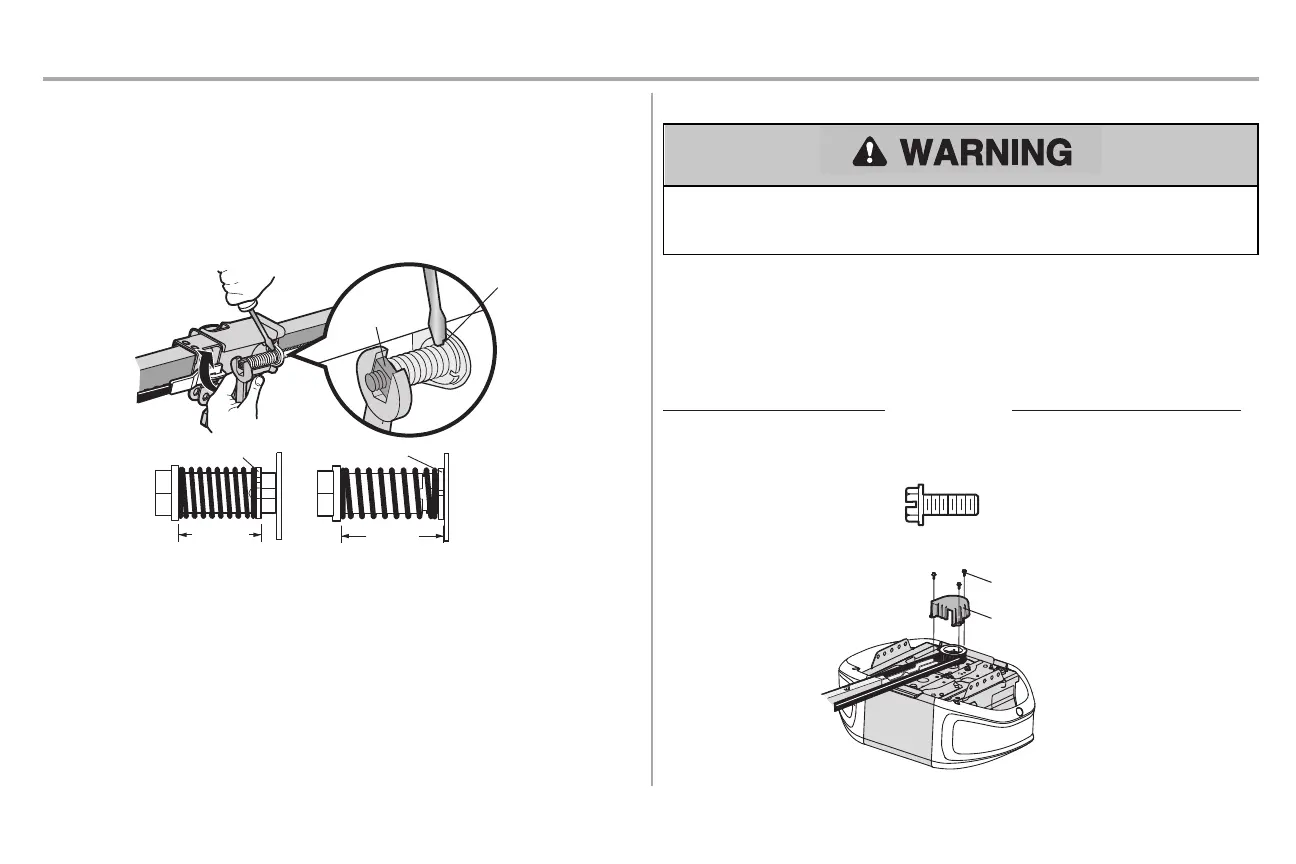
STEP 5 Tighten the belt
1. Byhand, thread the spring trolley nut on the threaded shaftuntil itis finger tight againstthe
trolley.Do not use any tools.Remove the screwdriver.
2. Insert a flathead screwdriver tip into one of the nut ring slots and brace it firmlyagainstthe trolley.
3. Tighten the spring trolley nut with an adjustable wrench or a 7/16" open end wrench about a
quarter turn until the spring releases and snaps the nut ring againstthe trolley.Thissets the
spring to optimum belt tension.
Nut Ring
BEFORE
1"
(2.5
cm)
Nut Ring
AFTER
1-1/4"
(3.18 cm)
Spring
Trolley Nut
Nut Ring Slot
STEP 6 Install the sprocket cover
To avoid possible SERIOUS INJURY to finger from moving garage door opener:
l ALWAYS keep hand clear of sprocket while operating opener.
l Securely attach sprocket cover BEFORE operating.
1. Position the sprocket cover over the sprocket as shown and fasten to the mounting plate with
8x3/8" hex screws provided.
You have now finished assembling your garage door opener. Please read the following warnings
before proceeding to the installation section.
Hex Screw #8x3/8"
(Packed with the
sprocket cover)
HARDWARE
Hex Screw #8x3/8"
Sprocket Cover