Do you have a question about the Char-Broil 625 and is the answer not in the manual?
Explains the meaning of the WARNING symbol and its implications.
Explains the meaning of the CAUTION symbol and its implications.
Covers critical safety warnings related to grill operation and hazards.
Provides cautions regarding sharp edges, hot surfaces, and unit weight.
Stresses reading the manual, following instructions, and keeping it for future reference.
Details the initial burn-in process for the grill before first cooking.
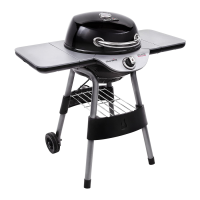
Explains how to light charcoal and manage the fire during operation.
Details how to clean the grill after use, including ash removal and bristle brush usage.
Details steps for curing the grill finish and seasoning the interior steel.
Provides instructions for cleaning, seasoning, and preventing rust on cast iron grates.
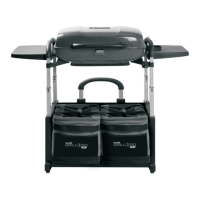
Describes the direct grilling method for quick-cooking items.
Explains the indirect grilling method for slow-cooking items.
Provides instructions on stacking charcoal and using fire starters.
Discusses using wood chips/chunks for added smoke flavor and provides wood type recommendations.
Details what parts are covered and the types of failures included under warranty.
Lists items and conditions not covered by the warranty, including shipping and misuse.
Limits implied warranties and remedies to the terms of the express limited warranty.
Provides the address for obtaining warranty service and instructions for returns.
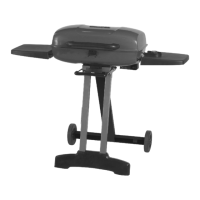
Instructions for constructing the two leg assemblies by connecting long and short leg sections.
Details attaching cart braces to a leg assembly using screws and nuts, with a note on tightening.
Instructions for laying out the leg assembly and inserting the storage rack.
Guides on connecting the second leg assembly to the storage rack and cart braces.
Explains how to insert the axle through the legs, attach wheels, and secure them with clips and caps.
Instructions for placing the firebox and fully tightening all screws and nuts from previous steps.
Details attaching front shelf brackets to the firebox and then attaching the front shelf slats.
Instructions for attaching side shelf brackets to the left side of the firebox.
Guides on attaching the lid handle, smokestack, temperature gauge, and the main lid.
Instructions for installing the swing-away grate and the butterfly damper wheel.
Explains how to insert the ash pan and fire grate into the firebox.
Guides on placing the cooking grates and attaching the grease cup clip, marking assembly completion.
Provides the website for registering the product online.
Details the process for registering the product via mail, including required information.
| Brand | Char-Broil |
|---|---|
| Model | 625 |
| Category | Grill |
| Language | English |