Do you have a question about the Char-Broil 463268107 and is the answer not in the manual?
Explains the meaning of DANGER, WARNING, and CAUTION symbols.
Outlines critical safety measures for grill installation and use.
Provides information on chemicals known to cause cancer or reproductive harm.
Details safe practices for storing, transporting, and filling LP cylinders.
Explains LP gas characteristics and associated flammability risks.
Guides on exchanging cylinders and performing leak tests for safety.
Provides step-by-step instructions for securely connecting the regulator to the LP cylinder.
Details the process of leak testing the gas system before use.
Warns against improper installation and attachment to other gas systems.
Provides essential safety rules for operating the grill, including clearance and lid usage.
Step-by-step guide for safely lighting the grill using the electronic ignitor.
Instructions for checking burner flames, turning off the grill, and inspecting components.
Offers advice on routine cleaning of the grill's interior and exterior surfaces.
Addresses potential burner blockages (spiders) and provides cleaning instructions.
Guidelines for storing the grill properly, whether connected or disconnected from the cylinder.
Explains cooking methods like indirect heat and emphasizes food safety guidelines.
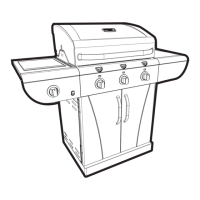
Instructions for preparing the grill for rotisserie cooking, including grate removal.
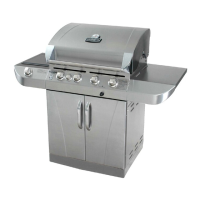
How to clean and maintain stainless steel surfaces after each use.
Methods for restoring stainless steel from stains, rust, and pitting.
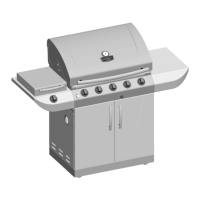
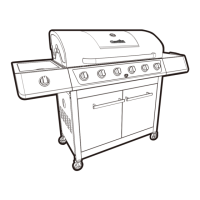
Attaching the locking and fixed casters to the bottom shelf.
Securing the left and right side panels to the bottom shelf.
Attaching the lower back panel to the side panels.
Safely lowering and aligning the grill head onto the cart.
Inserting and securing the front brace under the control panel.
Securing the upper back panel to the grill structure.
Attaching the right side shelf and towel bar.
Attaching the left sideburner shelf and its fascia.
Installing the sideburner valve bracket, bezel, and knob.
Inserting the sideburner burner into its bracket and connecting it.
Attaching ignitor wire, wind diverter, burner cap, and cooking grate.
Inserting rear shield tabs and grease tray rails, attaching to brace.
Securing the tank wire to the back panel and front brace.
Attaching the wire shelf to the side panel and bottom shelf.
Mounting the left and right doors using screws.
Sliding flame tamers into the firebox slots.
Positioning the cooking grates and warming rack on the firebox.
Installing the LP cylinder, ensuring correct orientation and regulator connection.
Sliding the grease tray into the opening in the upper back panel.
Unscrewing the ignition button and inserting the AA battery.
Procedures for handling gas leaks, fires, and grease fires.
Diagnosing and resolving issues with burner ignition and gas flow.
Addresses problems with match lighting, sudden flame drops, and blowouts.
Solutions for grease fires, flashbacks, and cylinder filling problems.
Detailed guide for troubleshooting electronic ignition system problems.
| Brand | Char-Broil |
|---|---|
| Model | 463268107 |
| Category | Grill |
| Language | English |