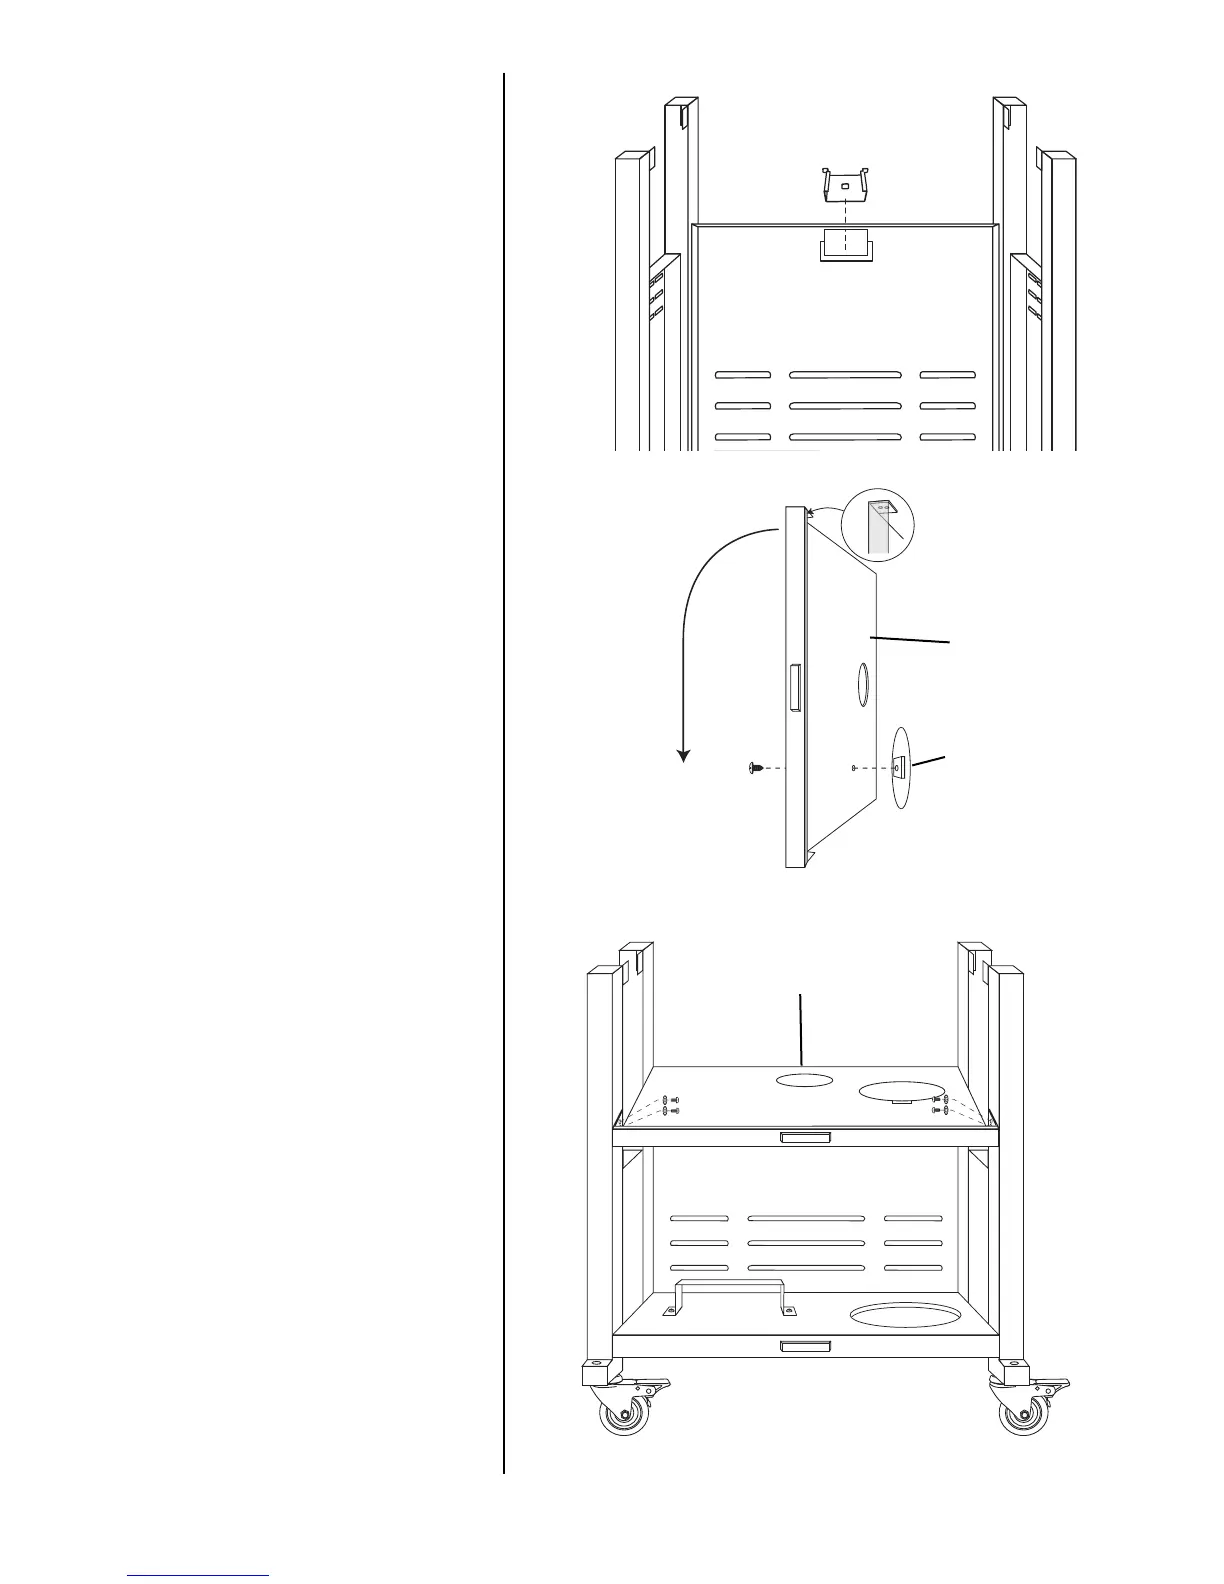
NOTE: With the help of a friend, turn
the cart to its upright position.
Step 5
Attach the grease cup bracket onto
the back panel by inserting the
three tabs into the slots on the back
cart panel.
Step 6
Attach tank heat shield to heat
shield plate using one
#8 self-tapping screw.
Step 7
Attach heat shield plate to cart
frame assembly using four
M6 X 12mm bolts (silver) and star
washers (silver).
24
Tank
Heat Shield
Heat Shield
Plate
Heat Shield Plate